Why 1.2 Gain Screens Struggle in 2026 Bright Living Rooms
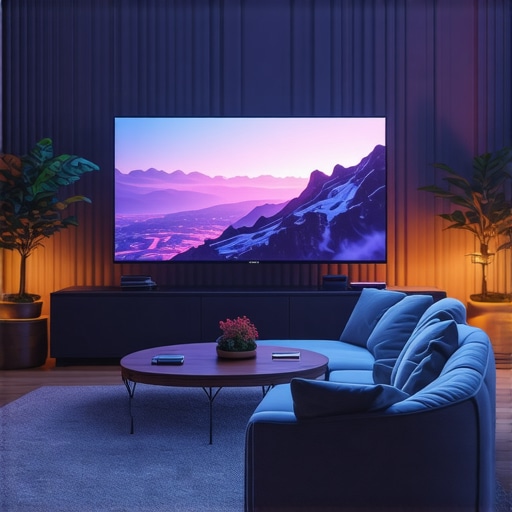
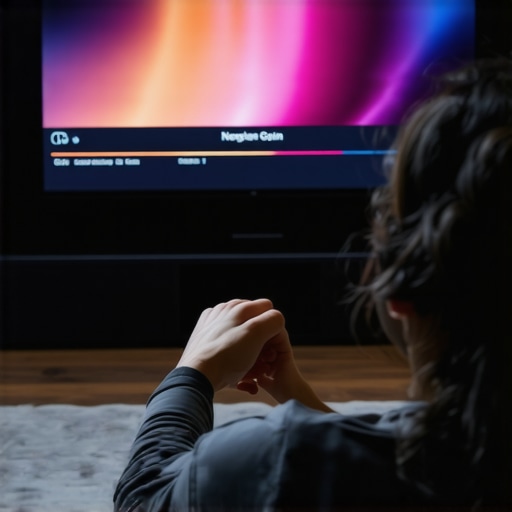
I remember the moment vividly. It was a lazy Sunday afternoon, and I had just upgraded my home theater with what I thought was a top-tier 1.2 gain projection screen. Expecting vibrant colors and crisp details, I was instead greeted by washed-out images and dull shadows. Frustration crept in as I realized my bright living room, filled with afternoon sunlight, was sabotaging my viewing experience every time. That lightbulb moment made me question: are 1.2 gain screens truly suitable for the increasingly luminous spaces in our homes?
Why Bright Living Rooms Are Changing the Projection Game
The shift towards brighter living environments isn’t just a trend—it’s a fundamental change in how we design our lounges and entertainment areas. Larger windows, open-plan layouts, and a penchant for natural light mean that our rooms bask in daylight for most of the day. While this creates a welcoming atmosphere, it also poses a challenge for projection screens, especially those with lower gain ratings like 1.2.
In 2026, the standard for home theaters demands more than just good picture quality; it requires screens that can outperform the ambient light rather than simply work within its constraints. According to a recent study by CineGear Guide, screens with higher gain values tend to reflect more light, making them more suitable for bright rooms—if chosen carefully. But there’s a catch. Higher gain screens often compromise on viewing angles and can produce hotspots, which is why many enthusiasts, myself included, initially believed that 1.2 gain was sufficient.
So, what went wrong?
Initially, I overlooked the importance of material quality, lighting conditions, and proper setup. I thought that choosing a screen with a standard gain would cater to my needs. But I missed the crucial detail: in bright environments, the screen’s ability to reject ambient light and reflect the projector’s light effectively is vital. Sadly, many early mistakes I made included ignoring expert recommendations and relying on generic advice found online.
If you’re tired of washed-out images during the day or struggling to find a screen that performs reliably in bright conditions, you’re not alone. Many home theater enthusiasts are discovering that a better understanding of gain and materials, such as those detailed on [CineGear Guide](https://screens.cinegearguide.com/alr-screen-options-best-materials-gain-size-for-bright-rooms-3), is essential for making an informed choice.
Now, let’s explore how to turn this challenge into an advantage. Finding the right screen for your bright living space is more achievable than you might think. Stay tuned as I walk you through the practical steps to select and optimize your projection setup for 2026.
Pick the Right Screen Size and Gain
Start by determining your ideal screen size based on your room dimensions and viewing distance. Use the guidelines from this resource to match your projector’s capabilities. Remember, in bright environments, a higher gain (around 1.4 to 1.6) can help bounce more light back to your eyes, improving visibility. Use a calculator like the one at this calculator to find the optimal size for your setup.
Focus on Screen Material and Technology
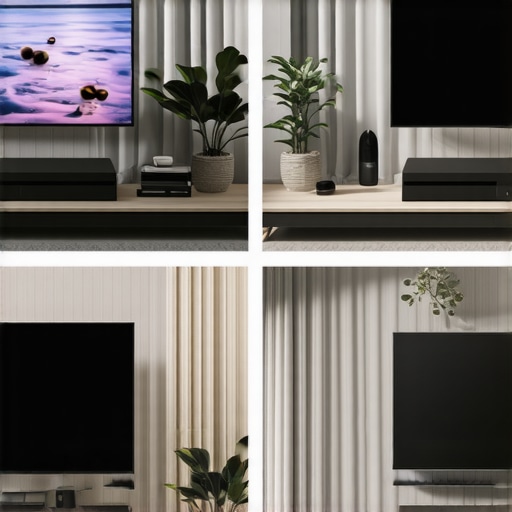
Choose a high-quality ALR (Ambient Light Rejection) screen material designed for daylight conditions. Unlike traditional white screens, ALR screens employ special micro-lens or layered structures to reflect projector light toward the viewer while absorbing ambient light from other directions. Review this article for top material options and gain tips. Materials like optical coatings or woven fabrics with specific properties often outperform PVC or polyester options, which are prone to washouts in bright rooms.
Optimize Your Room Lighting and Setup
Minimize ambient light by controlling window blinds and ceiling lights during viewing. Position your projector and screen to avoid direct sunlight or reflective surfaces that increase glare. Use blackout curtains if needed. For best results, follow the setup tips from this expert guide to achieve uniform illumination and optimal contrast. This way, your high-gain screen can perform at its best, even during daytime viewing.
Calibrate for Clarity
Adjust your projector’s settings—contrast, brightness, and color profiles—specifically for the chosen screen material. Use calibration tools or professional help if necessary. Proper calibration ensures that the reflected light maximizes picture quality without washing out colors. Refer to this resource for detailed calibration strategies tailored for high-gain, ALR screens.
Test and Refine Your Setup
Once everything is in place, run several viewing tests in different lighting conditions. Take notes on picture brightness, color accuracy, and viewing angles. If hotspots or color shifts appear, consider repositioning the screen slightly or adjusting projector angles. Remember, the goal is a balanced setup that offers vibrant images without glare or hotspots. Gaining hands-on experience and making small tweaks, as shared in this comprehensive guide, can dramatically improve your viewing experience in a bright environment.
Many enthusiasts believe that choosing a larger screen size always enhances viewing experience, but this common myth can lead to costly mistakes. In reality, oversizing a screen without considering your room’s lighting, projector brightness, and material quality can result in a washed-out image and poor contrast. For example, a 120-inch screen in a bright living room might seem ideal, yet if it’s not matched with the proper gain and material, the picture quality will suffer drastically. Advanced setups require balancing size with gain and material type, such as opting for high-quality ALR screens that reject ambient light more effectively than traditional white surfaces. Additionally, many overlook the importance of understanding the subtle differences between various screen materials; woven fabrics with specialized coatings often outperform PVC or polyester, especially in daylight conditions. An advanced mistake to avoid is relying solely on gain ratings; higher gain isn’t always better, as it can cause hotspots and narrow viewing angles if not paired with appropriate technology. Instead, focusing on expert-recommended materials and leveraging insights from this comprehensive guide can help you make more informed decisions. From my experience, the real key lies in matching your projector’s lumen output with an optimized screen surface designed for your specific environment, rather than just selecting the largest or most popular option. Remember, a properly calibrated setup with the right gain and material can outperform a larger, mismatched screen by miles. Never fall into the trap of equating size with quality; instead, prioritize understanding the nuanced interplay between screen size, gain, and material to achieve the perfect home theater experience. Have you ever fallen into this trap? Let me know in the comments.Maintaining your projection screen quality over time is essential to ensure consistent, vibrant images in your home theater setup. One of the most effective strategies is selecting high-quality materials, like those outlined in this detailed guide, which emphasize durability and light-rejection capabilities. Regular cleaning is another critical aspect; use a microfiber cloth and gentle cleaning solutions tailored for screen surfaces to avoid scratches or residue buildup. For ALR screens, cautious handling prevents micro-lens misalignment, which can degrade performance. To keep the projection system performing optimally, routinely calibrate your projector with software like Calman or ColorMunki—these tools allow precise adjustment of contrast, color balance, and gamma, preserving image fidelity over years. As projection technology advances, I predict that embedded sensors in upcoming screens will help automate calibration, making maintenance even simpler. To extend your screen’s lifespan, avoid exposing it to direct sunlight or extreme humidity, which can cause material warping or discoloration. I personally recommend setting up a maintenance routine every 6 to 12 months—inspecting, cleaning, and recalibrating—to ensure your investment remains at peak performance.
How do I maintain my projection screen over time?
Regular checkups, gentle cleaning, and software calibration are your best tools. Incorporate these practices to avoid costly replacements and keep your visuals stunning for years. For advanced setup, consider upgrading to an ALR screen with a durable coating, proven to withstand long-term use. Don’t forget: investing in proper tools now saves you time and money later, so try out dedicated calibration software and schedule biannual maintenance to keep your home theater in top shape.
The Hardest Lesson I Learned About Screen Size and Gain
One insight I wish I’d grasped sooner is that bigger isn’t always better—especially in bright rooms where ambient light can wash out your image. I used to believe that selecting the largest screen possible would heighten immersion, but I overlooked how crucial the right gain and material are for clarity and contrast in daylight conditions. Real-world experience taught me navigating this balance is key to true cinematic enjoyment.
My Go-To Resources for a Clearer Projection Future
Firstly, this guide on ALR screens revolutionized my understanding of light rejection, helping me choose materials that fight glare effectively. Additionally, this resource on screen sizing provided clarity on matching size to room and projector capabilities. Lastly, the deep dive into gain explanation clarified why higher gain surfaces are game-changers for daylight viewing. These sources have become my trusted companions on this journey.
Elevate Your Setup and Embrace the Bright Room Challenge
Don’t wait for the perfect dark room—start transforming your bright living space today. Experiment with higher gain, high-quality ALR screens, and room-light management to unlock stunning visuals. Remember, the right combination of screen material, gain, and calibration can turn any well-lit room into a cinematic haven. Your perfect setup is just a few informed choices away—take action now and watch your home theater come alive with vibrant, clear images that defy daylight limitations.
![Why 0.8 Gain Screens Stop 16K Washout in 2026 [Test Results]](https://screens.cinegearguide.com/wp-content/uploads/2026/03/Why-0.8-Gain-Screens-Stop-16K-Washout-in-2026-Test-Results.jpeg)
![3 Screen Gain Fixes for Low-Lumen Projectors [2026]](https://screens.cinegearguide.com/wp-content/uploads/2026/01/3-Screen-Gain-Fixes-for-Low-Lumen-Projectors-2026.jpeg)
Your detailed experience really resonated with me, especially the part about how initial assumptions about gain ratings can lead to disappointing results. I used to think that a standard 1.2 gain screen was enough for most lighting conditions until I faced similar issues during daytime viewing. It’s interesting how you emphasize the importance of high-quality materials like ALR screens, as I’ve recently upgraded to an optical coating woven fabric, which has dramatically improved my viewing clarity in a bright room. From my own experience, focusing on room setup—like blackout curtains and proper calibration—makes a huge difference. I’m curious, how do others balance between screen size and gain to optimize space without sacrificing image quality? Have you found specific ratios or setups that tend to work best for brighter conditions? It seems that understanding the interaction between projectors, room lighting, and screen material can truly transform a casual lounge into a cinematic experience.
Reading this post was quite an eye-opener for me. Like the original author, I also started with a standard 1.2 gain screen, expecting it to handle bright daylight conditions, but I quickly learned that it fell short, especially when I started adding more natural light sources. Upgrading to an ALR screen with micro-lens technology made a significant difference in my picture quality during daytime viewing. I’ve also found that room setup plays a huge role—thicker blackout curtains and careful projector placement help minimize glare and hotspots. I wonder if others have experimented with different layering techniques or screen materials for maximizing ambient light rejection? Also, at what point do you think increasing gain becomes counterproductive due to narrowed viewing angles or hotspot issues? It’s fascinating how these small adjustments can drastically improve the home theater experience. Achieving clarity in bright rooms seems like a delicate balancing act, but the effort definitely pays off when you get the setup right.