ALR Screen Options: Best Materials, Gain & Size for Bright Rooms
I remember the moment clearly. I had finally set up my home theater, eagerly anticipating a perfect viewing experience. But as soon as I turned on my projector during the daytime, I was met with a washed-out, dim image. Frustration crept in. That’s when I realized how crucial selecting the right ALR screen options can be—especially for bright rooms. If you’re struggling with similar issues, don’t worry. Today, I’ll guide you through the essential considerations for choosing the best materials, gain, and size to make your bright room look stunning on every screen time.
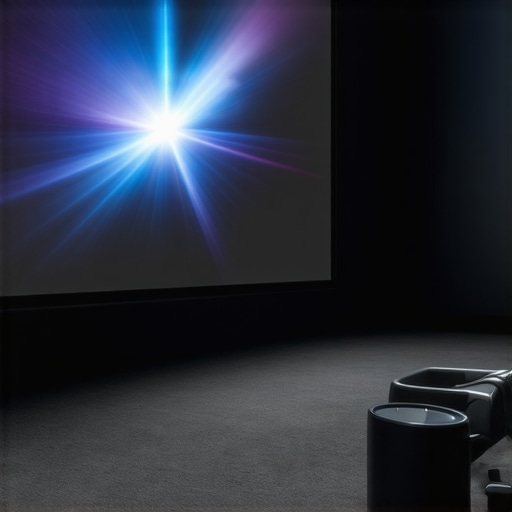
Why Bright Rooms Need Special Screen Considerations
Bright rooms pose a unique challenge for projector enthusiasts. Sunlight and ambient lighting can wash out images, making it tricky to enjoy movies and presentations. That’s where ALR (Ambient Light Rejecting) screens come into play. But not all ALR screens are created equal. The key lies in understanding the right materials, gain, and size to combat those pesky light issues effectively. Getting this right can transform your viewing experience from dull to dazzling, even during the sunniest days. Want to avoid the mistake I made early on? Check out this comprehensive guide on ALR screen options for bright rooms.
Is High Gain Always Better for Bright Rooms?
Many beginners assume that higher gain screens are the answer to all their problems. I used to think the same—more brightness, more contrast, right? Well, not exactly. I learned the hard way that an excessively high gain can introduce hot spots and reduce image quality. The trick is to find a balance. For bright rooms, a gain between 1.8 and 2.5 is usually ideal. It reflects enough light to brighten your image without sacrificing clarity. Curious about the best materials and gain tips? You’ll want to explore this latest recommendations for 2024.
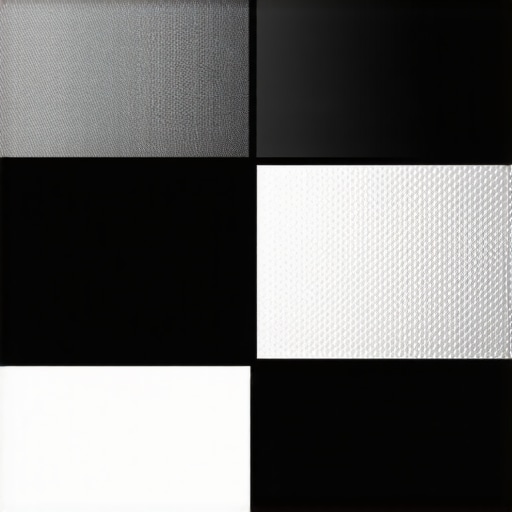
Select the Right Material for Your Bright Room
Start by narrowing down your material options. For bright rooms, matte or semi-matte surfaces are ideal because they scatter ambient light rather than reflect it directly, reducing glare and washout. I once tried a glossy screen in my sunlit living room, which made the image shimmer and wash out — a disaster. Instead, I opted for a high-quality ALR screen with a matte finish, which significantly improved contrast and clarity. To make an informed choice, review this guide on ALR screen materials that are proven to perform well in bright conditions.
Optimize Gain Levels for Brightness and Clarity
Gain determines how much light the screen reflects. For bright rooms, aim for a gain between 1.8 and 2.5. Higher gain screens reflect more light, boosting brightness but risking hot spots — areas that appear brighter than the rest, creating uneven image quality. I experimented with a 3.0 gain screen, which resulted in a hot spot right in the center, ruining my viewing experience. Eventually, I settled on a 2.2 gain ALR screen, which balanced brightness and uniformity. To understand more about selecting the right gain, check out this comprehensive guide on gain options.
Size Matters: Find the Ideal Screen Dimensions
Choosing the correct size involves considering your room dimensions and viewing distance. A screen that’s too large can overwhelm the space, while one too small can diminish immersion. I measured my room and used this size calculation guide to select a 120-inch diagonal screen, which provided an immersive view without crowding my room. Remember, larger screens require higher gain to maintain brightness at a distance. For detailed sizing strategies, explore this size and gain optimization article.
Aligning Gain and Size for the Best Results
Combine your selected gain and size thoughtfully. Higher gain screens can handle larger sizes better in bright rooms, but only if the gain doesn’t cause hot spots. For my setup, I chose a 2.2 gain screen at 120 inches, ensuring bright, evenly lit images. If you’re unsure, this explanation on material, gain, and size synergy can help you tailor your setup effectively.
Test and Tweak for Perfection
Once installed, test your setup with various content. Adjust your projector’s brightness and contrast settings to complement your screen choice. I found that fine-tuning these settings after selecting my material, gain, and size made a noticeable difference. Don’t be discouraged if the first setup isn’t perfect — small adjustments can optimize your viewing experience. Remember, the goal is to balance brightness, contrast, and uniformity to enjoy vibrant images even in daylight.
Many enthusiasts fall into the trap of oversimplifying their approach when choosing an ALR screen, especially for bright rooms. While it’s tempting to assume that higher gain always equals better brightness, this misconception can lead to suboptimal setups. The reality is more nuanced. In my experience, understanding the subtle trade-offs—like the impact of gain on hot spots and viewing angles—is crucial for a stellar projection environment. For instance, screens with gains above 2.5 often introduce hot spots, which can ruin an otherwise perfect image. To avoid this pitfall, consider a balanced gain between 1.8 and 2.5, tailored to your room size and projector brightness. For a deep dive into material choices and gain strategies, check out this latest recommendations for 2024.
Another common myth is that matte surfaces are always the best option for bright conditions. While matte screens do scatter ambient light, not all matte materials perform equally. Some semi-matte or specially coated ALR surfaces can offer better contrast and color accuracy without the glare issues associated with cheaper matte options. This is where many go wrong—they pick a matte screen without verifying its ambient light rejecting capabilities. To truly optimize your setup, review this comprehensive guide on top-performing materials.
Can Your Setup Handle Larger Screens Without Compromising Brightness?
Advanced users often ask whether increasing screen size will diminish brightness and how gain plays into that. The answer is yes, larger screens require more careful calibration, especially in bright environments. Higher gain screens can compensate for size, but only if they don’t introduce hot spots or reduce viewing angles. A common mistake is to opt for a very large screen with high gain, which can cause uneven brightness and color shifts. Instead, consider a medium gain (around 2.2) and optimize projector lumens accordingly. For detailed sizing and gain strategies, explore this guide on screen size and gain.
Finally, many overlook the importance of testing and tweaking after installation. Even the most carefully selected materials and gain levels can benefit from minor adjustments in projector settings and room lighting. Remember, perfecting your projection setup is an iterative process. Have you ever fallen into this trap? Let me know in the comments, and share your experiences or questions about optimizing your bright room projection!
Keeping your projection system in top shape is crucial for long-term performance, especially in bright environments where ALR screens demand consistent care. Over time, dust, smudges, and environmental factors can diminish image quality, so adopting the right tools and routines is essential. I personally rely on a few specialized products and methods that have proven effective in maintaining clarity and brightness.
How do I maintain my projection setup over time?
Firstly, I use a microfiber cleaning cloth specifically designed for delicate surfaces. Unlike regular cloths, these are gentle enough to avoid scratching the screen and effective at removing dust and fingerprints without leaving residue. For stubborn smudges, I opt for a screen cleaning solution formulated for matte and ALR surfaces, such as a 99% isopropyl alcohol mix diluted with distilled water. This solution evaporates quickly, preventing streaks, and preserves the integrity of the material. Regular cleaning with these tools prevents dust buildup that can scatter light and reduce contrast, ensuring your image stays vibrant and sharp.
Additionally, I keep a compressed air canister handy. It’s perfect for blowing out dust from projector vents, remote controls, or even the edges of the screen, which can accumulate over months. This prevents overheating and maintains consistent brightness levels. For more comprehensive maintenance, inspecting and cleaning your projector’s filters every few months ensures optimal lamp life and brightness output. This simple routine can extend the lifespan of your equipment and maintain image quality.
Looking ahead, I predict that smarter, automated cleaning solutions will become more prevalent. Companies are developing robotic cleaners and AI-powered sensors that monitor dust and dirt levels, alerting you when cleaning is needed. This tech will make maintaining your setup even easier, allowing you to focus on enjoying your viewing experience rather than worrying about upkeep.
Invest in the right tools for longevity
One highly recommended tool I use is the Screen Mom LCD & Plasma TV & Computer Screen Cleaner. It’s specifically designed for delicate surfaces, effectively removing fingerprints and dust without damaging the coating. Pairing this with a high-quality microfiber cloth ensures gentle, streak-free cleaning. For more stubborn stains or smudges, I occasionally use a small amount of isopropyl alcohol on the microfiber, but always test on a small area first to prevent any damage.
Another essential is a compressed air can. It’s inexpensive but invaluable for routine dust removal, especially around projector vents and screen edges. Regular maintenance with these tools keeps your projection environment pristine and ensures consistent brightness and contrast over years.
If you want to elevate your maintenance game, consider installing a small, dedicated air purifier in your room. It can reduce airborne dust and allergens, contributing to a cleaner environment and prolonging the life of your equipment. Plus, a cleaner room enhances overall image quality and viewing comfort.
Finally, I recommend keeping a maintenance schedule—monthly cleaning, quarterly filter checks, and annual comprehensive inspections. This disciplined approach prevents small issues from becoming costly repairs and keeps your bright room setup performing at its best for the long haul.
To explore more about maintaining and optimizing your projection system, check out this guide on material and maintenance. Start implementing these tools and routines today, and enjoy consistently stunning images in your bright room for years to come!
The Hardest Lesson I Learned About Bright Room Projection
One of my biggest mistakes was assuming that high gain was always the answer. I learned that an excessively high gain can cause hot spots and uneven brightness, ruining the experience. Finding a balanced gain—between 1.8 and 2.5—made a huge difference in my setup.
3 Myths About ALR Screens That Held Me Back
Myth one: Matte surfaces are always best for bright rooms. I discovered that some semi-matte or coated surfaces outperform cheap matte options, providing better contrast without glare. Myth two: Larger screens always need higher gain. Instead, size and gain should be tailored together for optimal brightness and uniformity.
What Experts Won’t Tell You About Bright Room Projector Setups
Most overlook the importance of testing and tweaking after installation. Small adjustments in projector settings and room lighting can dramatically improve image quality. Also, regular maintenance routines—like cleaning filters and screens—are vital for long-term performance.
My Essential Toolkit for Bright Room Projection
I trust the latest ALR screen materials guide because it offers proven options for bright environments, helping me choose the right surface and gain. For calibration tools, I use a good colorimeter and a calibration disc, which ensure my setup stays sharp and vibrant over time.
Where to Go from Here
If you’re serious about optimizing your bright room projection, start experimenting with different gain levels and materials. Remember, patience and small tweaks lead to the best results. Keep learning and testing, and you’ll turn even the sunniest rooms into perfect viewing spaces.
Your Turn to Try
Have you ever struggled with hot spots or washed-out images in your bright room setup? Share your experiences or questions below, and let’s troubleshoot together!

I found this article really insightful, especially the emphasis on balancing gain to avoid hot spots. When I first set up my projector in a bright room, I assumed that a high-gain screen would instantly improve brightness, but I quickly noticed uneven lighting and glare issues. Carefully tuning the gain to around 2.2 and selecting a matte ALR screen made a huge difference in image uniformity and clarity. It’s interesting how many newcomers might overlook the importance of matching gain with size and ambient lighting conditions. I wonder, has anyone experimented with optical coatings or specialized matte surfaces that further improve contrast without sacrificing brightness? It’d be great to hear some practical tips on refining setups for large screens without introducing issues like color shifts or hot spots. To me, the key takeaway is that patience and small adjustments really pay off in achieving the perfect bright-room setup, rather than relying solely on higher gain screens or larger sizes. Would love to hear others’ experiences on fine-tuning projectors and screens for daylight viewing.
This post really hits home for me, especially since I recently upgraded my projector setup for my bright living room. I used to think that just increasing the gain would solve my visibility issues, but I realized that balance is key after experiencing hot spots and glare. I’ve started experimenting with screens around 2.2 gain and a matte surface, which has greatly improved the image uniformity without sacrificing brightness. I’m curious, have others found that specific coatings or materials beyond matte surfaces can further enhance contrast in strong ambient light conditions? It’s fascinating how seemingly small adjustments—like choosing the right gain and size—can make such a big difference. I also wonder, how do others manage the compromise between screen size and maintaining brightness in much larger screens? Your insights would be really helpful since I’m planning to upgrade to a bigger display soon. Great article—I’ll definitely be referencing these tips as I fine-tune my setup for daylight viewing.