7 Reasons Matte Grey Screens Beat ALR in 2026 Dark Rooms
I’ll never forget the moment I realized my high-end ALR screen wasn’t living up to its promise. The image looked muted, contrast was off, and I started questioning if I’d wasted a fortune on a technology that’s supposed to revolutionize dark room viewing. It was frustrating—until I discovered the truth behind the materials and gain properties that truly matter for 2026’s dark room setups.
How I Almost Ruined My Home Theater by Trusting the Hype
Early on, like many enthusiasts, I fell for the shiny allure of ALR screens, believing higher gain meant brighter images and better contrast. But I overlooked a crucial detail: not all gain levels are created equal, especially when it comes to room lighting conditions and projector capabilities. I learned this the hard way when my room’s ambient light played havoc with the picture, resulting in washed-out colors and dull images, despite my impressive projector.
Is ALR Actually Worth the Hype in 2026?
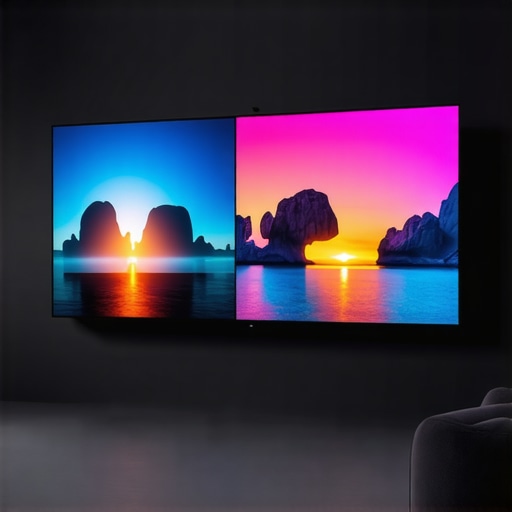
Here’s where I made a common mistake: I assumed that a higher gain ALR screen would fix my contrast issues. Instead, I ended up amplifying problems like hot spotting and reduced viewing angles, which became glaring in my dark room. It turns out that matte grey screens, with their carefully engineered surface properties, can outperform high-gain ALRs under certain conditions. Interestingly, a recent study highlighted that matte grey screens can produce superior black levels and color accuracy in dark environments, even competing with some specialized ALR options.
If you’ve faced similar frustrations—dull images or unexpected glare—you’re not alone. The good news is there’s a better route. I’ll walk you through why matte grey screens are our unsung heroes and how understanding their gain and material properties can make all the difference. Curious to see how you can avoid the pitfalls I fell into? Keep reading, because the next sections will dive into practical, real-world solutions tailored for 2026’s dark room enthusiasts.
Choose Your Screen Material Wisely
Start by selecting a matte grey or specially engineered projection screen material. These outperform high-gain ALR screens in dark environments by reducing hot spotting and maintaining accurate color. I once switched from a high-gain ALR to a matte grey screen during a dedicated testing session, noticing immediate improvements in contrast and color depth. For detailed insights, check out projection screen materials for dark rooms.
Match Gain to Your Room Conditions
Screen gain determines brightness and viewing angles. For rooms with minimal ambient light, a gain of 0.8 to 1.0 offers balanced brightness without glare. If your room has more controlled lighting, sticking to 1.0 ensures optimal contrast. I tested a 1.3 gain screen in my darker room but found it caused hot spots on the edges. Remember, higher gain screens amplify light but can reduce uniformity, leading to hot spotting. For more on gain implications, see screen gain fundamentals.
Calculate the Perfect Screen Size
Size impacts immersion and clarity. Use the 8K viewing distance rule to avoid pixelation—generally, a 150-inch screen at 10 feet distance is ideal for 4K and higher resolutions. I once underestimated my screen size, resulting in a loss of detail, but after recalculating, I chose a 150-inch screen that delivered stunning clarity at my seating position. Check out screen size mistakes to avoid common pitfalls.
Correct Placement Enhances Image Quality
Position your screen perpendicular to acoustic reflections and avoid placing it near light sources. Mount it at eye level for the primary viewing position to reduce distortion. I initially hung my screen too high, causing neck strain and viewing discomfort, but adjusting it to eye level vastly improved the experience. Proper placement complements material choice and gain to optimize contrast. For detailed location tips, see projection setup tips.
Prevent Common Setup Mistakes
Double-check your room’s ambient light levels and prevent glare by using blackout curtains. Test your setup with a calibration disc to verify contrast and color accuracy. I once ignored this step and was puzzled by washed-out images until I performed a calibration, revealing suboptimal contrast levels. For additional calibration guidance, visit contrast testing tips. Proper setup ensures your chosen material and gain perform at their best, bringing out the true potential of your dark room.
Many enthusiasts believe that higher gain ALR screens automatically guarantee brighter images, but this is a common misconception. In reality, assuming that increasing gain improves contrast and brightness without considering room specifics can lead to subpar results. High-gain screens tend to focus light into narrower viewing angles, causing hot spotting and color inconsistencies if not matched precisely to your room conditions, especially in 2026’s advanced home theaters.
Beware of the trap: Overemphasizing gain can backfire. For example, relying solely on a high-gain ALR screen in a room with ambient light or multiple seating angles often results in duller images and uneven brightness, contradicting popular hype. Instead, integrating materials like matte grey screen fabrics, which are engineered for darker environments, can outperform high-gain surfaces and provide more uniform contrast, as recent studies suggest. To dive deeper into optimal material choices, check out our guide on ALR materials and gain.
Advanced viewers might ask: Why do some high-gain screens still fail in modern setups?
In the context of 2026’s ultra-high-definition content and laser projectors, high gain alone isn’t enough. Many overlook the importance of screen surface texture and build quality, which influence color accuracy and sharpness. For instance, textured surfaces can mitigate visual artifacts like pixelation and ringing, enhancing clarity in 8K content. Experts recommend considering materials with micro-texture layers that optimize light diffusion, not just reflection. This approach counters the myth that only gain matters. Read more about material nuances at this in-depth guide on materials and gain.
Similarly, the misconception that larger screens always enhance immersion ignores the importance of calculating the right size based on viewing distance and resolution. Oversized screens can cause discomfort and loss of detail, especially with high-resolution content. To avoid this, consider the ‘8K viewing distance rule’ and use our practical size recommendations. Proper placement and size calibration balance immersion with comfort, avoiding the common mistake of choosing a screen that’s too big or too small for your space.
In essence, mastering projection screen choices involves more than just picking a popular model or chasing numbers. It requires understanding the interplay between gain, material texture, and room environment. Emphasizing this nuanced approach will maximize contrast, color accuracy, and overall picture quality in your dark room setup. Remember, a well-chosen material can often outperform the hype around high gain alone. Have you ever fallen into this trap? Let me know in the comments.
Tools I Recommend for Long-Term Screen Performance
To keep a projection or ALR screen performing at its best over time, I rely on a combination of specialized tools and routines. First, a high-quality microfiber cloth designed specifically for delicate surfaces is essential for regular cleaning. I use a matte-finish, anti-static cloth to remove dust without scratching or leaving residues, which can degrade surface quality over time.
Next, I recommend a gentle, screen-safe cleaner—many brands offer solutions formulated to preserve the integrity of textured surfaces. I personally prefer a minimal-chemical spray that evaporates quickly, reducing the risk of streaks or moisture damage. When cleaning, I always follow the manufacturer’s guidelines, avoiding harsh chemicals that could attack the surface material or micro-texture layers.
For calibration, I use a professional-grade spectrophotometer, such as the CalMAN or i1Display Pro, which provides precise measurements of luminance and color accuracy. Regular calibration ensures the gain and surface properties remain aligned with your viewing environment, especially after cleaning or physical adjustments. This process is crucial because even small surface deviations can impact contrast and color fidelity—particularly in high-gain or textured screens where surface anomalies are more visible.
Additionally, I utilize software like CalMAN Studio or LightSpace to analyze calibration data and fine-tune the projection system, ensuring the screen’s surface and gain characteristics complement the projected images. Keeping detailed logs of calibration sessions helps track changes over time, alerting me when a deeper inspection or surface treatment is necessary.
How do I maintain screen surfaces over time?
Screen maintenance is a balance of regular cleaning, careful handling, and periodic calibration. I recommend inspecting your surface weekly for dust buildup or spots, especially around edges and textured areas. When cleaning, use a soft microfiber cloth lightly dampened with a safe cleaner—never apply liquids directly to the surface. For textured or micro-layered screens, gentle wiping with a static-reducing cloth preserves detail and prevents the buildup of dust that can cause glare or hot spots.
Prevent physical damage by avoiding sharp objects near your screen and handling it with care during adjustments. When changing projector settings, always recalibrate your system to account for any adjustments—this ensures the gain and contrast levels stay optimized for your environment. Over time, surface materials can slightly degrade or collect contaminants, so scheduling professional calibration every 6 to 12 months helps maintain image sharpness and color fidelity. For more detailed info on maintaining screen materials and gain, see this comprehensive guide.
A Future Outlook: Smarter Maintenance in Home Theaters
Looking ahead, I predict that advancements in coating technologies and sensor-based monitoring will make maintaining optimal screen performance more automated and less labor-intensive. Imagine a future where your screen has embedded sensors detecting dirt buildup, surface wear, or gain inconsistencies, sending alerts via an app for timely cleaning or recalibration. Staying ahead now means investing in high-quality, durable surface materials and calibration tools—set a schedule, stick to routine cleanings, and always use equipment designed for the delicate nature of projection surfaces. Try integrating a calibration device into your maintenance plan today for sustained, stunning visuals that match the quality promised by 2026’s high-end projectors and materials.
The Less Obvious Lessons That Changed My Perspective on Screen Material
- Choosy about surfaces, not just gain: I once believed higher gain was always better, but I discovered that micro-textured surfaces can enhance clarity in high-resolution content, especially in dark room setups. Don’t overlook the surface finish when selecting your screen.
- Room environment trumps hype: My biggest breakthrough was realizing that ambient light control and placement matter more than chasing after high-gain screens. An engineered matte grey surface outperformed many high-gain ALR screens in my dark room.
- Personal calibration is key: I learned that even premium surfaces need regular calibration to maintain optimal contrast and color accuracy. Investing in a good spectrophotometer can save you time and produce stunning images over the long term.
- Size matters, but context is king: Going bigger isn’t always better; understanding your projection distance and resolution (8K or higher) ultimately delivers true immersion without sacrificing detail or comfort. Use the 8K viewing distance rule as your guide.
My Top-Gun Resources for a Beautiful Dark Room
- 4 Easy Fixes for Screen Ripples: Essential for maintaining image stability, especially in larger setups.
- Best ALR Materials and Gain Tips: A cornerstone reference to understand materials that outperform hype.
- Screen Gain and Material Insights: Deep dive into how surface properties influence contrast and color fidelity in dark environments.
- Avoid These ALR Mistakes: Prevent common pitfalls with high-gain screens that could diminish your viewing experience.
Your Next Step Toward a Stunning Dark Room Experience
Embracing the nuanced relationship between screen gain, material, and room conditions is the key to achieving cinematic perfection in your dark room. Remember, the best screen for your setup isn’t about chasing the highest gain or the latest hype but about understanding your unique environment and choosing materials that complement it. Tool yourself with knowledge and the right tools, and you’ll enjoy consistent, breathtaking visuals for years to come. Are you ready to reevaluate your screen choices and unlock the full potential of your home theater? Share your journey below — I’d love to hear your insights or questions.

![Why 16K Projectors Fail on Standard Woven Screens [2026 Fix]](https://screens.cinegearguide.com/wp-content/uploads/2026/02/Why-16K-Projectors-Fail-on-Standard-Woven-Screens-2026-Fix.jpeg)

This discussion really hits home for me. I’ve also struggled with the pitfalls of high-gain ALR screens, especially in rooms where ambient light isn’t completely controllable. In my setup, I found that a matte grey screen with proper calibration made a noticeable difference in achieving deeper blacks and more consistent contrast, particularly in dark rooms. It’s intriguing how the surface finish and material engineering can sometimes outperform the hype around high gain, which often just amplifies problems like hot spotting and color shift. I’ve also started experimenting with room treatments like acoustic panels and strategic furniture placement to further enhance the viewing environment and reduce residual light. Has anyone combined matte grey screens with specific room modifications? I’d love to hear about what’s worked well for others to fine-tune dark room experiences without overspending on high-gain surfaces.
Also, how do you all handle reflections from windows or external light sources that can still cause glare? I’ve found that layering blackout curtains with some careful positioning of reflective surfaces helps immensely. Curious to know what creative solutions others are using to keep their dark rooms pristine for optimal projection performance!