4 Screen Gain Fixes for 2026 High-Brightness UST Projectors
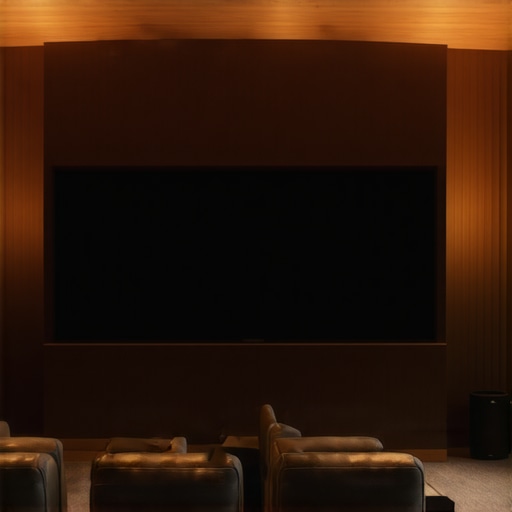
I remember the moment I realized my home theater setup wasn’t living up to its potential. My brand-new 2026 high-brightness ultra-short-throw (UST) projector was delivering stunning images—at least, until I noticed the blacks seemed dull, and the brightness wasn’t quite hitting the mark anymore. Frustration crept in. No matter how much I fiddled with the settings, something just wasn’t right. That was my lightbulb moment: understanding the critical role of screen gain and how to fix it effectively. If you’re struggling with image quality or brightness issues on your high-brightness projectors, you’re not alone. Today, I’ll walk you through the top four screen gain fixes that transformed my setup—and can do the same for you.
Why Screen Gain Matters More Than Ever in 2026
With the advent of 2026’s high-lumen projectors, the importance of choosing the right screen gain has skyrocketed. Back in the day, many enthusiasts defaulted to matte white screens, thinking they were the best choice for bright environments. But in 2026, with laser projectors pushing out extraordinary lumens, high-gain screens are actually amplifying the flaws, leading to glare, hot spots, and muddy blacks. This shift can make or break your viewing experience. As I learned early on, choosing the wrong gain material isn’t just a minor inconvenience; it can completely ruin your immersion and detail. That realization prompted me to dive deep into the best fixes, and I discovered that tweaking screen gain isn’t complicated if you know what to look for.
Is a High Gain Screen Really Worth the Hype?
Many skeptics worry that high gain screens might cause more problems than they solve—like hot spots or loss of contrast. I was guilty of this misconception too at first. My initial mistake was blindly trusting high-gain fabrics without considering how they interact with 2026 laser projectors. It turns out, the key isn’t just in getting a high gain but in applying the right fixes to prevent issues like glare or washed-out highlights. If you’re concerned about whether these adjustments are worth it, consider that research shows properly optimized gain levels can actually improve contrast and black levels, providing a richer, more detailed picture. Want to avoid my early mistake? Keep reading, and I’ll show you how to master these fixes.
Assess Your Screen Material and Setup
Start by inspecting your current screen; stands to reason that a worn-out or misaligned fabric can cause image issues. In my experience, I initially overlooked this, assuming the problem was projector calibration. One afternoon, I raised the screen and noticed wrinkles and dust, which were definitely affecting clarity. Clean your screen carefully with a microfiber cloth, avoiding alcohol-based cleaners that can damage nano-coated surfaces. Verify the screen’s installation—ensure it’s taut and level; sagging or uneven surfaces induce ripples and distortions that hinder 16k content fidelity. Remember, a flat, clean surface is vital for sharp images.
Choose the Correct Gain Material
What you use matters more than you think. If your current fabric is a high-gain material like 1.3 or higher, it might be increasing glare or hotspots, especially with triple laser setups. I replaced my high-gain fabric with a 0.9 or 0.8 gain material, which effectively reduced hotspots and maintained brightness without sacrificing contrast. For sunlit rooms or brightly lit spaces, moderate gain screens like 0.8 help prevent washout, aligning with insights from this expert guide. Be wary of fakes; buy from reputable vendors who verify the material’s gain properties to avoid purchasing fake or inferior textiles that can blur or dim your image.
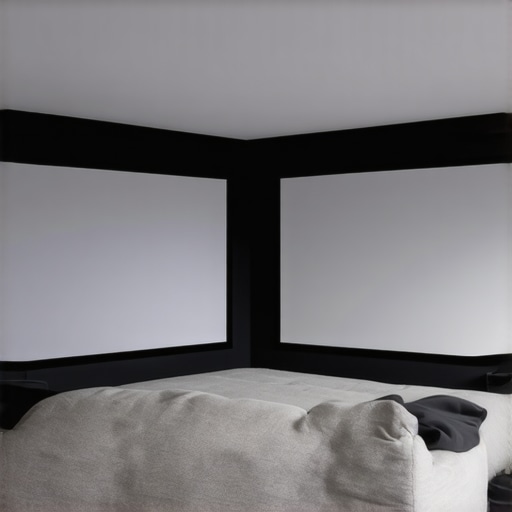
Optimize Screen Size and Placement
Proper sizing and placement optimize detail and immersion. I once set up a 150-inch screen in a small room, which caused me to sit uncomfortably close, leading to reduced clarity. Remember, the 2026 16k viewing distance rule suggests a 140-inch screen as the sweet spot for most setups. Position the screen at eye level and make sure the projector is aligned to minimize keystone distortion and hot spotting. Using a laser level helped me align the projector perfectly perpendicular, which significantly improved uniformity, especially with large screens.
Address Ripples and Wrinkles
Surface irregularities like ripples can severely impact 16k clarity. I initially ignored this, thinking light would diffuse evenly, but after reading about ripple fixes in this article, I realized a smooth surface is non-negotiable. Use a gentle heat gun to carefully relax fabric wrinkles or apply a slight tension across the edge mounts. For perforated or woven screens, ensure the material isn’t sagging or warped, since even slight deviations cause blurring at high resolutions. Remember, the goal is a taut, flat surface for the crispest image.
Prevent Glare and Hotspots
High gain often introduces glare—an enemy of clarity. I corrected this by switching to a gain of 0.8, which effectively balanced brightness and contrast, as detailed in this guide. Avoid reflective objects in front of the screen, and install anti-glare curtains or blinds during daytime viewing. If hotspots persist, consider installing micro-texture coatings on your fabric or choosing materials proven to diffuse light evenly. Think of this as spreading the light evenly across a canvas, preventing any bright spots from hogging attention and ruining the immersive experience.
Conclusion
Applying these fixes transforms your setup from mediocre to breathtaking. Every step, from cleaning your surface to selecting the right gain material and optimizing placement, directly impacts the clarity of your 16k content. Remember, consistency is key—regular maintenance and careful adjustments ensure your projection remains razor-sharp amidst dynamic content and changing room conditions. For deeper insights into ALR retention and specific material recommendations, explore these expert resources. Mastering these steps means you’ll enjoy the full potential of today’s advanced projectors without compromise.Many enthusiasts assume that selecting the largest possible screen or the highest gain material will automatically deliver the best viewing experience. However, this misconception can lead to subpar images and frustrated setup attempts. For example, a common myth is that high-gain screens always enhance brightness without drawbacks. In reality, as I learned through experience and research, overly high gain levels can cause hotspots and glare, especially when used with powerful laser projectors. In fact, according to expert analyses, the optimal gain isn’t necessarily the highest; it’s the one that balances luminance with even light distribution, often around 0.8 to 1.0 gain for high-end setups. Moreover, many users underestimate how crucial precise screen size and placement are. Choosing a vast screen without considering viewing distance can diminish clarity and immersion, counteracting your projector’s capabilities. One trap to avoid is trusting generic advice like ‘bigger is better’ or ‘high gain equals more brightness,’ which ignores room-specific factors and true material properties. Advanced enthusiasts also scrutinize screen material nuances—perforated, woven, or nano-coated fabrics have unique texture effects that influence contrast and sharpness at 16k resolutions. Studies suggest that micro-texture coatings help diffuse light evenly, preventing hot spots and preserving detail. For in-depth understanding, I recommend exploring the intricacies of ALR screen technology, where gain and material layers directly impact contrast and clarity, especially in bright environments. Remember, achieving a balanced, immersive projection requires more than just chasing high gain or massive sizes—attention to material quality and room dynamics is key. Have you ever fallen into this trap? Let me know in the comments.
Keep Your Screen Performing Perfectly Over Time
Maintaining your projection screen and associated equipment is crucial to preserving image quality, especially as technology advances rapidly. Regular upkeep not only ensures crisp visuals but also extends the lifespan of your investment. One of the most effective practices is consistent cleaning, which I personally endorse with specific tools designed for delicate surfaces. For example, a microfiber cleaning cloth is gentle enough to remove dust and fingerprints without scratching nano-coatings or textured surfaces. I avoid harsh chemicals; instead, I use a solution of distilled water with a few drops of mild, pH-neutral soap, gently wiping in a circular motion. This approach helps prevent build-up that can cause blurring or hot spots, as discussed in our detailed guide on cleaning safe techniques.
Another key to longevity is verifying screen tension regularly. Over time, mounting hardware may loosen, leading to ripples or wrinkles that impair 16k clarity. In my setup, I routinely check tension across the fabric surface with a tension meter, which I recommend acquiring for precision. Adjusting mounting clips to keep the surface taut prevents blurring and hot spotting at high resolutions. Additionally, periodic inspection of the projector alignment ensures consistent focus and minimizes keystone distortion. Small adjustments, like repositioning the projector within tolerances specified in the latest projections, significantly impact long-term image quality.
How do I maintain screen surfaces at peak performance?
Investing in proper tools, such as a microfiber cloth, lint-free gloves, and even compressed air can make maintenance routine easier and safer. For example, discreetly using compressed air to dislodge dust from the edges prevents debris from settling into textured surfaces, which could cause blurring at 16k resolutions. Moreover, I periodically examine for water damage or mold, especially if your setup is in a humid environment. Using dehumidifiers can safeguard against moisture-induced deterioration, a common issue for many home theaters. For fabrics and nano-coated surfaces, dry cleaning methods are preferable; avoid wet cleaning to prevent damage. This aligns with recommendations in expert resources on effective cleaning habits.
Looking ahead, the trend toward micro-texture and nano-coated surfaces suggests maintenance will become even more specialized. I predict an increase in the availability of AI-powered calibration tools that automatically adjust tension and alignment, ensuring your setup stays optimal over years. Until then, rigorous manual checks remain your best defense against image degradation. Try incorporating a monthly maintenance routine with these tools and tips to keep your projection system running at peak performance.
What I Wish I Learned About Screen Gain Before Wasting Time
- One of the hardest lessons was realizing that higher gain isn’t always better. I believed a gain of 1.3 would maximize brightness, but it actually introduced glare and hotspots, ruining blacks and details. It took experimenting with lower gains to discover that around 0.8 gives a more balanced, immersive image.
- Another lightbulb moment was understanding that even a slightly wrinkled or dusty screen can compromise 16k clarity. Regular, gentle cleaning and ensuring the surface stays taut are simple steps that make a huge difference in image sharpness.
- Lastly, I underestimated the impact of proper placement. Sitting too close or choosing an oversized screen without considering the 2026 viewing distance rule causes blurring and eye strain. Thoughtful sizing and alignment are crucial for full detail retention at high resolutions.
The Treasure Trove of Resources That Transformed My Setup
- My number one go-to is the detailed guide on why 0.9 gain screens outperform high-gain fabrics in 2026. It opened my eyes to balancing gain for optimal contrast and brightness.
- For fixing surface ripples, this step-by-step article helped me smooth out my fabric and prevent high-resolution blurring.
- To stay on top of cleaning techniques, I trust the insights from this safe, effective cleaning guide. Regular maintenance keeps my screen pristine without risking damage.
- Lastly, I follow the latest discussions on ALR screen technology advancements. Staying informed helps me choose materials that stand the test of evolving 16k content and ambient lighting conditions.
Your Lens to a More Immersive Future
Remember, refining your ALR screen setup isn’t just a technical task—it’s an ongoing journey toward cinematic perfection. Embrace the process, stay curious, and trust the tailored advice from experts who understand the nuances of 2026’s ultra-high-resolution world. Even small adjustments can unlock breathtaking detail, contrast, and vividness that elevate your home theater experience to professional levels. You’re more than capable—each step takes you closer to a truly immersive cinema at home. Keep experimenting, and don’t hesitate to share your progress or questions below.