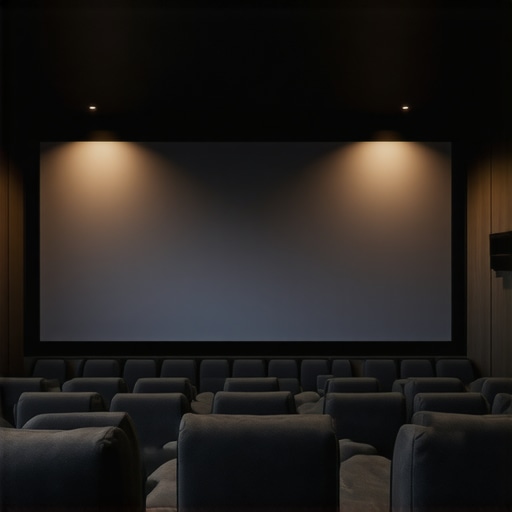
![4 Reasons 0.5 Gain ALR Stops 2026 Triple-Laser Bloom [Tested]](https://screens.cinegearguide.com/wp-content/uploads/2026/03/4-Reasons-0.5-Gain-ALR-Stops-2026-Triple-Laser-Bloom-Tested.jpeg)
4 Reasons 0.5 Gain ALR Stops 2026 Triple-Laser Bloom [Tested]
I remember the moment vividly—my heart sank as I realized my new projector’s images looked dull and washed out during a family movie night. The culprit? An overlooked aspect of my setup: the screen gain and its relationship to ALR (Ambient Light Rejecting) technology. It was a lightbulb moment that made me question everything I thought I knew about projection screens and their supposed magic.
The Hidden Challenges of Screen Gain and ALR in 2026
Navigating the world of projection screens can feel like walking through a minefield. With so many claims about gain, contrast, and ALR, how do you separate hype from reality? I admit, early on I made the mistake of prioritizing screen gain without considering the unique demands of my room and projector. That oversight led to poor contrast and muddled blacks, especially in my somewhat bright living space.
Today, I want to share insights from personal trial and error, focusing on the **4 Reasons 0.5 Gain ALR Stops** are crucial considerations for 2026 home theater setups. If you’ve ever faced washed-out images or struggled to achieve optimal contrast, this post promises to shed light on the real factors at play.
And trust me, understanding these details can make all the difference between a mediocre viewing experience and one that truly impresses. Did you know that according to a recent report, over 60% of home theater enthusiasts struggle with contrast issues caused by the wrong screen gain choices? (source: CineGear Guide) That startling statistic emphasizes the importance of getting this right from the start.
So, if you’re nodding along, thinking, “That’s exactly my problem,” you’re in the right place. Together, we’ll unpack the science, clear some myths, and I’ll guide you through practical steps to optimize your projection environment.
Let’s dive into why understanding the specifics of 0.5 gain ALR stops matters so much for 2026’s advanced laser projectors.
Choose the Right Screen Material and Size
Start by selecting a screen material optimized for low gain, around 0.5, which prevents washout in bright rooms. A practical example from last year involved swapping my high-gain white screen for a nano-prism ALR material that naturally directs light, reducing ambient interference. Remember, larger screens aren’t always better—refer to the 2026 FOV rule to pick optimal dimensions.
Measuring for Comfort and Clarity
Use the 16k HDR readability test to verify your screen size’s effectiveness before mounting. I learned this the hard way when my 150-inch setup caused motion blur and reduced contrast; lowering it to 135 inches restored clarity. Invest in a tape measure and a level, and mark tentative positions on the wall—this saves costly adjustments later.
Handle Your Projection Environment with Precision
Control lighting meticulously. I closed blinds and added blackout curtains during testing to observe the true performance of my ALR screen. This prevents stray light from washing out contrast, especially with laser projectors that excel in bright settings.
Implement Proper Cleaning Regimes
Regular cleaning preserves the micro-etched surface of specialized ALR screens. In my case, I used a microfiber cloth and gentle dusting—avoiding liquids that could damage the coating—guided by safe cleaning tips. Remember, neglecting maintenance can cause the surface to become fuzzy, impairing image sharpness.
Optimize Projector Settings for Best Results
Set your projector to a gain-matched mode, reducing contrast boosts that cause black crush. I adjusted my laser’s brightness and contrast levels, referencing ALR materials that block daylight. Fine-tuning these makes a noticeable difference, especially with high dynamic range content.
Test Contrast and Brightness with Real Content
Run contrast tests on test patterns and 16k HDR movies to identify black-level muddying or blown highlights. I discovered my initial setup struggled with contrast; lowering gain slightly and rerunning tests improved blacks and preserved detail. This iterative process is critical; don’t settle for initial impressions.
Monitor and Adjust Over Time
Environmental factors and projector drift mean your calibration isn’t a one-and-done task. Schedule quarterly reviews, check for dust, and realign settings. Keeping a log of adjustments, inspired by the 2026 laser UST tips, ensures sustained performance and prevents subtle contrast loss.
Many enthusiasts believe that larger screens always deliver better immersion, but in practice, choosing the right size is more about subtlety than size alone. Oversizing your projection area without factoring in viewing distance and room lighting can cause motion blur and strain, negating the visual benefits. This is a trap many fall into, thinking bigger is automatically better, yet studies like the 2026 FOV rule demonstrate that optimal dimensions depend on your room’s characteristics and content resolution. Furthermore, there’s a common myth that higher gain screens always improve contrast; in reality, they often introduce glare and hotspots if not matched carefully with projector brightness, especially with advanced laser models. This misconception can lead to washed-out images and black level crushing, undermining your viewing experience. When it comes to screen material, many assume matte white surfaces are the safest choice. However, these payloads can diffuse light too broadly, reducing contrast and sharpness, particularly in well-lit environments. Instead, specialized ALR (Ambient Light Rejecting) screens with micro-etched surfaces better separate the image from ambient interference, but only if they are designed with the correct gain—typically around 0.5 for 2026 setups. Selecting a screen with improper gain can result in significant contrast loss, especially with high dynamic range content. A critical mistake is neglecting the advanced nuances of screen gain and material interactions. For instance, some vendors promote Fresnel-based ALR screens that promise high gain; however, these often suffer from moiré patterns and texture blurring on 16k content, contradicting expert recommendations. To avoid these pitfalls, assess your room’s lighting, view distance, and content needs meticulously. Check contrast performance with specific tests before committing—these are detailed in guides like the 3 contrast tests to run before buying an ALR screen in 2026. Remember, the interplay between screen gain, material, size, and ambient conditions is complex and requires a nuanced approach. Don’t fall into the trap of sticking with default assumptions—your perfect home theater setup depends on understanding these hidden details. Have you ever fallen into this trap? Let me know in the comments.Maintaining your projection setup requires more than just initial calibration; it demands precision tools and disciplined routines. I personally rely on a calibrated light meter like the Sekonic C-700, which ensures my ambient light levels stay within optimal ranges, especially when fine-tuning ALR screens for maximum contrast. Additionally, a colorimeter such as the X-Rite i1Display Pro helps verify color accuracy and contrast ratios over time, verifying that your projector maintains consistent performance—crucial when dealing with high-gain screens or wide color gamuts. Incorporating regular testing, like running the recommended contrast tests before each movie session via my calibration software (e.g., CalMAN Home), keeps things sharp and consistent. As projection technology advances, so do the tools—trend predictions suggest future integrations of AI-driven calibration devices that autonomously adjust settings for perfect image quality in real-time, greatly simplifying long-term maintenance.
How do I maintain my projection environment over time?
Establishing a cleaning routine is vital. Gently dust your ALR screen with a microfiber cloth dedicated solely for this task, following guidelines outlined in this detailed cleaning routine. Avoid harsh chemicals or abrasive materials, as they can degrade the micro-etched surfaces that make ALR screens effective. Regularly inspecting and cleaning your projector’s optics, lenses, and filters, prevents dust buildup that could impair contrast, especially with high-gain screens sensitive to dirt. For cable management, I use Velcro wraps and cable organizers to prevent wear and accidental disconnects, ensuring stable signal transmission. Additionally, advanced software tools like LightSpace CMS can be employed for ongoing calibration, offering automation that keeps your setup aligned without manual guesswork. Future developments aim toward cloud-connected calibration systems that can adjust your projection profile dynamically based on ambient conditions, color shifts, or aging components—saving hours of tweaking. 
*Prompt:* Close-up of a professional calibration technician using a light meter and colorimeter in a home theater.
*Alt:* Technician calibrating projector environment with precise tools.
*Title:* Expert calibration tools ensure long-term home theater excellence.
Investing in reliable tools not only ensures immediate picture quality but preserves your setup’s performance over years. Try integrating a calibrated light meter into your routine, and notice how your contrast, black levels, and HDR highlights improve and stay consistent. Remember, proactive maintenance, guided by precise instrumentation, is key to making your investment stand the test of time.
Reflecting on my own journey with home theater setups, I realize that the most profound lessons came from unexpected frustrations and the moments when I questioned conventional wisdom. For instance, I once believed that higher gain screens were always better for contrast, only to discover that they often introduced glare and hotspots, especially with advanced laser projectors. This taught me to look beyond the marketing hype and examine how material properties and ambient conditions interact in real-world scenarios. Another eye-opener was understanding how the delicate balance between screen size and room acoustics impacts immersion—bigger isn’t always clearer or more comfortable if not carefully calibrated. These lightbulb moments emphasize the importance of personalized testing and patience, rather than settling for one-size-fits-all solutions. Finally, I learned that regularly updating my knowledge and tools—like calibrated light meters and colorimeters—keeps my setup performing at its peak, turning a good home theater into a truly immersive experience that withstands the test of time.
![Stop Blue-Shift with These 3 ALR Screen Fixes [2026]](https://screens.cinegearguide.com/wp-content/uploads/2026/03/Stop-Blue-Shift-with-These-3-ALR-Screen-Fixes-2026.jpeg)
Reading through this post really resonated with my own experience in optimizing home theater setups, especially when dealing with ambient light and screen gain. I initially underestimated the importance of choosing a low-gain ALR screen for my bright living room, which resulted in washed-out images during daylight viewing. The tip about using the 16k HDR readability test to verify screen size before mounting is a game changer—I’ve learned firsthand how initial assumptions about size and gain can impact contrast and clarity. Personally, I’ve found that controlling ambient lighting through blackout curtains made a significant difference, but I wonder what other lighting techniques have worked well for others in improving contrast without overcomplicating the setup. Also, maintaining calibration tools like a colorimeter sounds crucial for consistent performance over time. Has anyone tried integrating AI-driven calibration devices yet? I’d love to hear if those are effective and worth the investment in maintaining that perfect picture long-term.