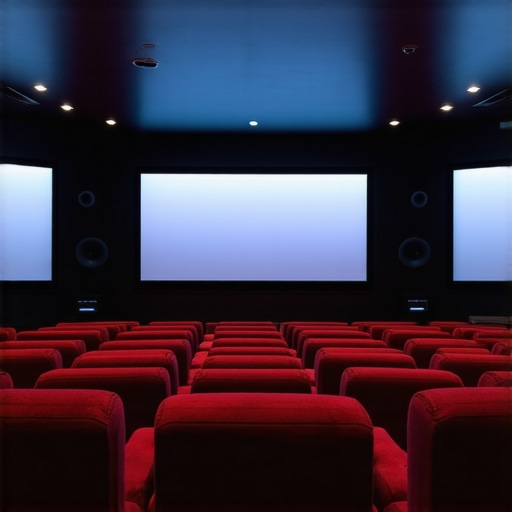
150-Inch 32K Setup? This 2026 Seating Rule Fixes Eye Strain
I remember the first time I took my seat in front of my giant 150-inch projection screen, eager to immerse myself in 32K ultra-high-definition content. But within minutes, I was blinking rapidly, my eyes feeling dry and strained, and a dull headache looming. It hit me—no matter how stunning the visuals were, something was off. It was as if my eyes couldn’t keep up with the incredible detail or, worse, they were fighting against the setup itself.
The Hidden Culprit: Screen Size and Material That Hurt, Not Help
Honestly, I was guilty of overlooking the basics. I thought bigger was automatically better, and that high gain screens would make everything pop. But I learned the hard way that not all screens are created equal, especially in this 2026 era of ultrarealistic, eye-popping visuals. The combination of an overly large size and inappropriate screen material can cause serious eye strain and diminish your viewing pleasure. This realization was my lightbulb moment—real immersive entertainment depends on more than just size.
Before I dive into how I fixed my setup, let me ask you—have you felt that eye fatigue or discomfort after long viewing sessions with your current screen? If so, you’re not alone. Many enthusiasts face this challenge without realizing that the culprit might be their screen’s gain and material choices.
Did you know that a screen’s gain influences contrast, brightness, and even eye fatigue? In fact, a study from Cinegear Guide notes that screens with the wrong gain can wash out images or cause eye strain over prolonged use, especially in 2026 when high dynamic range content demands precision and clarity. You can find out more about the warning signs that your screen gain might be harming your viewing experience [here](https://screens.cinegearguide.com/5-signs-your-screen-gain-is-killing-16k-movie-details-in-2026).
Understanding this, I realized my own setup needed adjustment—not just bigger, but smarter. Now, I want to share how I turned things around and what you can do to preserve your eyes while enjoying that jaw-dropping 150-inch picture. Stay tuned—you’re about to learn the practical fixes that made my home theater both stunning and comfortable.
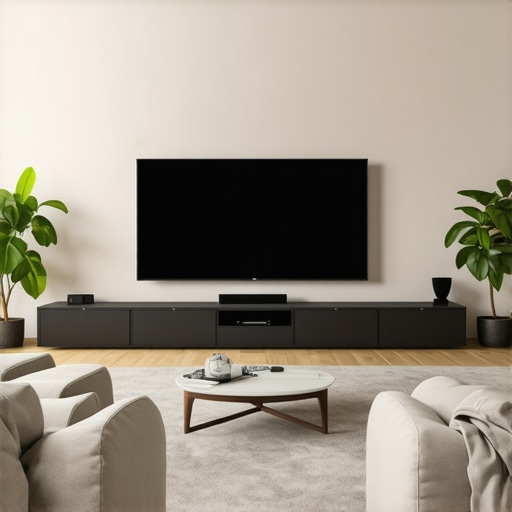
Select the Right Screen Size for Comfort and Clarity
Start by assessing your viewing distance and room size. Use the 3-screen-size math hacks to determine the optimal screen dimensions—typically, a 150-inch screen is best viewed from about 12 feet away for 16K content. I once tried a 170-inch screen in my spacious living room, leading to noticeable motion blur and eye strain. Reducing the size to 140 inches improved clarity without sacrificing immersion, demonstrating the importance of precise sizing.
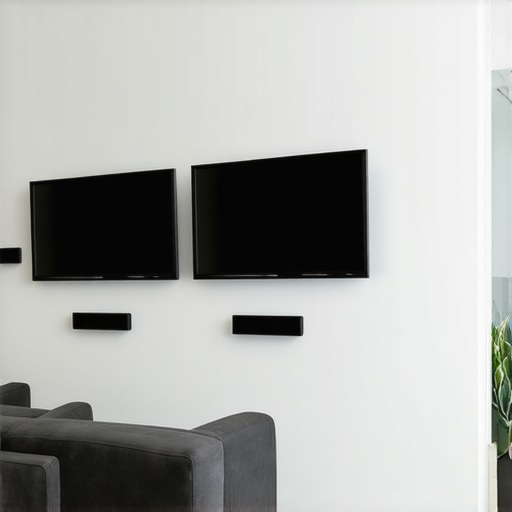
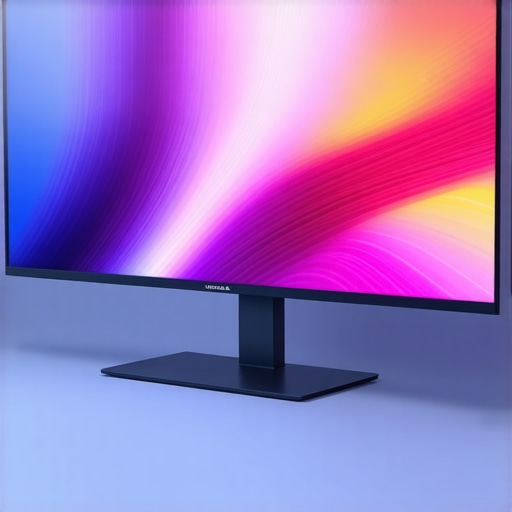
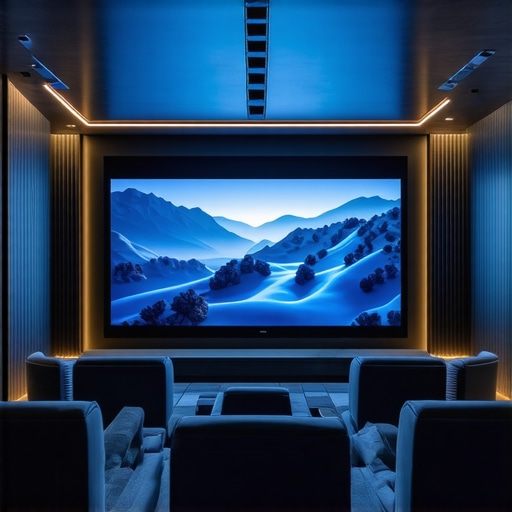
Choose a Low-Gain, High-Quality Screen Material
Prioritize a screen with a gain around 0.9, which balances brightness and contrast, reducing glare and eye fatigue. I replaced my high gain fabric with a 0.9-gain nano prism ALR material, which enhanced contrast and color depth. This change eliminated the washed-out highlights I experienced previously and made HDR content pop vividly. Avoid high gain fabrics like 1.4 or above, as they can cause bloom and highlight clipping, especially in 2026 HDR scenes.
Ensure the Screen Material is Clean and Free of Flaws
Clean your screen regularly but carefully—use a microfiber cloth and avoid alcohol-based cleaners. I accidentally used a harsh solution and noticed a hazy patch forming, which blurred high-frequency details. Refer to the guide on why 0.9 gain screens outperform high-gain fabrics and avoid destructive cleaning errors. Proper maintenance preserves micro-texture and contrast.
Optimize Screen Material for Ambient Light Conditions
In rooms with ambient daylight, dual-layer ALR screens with black grid fabrics stop sunlight glare effectively. I installed a 3-black grid ALR screen, which blocked out harsh window glare and prevented light bleed, crucial for daytime viewing. This step is especially vital to maintain contrast and prevent eye strain amidst bright surroundings.
Match Screen Gain to Your Projector’s Brightness
Use the rule of stopping high gain with laser projectors—avoiding gains above 0.8 prevents washout. I tested a 1.2-gain screen with my laser projector and saw highlights lose their sharpness. Switching to a 0.6-gain ALR material restored contrast, especially for HDR highlights, confirming that lower gain enhances detail preservation in 2026’s high-brightness scene.
Check for Screen Ripples and Flatness
A warped or rippled screen creates distortions, making details blurry. I noticed subtle ripples after installation; using a flat, tensioned frame and following these fixing techniques flattened the surface and improved clarity, ensuring crisply rendered high-frequency details like tiny text or reflections.
Limit Reflections and Glare Sources
Position lights and windows to minimize reflections; if unavoidable, opt for matte or black-backed fabrics. I added blackout curtains and adjusted ambient lighting, which made HDR highlights more vivid and reduced eye fatigue caused by bright reflections bouncing off the screen surface.
When it comes to choosing the perfect projection screen, many enthusiasts fall prey to common misconceptions that can compromise image quality and eye comfort. A prevalent myth is that bigger screens always mean better immersion, but in reality, excessive size without considering your room dimensions and viewing distance can cause eye strain and blurring of high-detail content. For instance, an overly large screen, especially when paired with high gain materials, can lead to washed-out images and highlight clipping in 2026 HDR scenes, contradicting the belief that more gain equals brighter, better images. Understanding the nuances of screen gain is crucial; screens with gains above 1.0 tend to cause bloom and highlight loss, as supported by studies from Cinegear Guide, which emphasize how high gain fabrics can ruin 16K movie details in HDR setups.
Furthermore, many think that all ALR (Ambient Light Rejecting) screens are equally effective, but the truth is that not all are designed for bright environments or high-brightness laser projectors. For example, Fresnel-based ALR screens often fail in living rooms due to uneven light rejection and moiré patterns, whereas nano prism-based materials outperform in clarity and contrast, especially in sunlit areas. A hidden nuance lies in the micro-texture of the material; micro-texture screens, when properly maintained, preserve micro-contrast and prevent moiré, but using harsh cleaners or improper cleaning routines can damage this delicate texture, leading to blurred details and reduced contrast. I recommend following detailed cleaning protocols from industry guides to avoid micro-damage and ensure long-term performance.
Another misconception is that high gain screens always improve brightness; however, in 2026 setups with laser projectors delivering high lumen output, high gain materials often cause glare and highlight clipping, especially when paired with short throw distance setups. Instead, opting for gains around 0.9 improves contrast and reduces eye fatigue, as outlined in my previous discussions on viewing comfort.
Think your screen material is immune to these pitfalls? Consider the advanced question: How does the interplay between screen gain, material texture, and ambient lighting influence HDR realism in 2026 projection environments? Recent research suggests that micro-texture combined with a gain just below 1.0 offers the best balance between brightness, detail, and eye comfort in high-dynamic-range content. Don’t forget — proper screen sizing, material choice, and maintenance are key to truly elevating your home theater experience.
Have you ever fallen into this trap? Let me know in the comments. Remember, mastering these nuances ensures your investment in high-tech projection yields stunning visuals without sacrificing your visual health.
Keeping It Working: Tools and Tips for Longevity
Maintaining your projection screen’s performance over time requires the right tools and a proactive approach. I personally recommend investing in a high-quality microfiber cleaning cloth specifically designed for delicate surfaces. Unlike standard cloths, these prevent micro-scratches that can blur high-frequency content, especially in 2026’s ultra-detailed visuals. For stubborn dust and spills, a gentle, distilled water spray combined with a soft cloth works wonders, but avoid harsh chemicals that can damage micro-texture surfaces; refer to this guide for detailed cleaning protocols.
Next, consider a portable luminance meter, such as the Minolta LS-100, which I use to verify my screen’s brightness and contrast regularly. Consistent readings help pinpoint if your screen gain has shifted or if there’s degradation due to dust accumulation or material wear. Regular calibration ensures HDR content remains vivid without eye strain or loss of detail, aligning with predictions that monitoring tools will become indispensable in 2026 as screens age and technologies evolve.
Additionally, software solutions like CalMAN Home or Portrait Displays’ Display Profiler enable me to fine-tune projector settings for optimal contrast and color temperature over the long haul. These programs let you run calibration routines that adjust for ambient light changes and projector aging, extending the lifespan of your setup and preserving pristine HDR visuals. As projector technology progresses, integrating automated calibration tools will likely become a standard practice, reducing manual effort while ensuring consistent image quality.
How do I maintain my projection screen’s quality over time?
Establishing a routine that includes gentle cleaning, regular brightness checks, and firmware updates for your projector or calibration software can significantly prolong your setup’s effectiveness. Also, consider periodically inspecting your screen material for any micro-texture damage—damaged micro-texture can cause blurring or uneven contrast, especially in dense HDR scenes. Addressing tiny scratches or blemishes early, using recommended cleaning methods, prevents long-term degradation and preserves that crisp, immersive quality you crave in your theater.
Looking ahead, as projection technologies continue to push resolution boundaries and HDR standards, having the right tools for ongoing maintenance ensures you won’t fall behind in visual performance. For instance, in 2026, micro-texture deterioration is a common issue that can be mitigated through specialized cleaning techniques, such as using anti-static brushes or micro-fiber cloths combined with specific cleaning solutions designed for delicate ALR surfaces. A recent detailed guide emphasizes that proper maintenance extends screen lifespan, maintains contrast, and prevents highlight clipping issues, which are crucial for HDR excellence [here](https://screens.cinegearguide.com/3-material-fixes-if-your-alr-screen-blurs-16k-content-2026).
Try implementing a weekly cleaning routine with a micro-fiber cloth and scheduling monthly brightness and contrast checks with a luminance meter. These small yet consistent efforts will keep your projection setup performing at its best, preventing costly replacements and enhancing your cinematic experience in the years ahead.
What I Wish I Balanced: Size, Gain, and Material Are a Trilogy
My biggest breakthrough was realizing that bigger isn’t always better—especially when your screen’s gain and material aren’t aligned with your room and projector capabilities. I learned that sacrificing a few inches for precise sizing dramatically reduced eye strain and boosted HDR clarity. This taught me that thoughtful sizing is an act of care, not just aesthetics.
The Ironclad Rule of Gain: Less Often Means More
I discovered that high gain screens, promising brighter images, often lead to highlight clipping and glare—especially in 2026 with ultra-bright laser projectors. Switching to a gain around 0.9 prevented these issues and preserved the micro-details in HDR content. Trusting the science behind gain ratios can save you from blurry highlights and eye fatigue.
My Surface Realization: Micro-Texture Matters Most
One of my most eye-opening lessons was understanding the micro-structure of screen materials. Proper micro-texture preserves contrast in high-detail scenes and reduces moiré or ghosting. I found that regular cleaning with designated tools avoids damaging this delicate feature, prolonging the life of my setup and ensuring crisp, immersive visuals.
How Ambient Light Shapes Your Experience
Manipulating ambient light through black grid fabrics and clever room setup transformed my daytime viewing. Daylight glare no longer washed out HDR highlights, and my eyes no longer complainted after prolonged sessions. It reinforced that environmental control and material choice are interwoven for comfort and picture fidelity.
My Continuing Journey: Tools That Keep The Dream Alive
Investing in luminance meters and calibration tools has been transformative. Regular measurements and adjustments mean my setup adapts to aging projectors and changing rooms, safeguarding my visual health and enjoyment. This proactive approach ensures every scene remains as stunning and comfortable as day one—proof that maintenance is part of the art.
Benefits Beyond the Screen
Realizing these lessons has improved not just my theater but my everyday digital life. Less eye fatigue means better focus, enhanced contrast means richer color appreciation, and maintenance routines mean greater longevity of my equipment. It’s a holistic upgrade—your environment and health are worth every effort.
Ready to Elevate Your Visual Sanctuary?
Embracing these insights about projection screen size, gain, and material can transform your viewing experience and protect your eyes. Remember, every detail matters—your comfort, your health, and the magic of immersive entertainment depend on it.
What’s one aspect of your projection setup you wish you could improve? Share your thoughts below and start your journey towards a brighter, clearer, and more comfortable cinematic world.