ALR Screen Technology: Best Materials, Gain & Size Tips for 2024
Ever set up a home theater only to discover your bright room turns your sleek projector into a washed-out disappointment? I’ve been there. I spent more time tweaking contrast and brightness than actually enjoying my movies. That frustrating moment when your screen just doesn’t deliver the vivid, clear image you imagined? Yeah, I’ve had plenty of those. But here’s the thing — I finally cracked the code on ALR (Ambient Light Rejection) screens, and it was a game-changer. Today, I want to share what I’ve learned about the best materials, gain, and sizing tips for 2024, so you don’t have to go through the same trial and error. If your room has ambient light or you’re tired of squinting at your screen, this post is for you. We’ll explore the crucial details that help you choose the right ALR screen to transform your viewing experience from mediocre to spectacular.
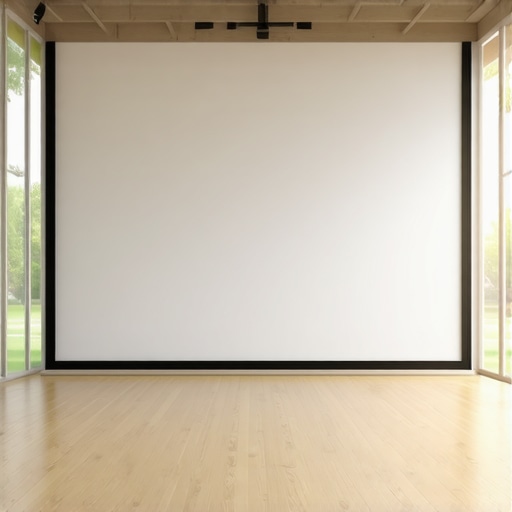
Why Your Room’s Lighting Can Make or Break Your Projection
When I first started with projectors, I underestimated how much ambient light would ruin the picture. It’s one thing to have a dark room, but most of us don’t have perfect blackout curtains. That’s where ALR screens come into play. They’re designed to reject ambient light and boost contrast, making your image pop even in brighter environments. But not all ALR screens are created equal. The materials used, the gain level, and the size of the screen all matter — a lot. I learned this the hard way early on, when I bought a high-gain screen that reflected too much light, resulting in glare and a washed-out picture. Trust me, selecting the right material and gain isn’t just a detail; it’s the foundation for a stunning projection setup. To get the best results, I dove into the latest insights for 2024, including the top-rated materials and gain options, which you can explore in detail at this guide. Knowing the difference between matte and semi-matte surfaces and choosing the right gain can dramatically improve your viewing clarity and color accuracy.
Is ALR Screen Technology Actually Worth the Hype?
Early in my journey, I made a common mistake — I assumed that a high-gain screen would automatically give me the brightest image, without considering how it might introduce glare or hotspots. That’s a trap many fall into. The truth is, the best ALR screens are a balance. They need to reflect ambient light away while still providing enough brightness for vivid images. Recent advances in screen materials have made this easier, with options tailored for bright rooms and daylight viewing. If you’re skeptical about whether ALR screens are worth the investment, I get it. I was too until I saw my image transform. Now, I recommend doing a bit of research on the available materials, gain options, and how they suit your room’s lighting conditions. For a detailed breakdown, check out this comprehensive resource. It helped me avoid costly mistakes and get exactly what I needed for my space.
So, if you’re tired of battling glare and washed-out images, don’t worry. The right ALR screen, combined with proper size and gain, can turn your bright room into a cinematic paradise. Ready to discover the best materials and tips for 2024? Let’s dive into the practical steps to upgrade your setup.
Choose the Right Material for Your ALR Screen
Start by selecting a screen material that effectively rejects ambient light while maintaining color accuracy. In my experience, matte or semi-matte surfaces with specific light-rejecting properties work best for bright rooms. I initially purchased a glossy material, thinking it would maximize brightness, but it reflected too much ambient light, creating glare. I switched to a specialized ALR fabric after reading this detailed guide and saw immediate improvement. Look for materials with a gain level around 1.0 to 1.3 for balanced brightness and contrast. Avoid high-gain screens that can cause hotspots and glare. Once you’ve narrowed down your options, order samples if possible to test in your room’s lighting conditions.
Test and Compare Before Committing
Before making a final purchase, set up a temporary screen or use a portable one to test different materials. During my testing phase, I hung a few fabric swatches in my room and projected a test pattern. The semi-matte material provided the best contrast without glare, even during daytime. This hands-on approach helped me avoid costly mistakes. Remember, what works in one room might not work in another, so always test your options in your actual space.
Determine the Optimal Screen Size and Gain
Getting the size right is crucial. Think of your screen as a window frame; too small, and it feels cramped; too large, and it overwhelms the room. I used size calculation tools to match my room dimensions and seating distance. For bright rooms, a larger screen with a moderate gain (around 1.2) helps maximize brightness without hotspots. When I increased my screen size from 100 inches to 120 inches, I noticed a more immersive experience with no loss in clarity, thanks to my careful gain selection.
Balance Gain and Room Lighting
Higher gain screens reflect more light, which can boost brightness, but also risk hotspots and glare. Lower gain screens diffuse light better but may need a brighter projector. For my setup, I opted for a gain of 1.2, which provided a good compromise—bright enough without hotspots. If your room has a lot of ambient light, leaning towards a gain closer to 1.3 might be beneficial. Check out this resource for the latest gain options suitable for bright environments.
Fine-Tune Your Setup for Maximum Impact
Once you’ve selected your material and size, install your ALR screen securely and at the optimal height—typically at eye level when seated. Use a level to ensure it’s perfectly aligned. I initially hung mine slightly crooked, which distracted from the picture quality, so take your time to get it right. Adjust your projector’s throw distance and lens settings to fill the screen properly, avoiding keystone distortion. Test different viewing angles and lighting conditions to confirm your setup’s effectiveness. Small adjustments can make a big difference in image uniformity and contrast, especially in a room with variable ambient light. For more detailed guidance, explore this comprehensive guide.
Many enthusiasts believe that selecting a projection screen is as simple as picking a size and a gain number. However, this oversimplification often leads to subpar results. One hidden nuance is the misconception that higher gain always means brighter images. In reality, high-gain screens (>1.3) tend to create hotspots and glare, especially in rooms with ambient light, which can diminish overall picture quality. To avoid this trap, I recommend focusing on moderate gain options around 1.0 to 1.3, tailored to your room lighting conditions. For more detailed insights, check out this guide.
Why do most people overlook the importance of material finish?
Many assume all matte surfaces are equal, but the reality is that semi-matte or special light-rejecting fabrics outperform standard matte surfaces in rejecting ambient light and maintaining color accuracy. Glossy or reflective surfaces, while seemingly attractive for their brightness, often cause glare and hot spots that ruin the viewing experience. I learned this the hard way when I initially chose a glossy screen, only to switch after testing various materials with the comprehensive material guide.
Advanced mistake: Misjudging room size and screen dimensions
Many assume that bigger is better, but an oversized screen in a small room can cause eye strain and reduce perceived contrast. Conversely, a too-small screen can diminish immersion. The key is to calculate the optimal size based on seating distance and room dimensions. I used size calculators to determine the right fit, which made a noticeable difference in my setup. Remember, the goal is a balanced, immersive experience without sacrificing image clarity.
Have you ever fallen into this trap? Let me know in the comments!
Keeping your projection setup in top shape requires more than just choosing the right screen material or size. Over time, even the best screens and projectors need regular maintenance and careful handling to ensure consistently stunning visuals. I’ve learned firsthand that investing in the right tools and following a disciplined maintenance routine can extend the life of your screen and preserve image quality, saving you money and frustration down the line.
Invest in a High-Quality Screen Cleaning Kit
One of the most overlooked aspects of maintaining a projection screen is cleaning. Dust, fingerprints, and smudges can diminish contrast and cause glare, especially on matte or semi-matte surfaces. I personally recommend a dedicated screen cleaning kit that includes a microfiber cloth, a gentle cleaning solution, and a soft brush for dust removal. Avoid harsh chemicals or abrasive materials, which can damage delicate screen surfaces. Regular cleaning—about once a month—keeps the surface pristine, ensuring optimal reflectivity and color accuracy. For recommended products and techniques, check out this detailed guide.
Use a Laser Level for Perfect Alignment
Proper alignment is critical for maximum image uniformity and avoiding keystoning. I swear by a high-precision laser level, which helps me hang my screen perfectly straight and at the ideal height. Misalignment not only looks unprofessional but can also cause distortion and uneven brightness. Investing in a laser level with a magnetic base and adjustable beam allows for quick, accurate setup, especially in rooms with uneven walls or ceilings. This small tool can make a big difference in achieving a professional-looking installation that maximizes your screen’s effectiveness.
Maintain Your Projector with a Cleaning and Calibration Schedule
While the focus is often on screens, don’t forget your projector. Dust buildup on the lens can reduce sharpness and contrast, and aging bulbs can dim over time. I recommend scheduling a thorough cleaning of the projector’s lens and filters every 3-6 months, depending on usage and environment. Additionally, calibration tools—like colorimeters or dedicated software—help fine-tune brightness, contrast, and color accuracy. Regular calibration ensures your display remains vibrant and true-to-life, especially as bulbs age or ambient lighting changes. For professional calibration, I suggest consulting resources like this comprehensive guide.
Monitor and Adjust Gain Settings Over Time
Screen gain can fluctuate slightly with environmental factors and wear, so periodically testing and adjusting your gain settings helps maintain the best image quality. Use a light meter or calibration disc to measure ambient and reflected light, then tweak your projector’s settings accordingly. If you notice hotspots or uneven brightness, consider re-evaluating your screen’s positioning or cleaning the surface thoroughly. Staying proactive with gain adjustments ensures your setup adapts to changing conditions, preserving that crisp, vivid picture you worked so hard to achieve.
Predicting Future Trends in Maintenance and Tools
Looking ahead, I believe the integration of smart calibration devices and AI-powered cleaning tools will become standard. Imagine a device that automatically detects dust or misalignment and corrects it via app-controlled adjustments—making maintenance effortless. Additionally, advancements in self-cleaning screen coatings may reduce the need for manual cleaning altogether. Staying updated with these innovations will help you keep your projection system performing at its best for years to come.
Ready to take your projection setup to the next level? Try investing in a laser level for perfect alignment and schedule regular cleaning and calibration routines. These small steps will ensure your screen and projector deliver crystal-clear images every time, making your home theater truly shine. For more expert tips, explore this resource.
The Hardest Lesson I Learned About projection screen,alr screen,screen material,screen gain,screen size
One of my biggest surprises was realizing that not all ALR screens are created equal. I initially thought that choosing a high-gain surface would automatically solve my ambient light issues, but I quickly learned that too much gain causes hotspots and glare, ruining the picture quality. The lesson? Balance is key—moderate gain around 1.2 often provides the best contrast without the unwanted glare.
3 Myths About projection screen,alr screen,screen material,screen gain,screen size That Held Me Back
I used to believe bigger screens always meant better immersion, but in a small room, an oversized screen actually caused eye strain and reduced contrast. I also thought glossy surfaces would maximize brightness, but they reflected too much ambient light, creating glare. Finally, I assumed all matte surfaces were equal—turns out, specialized semi-matte or light-rejecting fabrics outperform standard matte options in bright environments.
What Experts Won’t Tell You About projection screen,alr screen,screen material,screen gain,screen size
Many overlook the importance of proper installation and calibration. Even the best ALR material won’t shine if the screen isn’t perfectly aligned or if the projector isn’t calibrated correctly. Using tools like a laser level for precise hanging and regular calibration ensures you get the most from your setup. Also, investing in quality cleaning tools keeps the surface pristine, preserving brightness and contrast over time.
Curated Resources for Bright Room Projection Success
My go-to resource for choosing the right ALR material is this comprehensive guide. For understanding gain options and their impact, I rely on the latest insights for 2024. When calculating the perfect screen size, this size calculator has been invaluable. These tools have helped me avoid costly mistakes and achieve stunning results.
Your Turn to Try
Achieving optimal projection in a bright room is a blend of science and art—balancing material, gain, size, and precise setup. Don’t hesitate to experiment with different materials and tools; the perfect setup is within reach. Remember, the right ALR screen can transform your space into a cinematic haven even in challenging lighting conditions. Are you ready to upgrade your home theater and enjoy vibrant, clear images every time?
What has been your biggest challenge with projection screens or ambient light? Share your experience below—I’d love to hear your story!