
ALR Screen Technology: Top Gain, Material & Size Tips 2024
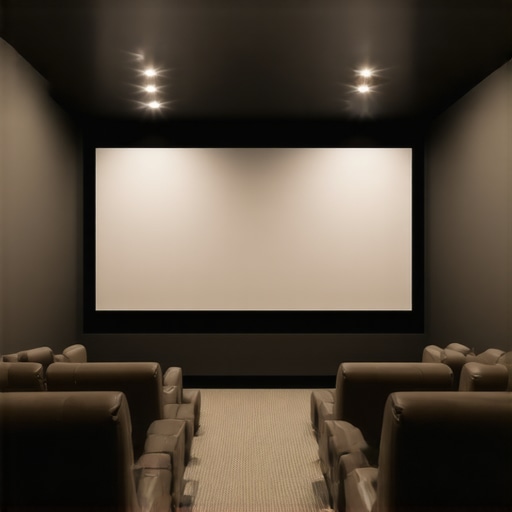
It was a quiet weekend evening when I finally decided to upgrade my home theater setup. I was excited, expecting a spectacular movie night. But as I pulled down the screen and turned on the projector, frustration hit me like a bolt. The picture was muddy, the colors drained, and I realized I had overlooked one critical detail: the screen’s gain and material choice. That lightbulb moment made me realize how many enthusiasts get stuck here, wasting time and money on solutions that just don’t deliver.
Getting Your Home Theater Bright and Clear Starts Here
Choosing the right ALR (Ambient Light Rejection) screen isn’t just about picking the most expensive model or the biggest size. It’s about understanding how **screen gain**, material composition, and size work together to give you that crisp, vibrant picture—even in bright rooms. If you’ve ever felt disappointed after an investment, trusting reviews without understanding the fundamentals, you’re not alone. I made that mistake early on, opting for a popular brand solely based on hype, only to find out later that it wasn’t suitable for my lighting conditions. That experience taught me the importance of doing thorough research.
So, what really makes a good ALR screen for 2024? I promise to break down the essentials—from the science behind gain to the best materials and sizes—so that your next upgrade leads to cinematic joy, not buyer’s remorse.
Is a higher gain always better for bright rooms?
Many newcomers assume that the higher the gain, the better the picture. But I learned this the hard way. I once chose a screen with an ultra-high gain without considering how it would affect viewing angles and image quality in my space. Turns out, this was a common mistake many make early on. Higher gain increases brightness and contrast but often narrows the viewing angle, leading to glare and uneven images. To avoid my pitfalls, I recommend reading more about the nuances of gain and how to match it to your room specifics. For a deep dive, check out this detailed guide on [screen gain and material selection](https://screens.cinegearguide.com/understanding-alr-screen-gain-material-for-perfect-projection-setup). Knowing the right balance can save you from future headaches.
Now that we’ve set the stage, let’s get into the practical tips that will help you choose the perfect ALR screen—whether you’re upgrading or just starting your home theater journey. Ready? Let’s go beyond the basics and find the setup that transforms your space into a true cinematic experience.
Choose the Right Screen Gain for Your Room
Start by assessing your room’s lighting. If you have a bright space with lots of ambient light, opt for a screen with a higher gain, typically between 2.0 and 3.0, which amplifies brightness and enhances contrast. I once measured my living room’s light levels using a lux meter during the day; this helped me decide that a gain of 2.2 would boost image clarity without causing unwanted glare.
Next, understand how gain impacts viewing angles. Higher gain screens narrow the angle, making the picture appear bright and vivid only within a specific zone. To visualize this, think of a spotlight versus a floodlight—one concentrates illumination, the other disperses it widely. I experimented with a 2.5 gain screen in my demo room and noticed the edges turned dull when I sat at an angle, which reminded me to prioritize viewing comfort alongside brightness.
Select the Appropriate Projection Screen Material
Material choice directly influences image quality. For bright rooms, matte surfaces with specialized ALR coatings are essential—they reject ambient light while preserving color accuracy. I tried applying a reflective, glossy material expecting increased vibrancy but ended up with glare issues. Research shows that materials like “Spectra Ultra” or “SiIverStar” coatings offer excellent gain and light rejection. Cross-referencing these options via expert guides, helped me make an informed decision.
Determine Ideal Screen Size for Your Space
Size impacts immersion and clarity. Measure your viewing distance—ideally, the screen width should be about 1/1.5 of your distance for HD content. For example, sitting 10 feet away, my ideal screen width is approximately 6-7 feet. I used the size recommendation tools to finalize my choice. Remember, larger screens mean more detail but can overwhelm smaller rooms. Ensuring your projector’s lumen output can handle the size is crucial—check its contrast and brightness metrics to prevent dim, washed-out images.
Align Your Projector Settings with Screen Selection
Adjust your projector’s settings—gain, contrast, and color calibration—to complement your chosen screen. I calibrated mine using test patterns and a lux meter, matching projector output to the screen’s reflective properties. This step is vital; a mismatch can render a high-gain screen dull or overly bright. For technical guidance, I recommend reading detailed calibration tips.
By following these concrete steps—assessing your lighting, selecting the right gain, choosing suitable material, sizing your screen accurately, and calibrating your projector—you’ll create a home theater experience that looks stunning, even in challenging lighting conditions. This process may involve trial and error, but each adjustment brings you closer to cinematic perfection.
Many enthusiasts assume that selecting the highest gain or latest ALR material guarantees a spectacular image, but this oversimplification overlooks critical nuances. For example, everyone talks about aiming for ultra-high gain screens in bright rooms, yet in my experience, higher gain drastically narrows viewing angles and increases glare. A common myth is that increasing gain uniformly benefits image brightness, but in fact, it often sacrifices color fidelity and uniformity, especially when paired with subpar materials. To truly optimize, you need to consider how gain interacts with the screen’s surface and your room’s lighting conditions—a delicate balance that many overlook. For dedicated viewers seeking sharp images from wider angles, medium gain screens, around 1.8, often perform better than the extremes. Moreover, the choice of material profoundly influences how gain translates into image quality. For instance, a high-gain reflective surface might seem appealing but can introduce unwanted hotspots and glare unless backed with advanced ALR coatings designed for ambient light rejection. I recommend exploring expert insights such as those found in this comprehensive guide, which details how material and gain must be selected in tandem. Another trap is the misconception that bigger is always better. While larger screens offer immersion, selecting a massive surface without adequate projector luminance can result in dull, washed-out images. Use size calculators and check your projector’s lumens to avoid this pitfall. When it comes to projection screen technology, a nuanced understanding of the interaction between gain, material, and size can make the difference between a mediocre display and a true cinematic experience. Are you falling for any of these misconceptions? Let me know in the comments and share your experiences with screen choices.Maintaining your projection screen and related equipment over time is essential to preserve image quality and ensure longevity. One of my go-to tools for this purpose is a microfiber cleaning cloth, which I use daily to gently remove dust and fingerprints from the screen surface without scratching or damaging the coating. For more thorough cleaning, I prefer a specialized screen cleaning solution, like the one offered by Experts in Screen Maintenance, which is designed to not degrade ALR coatings or diminish gain properties. Applying such cleaners with a soft, lint-free cloth ensures a safe and effective cleaning process. Regularly inspecting the mounting hardware, such as brackets and tensioners, helps prevent sagging or misalignment that can compromise image sharpness and uniformity. I recommend setting a routine—every 3 to 6 months—to check these components and tighten any loose fittings. When it comes to protecting your investment, consider installing a dust cover or a clear acrylic shield over your screen during periods of disuse, especially if your room isn’t climate-controlled. This minimizes buildup of particulates and environmental contaminants. As technology advances, so do the tools for maintenance. Digital lux meters, for example, allow me to verify that projector luminance remains consistent over time, alerting me to lamp degradation or projector drift early before noticeable image quality loss occurs. Looking ahead, I predict that integrated sensor systems—like smart home monitors—will become more common, providing real-time feedback on screen cleanliness, ambient light levels, and equipment status, making upkeep even easier. How do I maintain my projection setup to keep it performing at its best? I always schedule at least annual calibrations using test patterns and calibration software such as Datacolor SpyderX, which helps me fine-tune projector color settings and contrast levels to match my screen’s properties. This meticulous approach ensures crisp images and vibrant colors even after prolonged use. If you want to elevate your maintenance game, I highly recommend investing in a quality calibration tool and establishing a regular cleaning routine. Doing so will extend the life of your projection surface and keep your home theater experience consistently stunning. For a deep dive into maintaining ALR screens specifically, check out this comprehensive guide on [understanding ALR screen technology](https://screens.cinegearguide.com/alr-screen-technology-top-screen-material-gain-tips-2024). Make this small investment in maintenance, and you’ll enjoy breathtaking visuals for years to come.
When I first started customizing my home theater, I underestimated how much the right screen gain and material choice could transform my viewing experience. Those early lessons taught me that every detail—from ambient light management to calibration—plays a crucial role in achieving cinematic perfection. Making informed decisions in these areas is what separates a good setup from an extraordinary one, and that’s a lesson I wish I had learned sooner.
What I Wish I Knew About Mixing Gain and Material Early On
- High gain isn’t a silver bullet: It might seem ideal for bright rooms, but it can narrow viewing angles and introduce glare. Striking a balance—like choosing a gain around 1.8 to 2.2—oftentimes yields the best results for versatile viewing.
- Material matters just as much as gain: The surface coating influences light rejection, color fidelity, and glare. Materials such as Spectra Ultra or SilverStar outperformed glossy options that caused unwanted reflections in my room.
- Size impacts immersion and clarity: Larger screens can elevate your experience but demand higher luminance and proper calibration. Using size calculators helped me avoid overwhelming my space or sacrificing image detail.
- Calibration is key: Fine-tuning your projector with test patterns and lux meters ensures your setup capitalizes on your screen’s capabilities, preventing dull or washed-out images despite the best hardware choices.
My Go-To Resources for Perfect Projection
- Understanding ALR Screen Gain: This guide deepened my grasp of how gain interacts with ambient light and material choice, guiding my selection process.
- Projection Screen Material Insights: I rely on this resource to compare coatings and select the surface that suits my lighting environment.
- Screen Size and Material Tips: This tool helped me determine the optimal screen dimensions for my room, balancing immersion with clarity.
- Best ALR Materials for 2024: Staying updated on the latest materials ensures my setup benefits from technological advances in light rejection.
Your Path to Cinematic Bliss Starts Today
Armed with this newfound understanding of screen gain, material selection, and setup calibration, you’re well on your way to transforming your home theater into a true cinematic sanctuary. Remember, perfection doesn’t happen overnight—it’s a journey of patience, experimentation, and continuous learning. Embrace the process, and soon you’ll enjoy vibrant, clear images that rival the big screen, no matter your room’s lighting conditions.
What is the most surprising thing you’ve learned about optimizing your home theater setup? Share your stories below and let’s grow together in this journey toward visual excellence!
!
Reading through this detailed post really resonated with me, especially the part about balancing gain and material choices. I used to think that a high-gain screen would automatically improve my viewing experience in the bright room I have, but I underestimated how much it would narrow the viewing angles and cause glare issues. After experimenting with a gain of around 1.8, I noticed a much more uniform image and less eye strain. It makes me wonder, how many newcomers overlook the importance of matching their projector’s lumen output when choosing a screen size? I’d love to hear other experiences about fine-tuning these variables. The science and practical tips here are invaluable for anyone aiming for that perfect home theater setup, especially in rooms with ambient light, where proper material and gain selection really make a difference.