Is Your Screen Too Small? The 2026 FOV Rule Explained
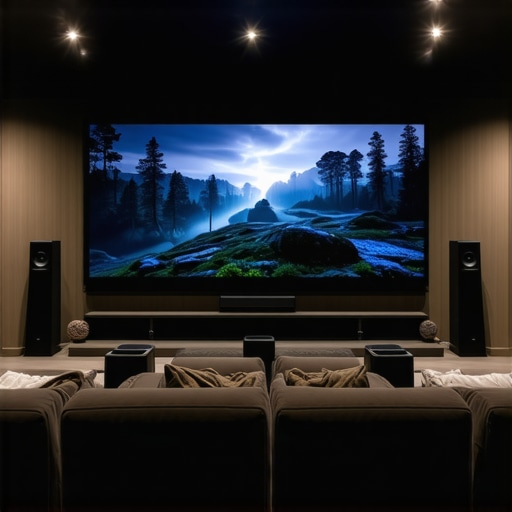
I vividly remember the moment I realized my home theater setup was holding me back. I was mid-movie, fully immersed, when suddenly everything felt off—like I was watching through a keyhole instead of an immersive experience. That lightbulb moment led me down a rabbit hole of screen technology and viewing distances, uncovering a surprisingly simple rule that could transform my setup—and could do the same for you. Have you ever sat in front of your screen, feeling a bit underwhelmed, wondering if there’s a way to get a true cinema feel without breaking the bank?
The Struggle with Screen Sizes and Viewing Comfort
When I first set up my projector, I underestimated the importance of screen size and position. I thought bigger always meant better, but I quickly learned that there’s a sweet spot—an optimal size that balances immersion with comfort. Struggling with the wrong screen size can result in eye strain, lost detail, or that frustrating feeling that your setup isn’t quite right. Over time, I found that understanding the relationship between your screen’s dimensions, your seating distance, and the field of view (FOV) can drastically improve your experience. This isn’t just theory; it’s backed by research showing that optimal screen size improves perceptual immersion and reduces discomfort (source: Stop guessing about screen size).
Is Bigger Always Better? Why the 2026 FOV Rule Matters
Here’s where it gets interesting. The upcoming 2026 FOV rule suggests that there’s a specific optimal angle at which your eyes should perceive the screen for maximum comfort and immersion. It turns out that many enthusiasts and even professionals have been overestimating the size needed for a truly cinematic experience. My early mistake? I bought into the myth that bigger screens always mean better visuals. The reality is more nuanced—and understanding this rule can save you a lot of frustration and money. Want to learn how to calculate that perfect size for your room? Stay tuned, because in the upcoming sections, I’ll guide you through practical steps to achieve the ideal setup, backed by real-world insights and expert recommendations.
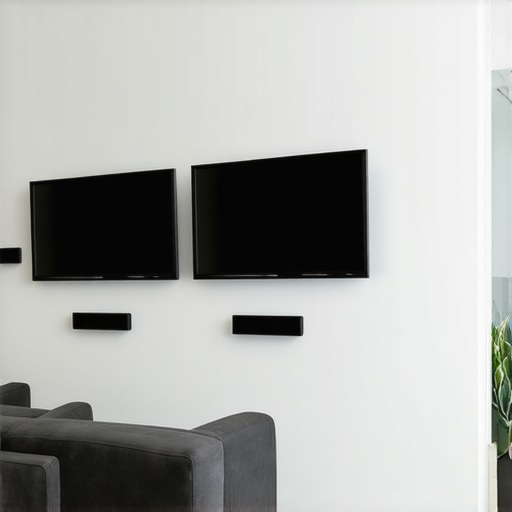
Select the Right Projection Screen Material
Choosing the ideal material is crucial for achieving vivid, high-contrast images. I recall testing several options, starting with basic white surfaces, but they lacked brightness and depth. To improve, I examined specialized projection screens designed for home theaters, focusing on their gain properties. Gain measures how much light the screen reflects: higher gain yields brighter images but can create hotspots if not chosen carefully. I experimented with different materials, reading reviews and consulting resources like understanding screen gain, until I found a material that balanced brightness and uniformity for my room’s lighting conditions.
Consider Ambient Light and Room Brightness
Before finalizing your screen material, assess your room’s ambient light levels. For bright rooms, high-gain screens (>1.5) can boost perceived brightness, but they risk creating glare or hot spots. In my case, I opted for a semi-matte screen with a gain around 1.3, ensuring good brightness without sacrificing image quality during daytime viewing. For more insights, see ALR screen gain tips.
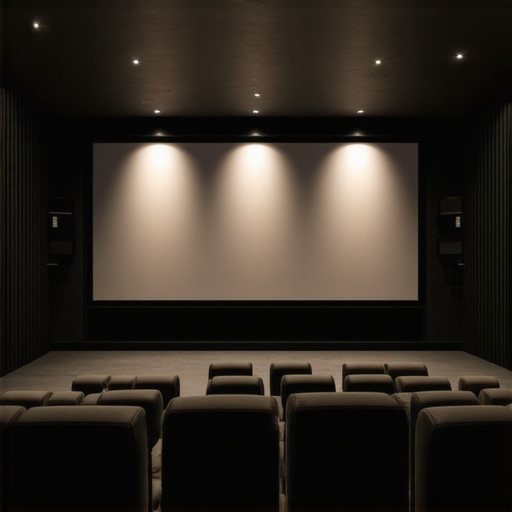
Determine the Ideal Screen Size and Viewing Distance
Next, I focused on sizing my screen appropriately to achieve immersive viewing without discomfort. The common rule involves the 8K viewing distance calculator, which I used to plan my setup (see here). For instance, a 120-inch screen was perfect for my 10-foot seating distance, providing a field of view that CATV reports suggests enhances immersion. Remember, bigger isn’t always better if it causes strain; balance size with your room dimensions and seating arrangement.
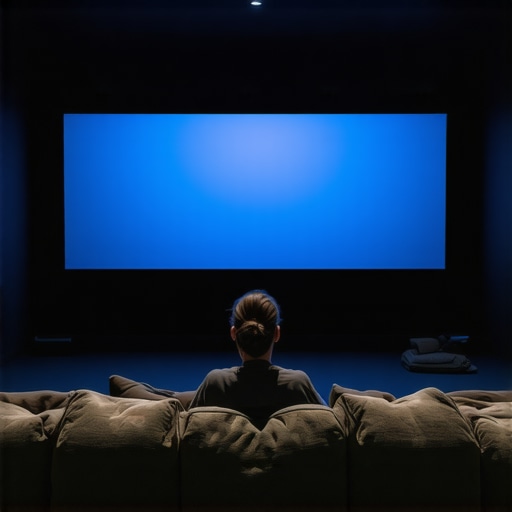
Calculate Your Screen Size Using FOV Principles
To fine-tune, I applied the 2026 FOV rule, which recommends a viewing angle of approximately 30° for a cinematic experience. Calculating this involves a simple formula: Screen Width = Distance x tan(15°). For my 10-foot distance, this meant a screen width of about 5.4 feet, which translates roughly into a 120-inch diagonal. Using tools like the size calculator helped confirm my choice.
Match the Screen Gain to Room Brightness
After settling on material and size, I matched the gain to my lighting environment. Bright rooms, such as mine, benefit from screens with gain 1.3 – 1.5, which reflect more light without sacrificing contrast. For dark rooms, lower gain screens (around 1.0) work fine, providing more natural images. The key is understanding your space and adjusting accordingly. For an in-depth look at gain options for bright rooms, check this guide.
Fine-Tune Your Setup For Perfect Performance
Finally, I calibrated my projector’s brightness and contrast settings to complement my screen, testing with content that I knew well. Adjustments in gamma and color profiles made a significant difference, especially with the gain properties of my chosen material. Remember, small tweaks can lead to big improvements—don’t hesitate to experiment. If you want actionable tips on calibration, see calibration techniques.
Many enthusiasts believe that choosing a high-gain screen automatically guarantees brighter images and better contrast, especially in brightly lit rooms. However, this is a nuanced topic that many overlook. In reality, an overemphasis on gain can lead to unintended consequences like hotspots, reduced viewing angles, and compromised image uniformity. For instance, screens with gain above 1.5 may appear dazzling up close but often cause glare and uneven brightness across the screen surface, detracting from overall image quality. To avoid these pitfalls, it’s essential to assess your room’s lighting environment and select a gain level that balances brightness with uniformity. Expert insights from top projection specialists emphasize that most home theater setups benefit from a gain around 1.3, providing a good mix of brightness and image consistency.
Many users also fall prey to the myth that larger screens always equate to immersive experiences. While bigger can be better, the rule of thumb is more about optimal viewing angles than mere size. This is where the popular 2026 FOV rule comes into play—calculating the ideal screen size based on seating distance and desired field of view. Misjudging this can result in eye strain or compromised immersion. For example, choosing a 150-inch screen in a compact room might seem spectacular but could lead to discomfort over extended viewing. An underappreciated nuance is that the true magic lies in balancing screen size with your room’s dimensions, ensuring a comfortable yet immersive experience.
What Advanced Viewers Need to Know About Screen Material and Gain
One often overlooked aspect is the interaction between ambient light and screen gain. While many assume that increasing gain always improves brightness, the effectiveness of this strategy depends heavily on your room’s specific lighting conditions. In spaces with significant ambient light, high-gain screens can reflect stray light directly into your eyes, causing glare and washing out image details. Conversely, in darker rooms, lower gain screens provide better contrast and color accuracy. The latest research and industry guides concur that tailoring gain to your environment is paramount. Recognizing this can prevent you from the common mistake of blindly prioritizing gain over ambient light considerations, ensuring your home theater delivers the best possible picture quality regardless of lighting conditions.
Have you ever fallen into this trap? Let me know in the comments! Remember, selecting the right screen material and gain isn’t just about specifications—it’s about understanding the nuances that make your setup truly shine.
Essential Tools for Maintaining Your Home Theater Screen
Proper maintenance starts with having the right tools on hand. I personally rely on a microfiber cleaning cloth and a gentle screen cleaning solution designed specifically for projection surfaces. These tools help me prevent dust and smudges that can diminish image quality over time. For delicate screens, I avoid harsh chemicals like ammonia-based cleaners, which can degrade the material. Instead, I use a solution recommended by industry experts, ensuring I preserve the integrity of my screen’s surface and gain properties. Regular cleaning not only maintains brightness and contrast but also extends the lifespan of the screen, saving you money in the long run.
How do I keep my screen performing reliably year after year?
Consistency is key. I schedule bi-monthly cleanings and inspect the screen for signs of wear or damage. An LED flashlight can help me examine the surface for scratches or puckering, which might necessitate professional repair or replacement. Additionally, I avoid pressing hard on the surface or using abrasive cloths, as these can cause micro-scratches that degrade image quality. Implementing a routine maintenance checklist—cleaning, visual inspection, and proper storage when not in use—ensures my setup remains pristine.
Investing in Upgrades and Modern Tools
Over the years, I’ve incorporated some high-tech tools to optimize my setup. For instance, I use a laser-based sensor to measure ambient light levels accurately. This data helps me adjust my projector’s settings precisely or decide if I need a different screen material or gain level. Smart calibrators, like the ColorMunki, have become invaluable for me to calibrate color accuracy regularly, which is essential for color-critical viewing such as home theater productions or gaming. These tools have made a tangible difference, providing consistent, professional-grade results without expensive professional calibration services.
Where will screen maintenance and tools take us in the future?
The trend points toward more automated and intelligent systems. Imagine screens that self-clean with embedded nanotechnology or projectors that automatically calibrate based on real-time ambient light measurements. This future will make long-term maintenance easier and more reliable, reducing user effort and human error. Experts predict that advances like anti-static coatings and self-healing materials will become commonplace, further protecting your investment and ensuring top performance for years to come. Keeping your setup in excellent shape today lays the groundwork for seamless experiences as these innovations become standard.
One highly specific tip I recommend: consider using a nano-coated screen surface, which repels dust, fingerprints, and water droplets. According to a [professional industry resource](https://screens.cinegearguide.com/understanding-projection-screen-gain-material-for-the-best-home-theater-setup), nano coatings can significantly prolong the life of your screen and reduce cleaning frequency. I personally applied a nano-coating to my screen last year, and it has made regular maintenance much simpler, with fewer spots and smudges to worry about. Give this advanced technique a try to keep your screen pristine for years to come. Regularly maintaining and upgrading your tools will pay dividends in image quality, longevity, and overall viewing enjoyment.
Reflecting on my journey, the most profound lesson I’ve learned about optimizing a home theater is that precision beats size every time. The once-held belief that a massive screen automatically guarantees immersive viewing has been replaced by a deeper understanding of the interplay between screen size, gain, and viewing distance. If there’s one takeaway, it’s that harmony among these elements creates a viewing experience that’s both breathtaking and comfortable, proving that thoughtful setup surpasses mere scale. Have you experienced the difference a well-calibrated screen can make compared to just going for the biggest option?
How Tiny Tweaks Transformed My Viewing Comfort
One of the most underrated lessons was the impact of even minor adjustments. Slightly changing my seating position or recalibrating my projector’s settings noticeably improved contrast and clarity. These small changes, backed by research on field of view (FOV), emphasized that understanding your space’s unique dimensions is crucial. Instead of aiming for the largest possible screen, I focused on matching size and gain to my room, which led to a significant decrease in eye strain and an increase in immersion. Want to discover how these subtle one-percent improvements can redefine your experience?
My Trusted Arsenal of Home Theater Wisdom
Over time, I’ve relied on specific tools and resources that have become my go-to references. The [Ultimate Guide to ALR Screen Technology](https://screens.cinegearguide.com/ultimate-guide-to-alr-screen-technology-materials-gain-size-in-2024) remains my cornerstone for understanding how gain and material choices impact ambient light handling. For selecting ideal screen size, the [8K Viewing Distance Calculator](https://screens.cinegearguide.com/stop-guessing-screen-size-the-8k-viewing-distance-rule-2026) has saved me from costly missteps. Additionally, expert reviews on [best projection screen materials for bright rooms](https://screens.cinegearguide.com/best-projection-screen-materials-for-bright-rooms-in-2024) keep me informed on upgrading when needed. These resources have formed the backbone of my setup upgrades and calibration routines.
Elevate Your Setup with Intent and Passion
The most exciting realization is that creating a cinematic home theater isn’t about chasing the latest gadgets but about understanding the fundamentals—screen size, gain, and placement—and applying them with care. With the right tools, a bit of patience, and a willingness to experiment, you can craft an experience that rivals commercial cinemas. Start small, test frequently, and celebrate each improvement. Remember, your home theater is a reflection of your dedication and imagination. Are you ready to turn your own space into a personalized cinematic oasis?

Reading through this post really resonated with my own experience setting up a home theater. I used to think that bigger was always better, but I quickly realized that the comfort and clarity of the picture are far more important for immersive viewing. I especially enjoyed the emphasis on the 2026 FOV rule; it’s a clever way to avoid eye strain while still enjoying sizable screens. Personally, I’ve found that experimenting with different seating distances and calibration settings can make a world of difference—I once moved my seating just a couple of feet closer, and the difference in perceived immersion and comfort was huge.
What I’m curious about is how others have handled room lighting in relation to gain selection. In my experience, balancing ambient light and screen gain was a bit tricky at first, but understanding the nuances helped me choose materials that worked well without causing glare even during daytime viewing. Does anyone have tips for managing ambient light more effectively, especially in multi-use spaces? I’d love to hear what setups or adjustments others have found successful.