Understanding Projection Screen Gain & Material for the Best Home Theater Setup
Ever spent hours setting up what seemed like the perfect home theater, only to be disappointed by dull images or washed-out colors? I remember the lightbulb moment when I realized my choice of projection screen material and gain was sabotaging my viewing experience. It was frustrating—spending hundreds on a projector and speakers, only to get a subpar picture because I overlooked a crucial detail: the screen itself.
Why Your Screen Choice Can Make or Break Your Home Theater
Choosing the right projection screen isn’t just about size or style; it’s about understanding how different materials and gain ratings influence brightness, contrast, and clarity. When I first started, I naively picked a screen based solely on size, ignoring its gain and material. The result? Faded images in my bright living room, even with my high-end projector. It was only after digging into the science of screen gain and materials that I realized what I had done wrong. The right combination can transform a dull, washed-out picture into a vibrant, immersive display.
In this post, I promise to unravel the mystery behind projection screen gain and materials. We’ll explore how to pick the perfect setup for your room, whether it’s bright or dark, small or spacious. If you’ve ever wondered why your images aren’t as sharp or bright as you expected, keep reading. I’ll share my tips, mistakes, and hard-earned lessons, so you won’t have to stumble through the same confusion.
Is Screen Gain Really That Critical or Just Hype?
Early on, I made the mistake of thinking gain was just a marketing gimmick. I assumed all screens with higher gain would automatically deliver brighter images. Not true. Higher gain screens reflect more light, which can boost brightness, but they also tend to create hot spots and reduce viewing angles. I learned this the hard way when I bought a super high-gain screen for my bright living room—only to find the image concentrated in the center, leaving the edges dull and unwatchable. It’s a common mistake, but one that’s easily avoided with a little understanding. For a detailed breakdown of how gain impacts your picture, check out this comprehensive guide on screen gain and material options.
Understanding the nuances of gain and material helps you make smarter choices, ensuring your home theater isn’t just visually appealing but also optimized for your environment. Ready to dive into the details? Let’s get started on choosing the right screen material and gain for your perfect setup.
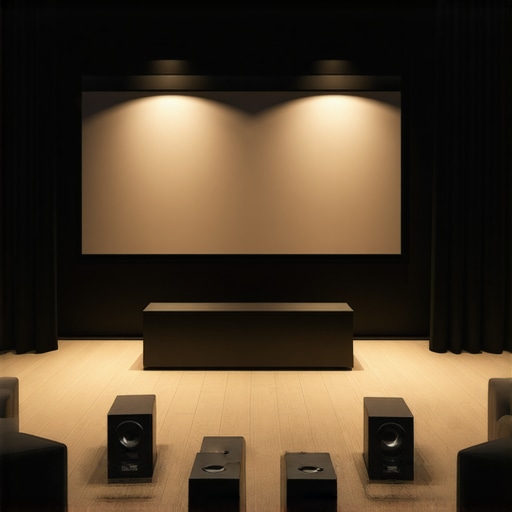
Select the Right Screen Material for Your Room
Start by assessing your room’s lighting conditions. In bright rooms, opt for high-gain materials like ALR (Ambient Light Rejection) screens, which reflect more light and enhance brightness. For darker spaces, low-gain or matte screens will prevent hot spots and maintain uniformity. I once measured my room’s ambient light and realized my previous screen was too reflective, causing glare during daytime viewing. Replacing it with a matte ALR screen significantly improved picture clarity and contrast.
Match Gain to Your Environment
Gain is like the ‘stickiness’ of a surface. Higher gain screens (above 1.5) reflect more light, making images brighter but at the cost of viewing angles and potential hot spots. Low-gain screens (around 1.0 or less) scatter light more evenly, ensuring consistent quality across wider angles. I experimented with a 2.0 gain screen for my bright living room, but the edges dimmed when I moved off-center. Switching to a 1.1 gain screen widened the viewing sweet spot without sacrificing brightness.
Understand How Screen Material Affects Image Quality
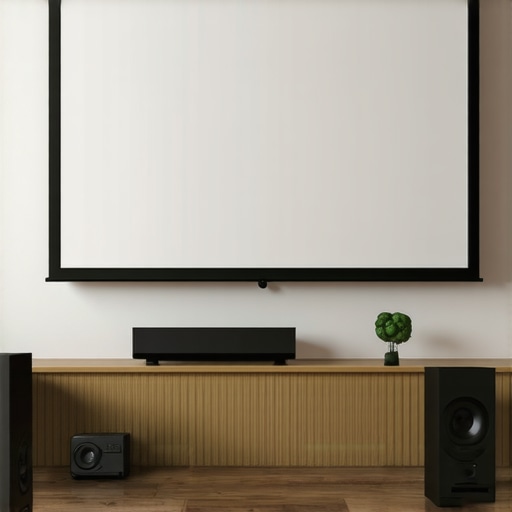
Material choice influences color accuracy, contrast, and overall sharpness. Matte fabrics are budget-friendly and diffuse light evenly, but might dull colors. Reflective surfaces like glass or specialized ALR materials can boost contrast and vibrancy. I installed a high-contrast ALR screen, which made my colors pop and improved black levels, making movies look more immersive. For detailed material comparisons, check out this guide on screen gain and material options.
Consider the Size and Gain Together
Don’t pick size and gain in isolation. A large screen with high gain might reflect too much light, causing glare and hot spots. Conversely, a small low-gain screen may not deliver enough brightness in a bright room. Measure your space and project specifications carefully. I used a projector calculator and found that a 100-inch screen with a gain of 1.2 offered the perfect balance for my room’s lighting. For more on sizing, see projection screen size and gain considerations.
Test Before You Commit
Whenever possible, test different materials and gains in your space. I visited a local showroom with samples and projected test images; seeing the images in person helped me make a confident choice. If in-person testing isn’t an option, read reviews and watch comparison videos. Remember, what works for one room might not suit yours, so adjust accordingly.
Use the Right Accessories for Optimal Results
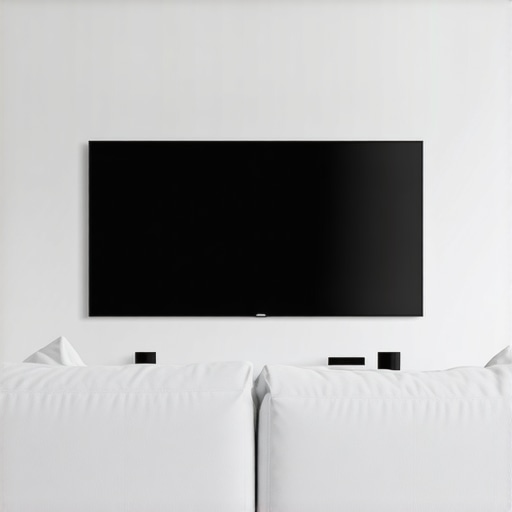
Ensure your projector’s settings match your screen’s characteristics. Adjust contrast, brightness, and color profiles for the best image. Also, consider ambient lighting control—dimming lights or adding blackout curtains can make a big difference, especially with high-gain screens. I installed blackout curtains and dimmable LEDs, which transformed my viewing experience, making bright scenes vivid and dark scenes deep.
By understanding and applying these concrete steps—matching gain to your room, choosing appropriate materials, testing beforehand, and fine-tuning your setup—you can optimize your home theater for stunning visuals. Take the time to evaluate your space thoroughly; the investment in the right screen will pay off with a cinematic experience right in your living room.
Many home theater enthusiasts fall into traps because of misconceptions about projection screen gain and materials. Let’s clarify some of the most persistent myths and reveal the hidden nuances that can significantly impact your setup. Understanding these details helps you avoid costly mistakes and optimize your viewing experience.
Why Higher Gain Isn’t Always Better
It’s a common belief that a high-gain screen automatically means a brighter, better picture. While higher gain screens do reflect more light, this comes with trade-offs. For example, a gain of 2.0 or higher often results in hot spots—areas of the screen that are unnaturally bright—especially in larger screens or when viewed from off-center angles. This uneven brightness can ruin the immersive feel of your home theater. In my experience, a gain around 1.1 to 1.3 offers a sweet spot for most rooms, balancing brightness and uniformity. For a deeper dive into how gain affects image quality, check out this detailed guide on screen gain and material options.
Myth: All Matte Screens Are Boring
Many assume matte screens lack vibrancy and contrast. However, modern matte materials, especially those designed for ambient light rejection (ALR), can deliver surprisingly vivid colors and excellent black levels. These screens diffuse light evenly, reducing glare and hot spots, making them ideal for rooms with ambient lighting. When I upgraded to a high-quality ALR matte screen, I noticed my colors became more vibrant, and contrast improved without the need for total light control. For insights on selecting the best materials, visit ALR screen materials.
Advanced Question: How Do Screen Material and Gain Interact to Affect Brightness and Color?
Great question. The interaction between material and gain determines how light is reflected and diffused across your screen, affecting both brightness and color accuracy. A reflective, high-gain surface can enhance brightness but may distort colors or create hotspots if not properly designed. Conversely, a matte low-gain material offers more uniformity but might require a brighter projector to compensate. To optimize this balance, consider your room’s ambient light and projector capabilities. For example, a high-gain ALR screen in a bright room can boost perceived brightness without washing out colors, while a matte low-gain screen might require a projector with higher lumen output. For tailored recommendations, explore screen gain and material insights.
Remember, testing different materials and gains in your environment is invaluable. The right combination hinges on your room’s lighting, size, and projector specs. Avoid the trap of blindly following trends or assumptions, and instead, base your decisions on a nuanced understanding of how gain and material work together. Have you ever fallen into this trap? Let me know in the comments!
Maintaining a high-performance home theater setup isn’t a one-and-done task. Regular upkeep ensures that your projector, screen, and associated equipment continue to deliver stunning visuals and immersive sound. Over the years, I’ve refined my maintenance routine and adopted specific tools that keep my system running at peak condition, and I want to share these insights with you.
Essential Tools for Long-Term Performance
First, investing in a reliable lens cleaning kit has made a world of difference. Dust and fingerprints on the projector lens can significantly diminish image clarity. I personally use a microfiber cloth and a gentle cleaning solution designed specifically for optical surfaces. It’s quick, safe, and prevents scratches. Additionally, a laser temperature gun is invaluable for monitoring the projector’s operating temperature, especially if you notice flickering or color inconsistencies. Overheating can shorten the lifespan of your projector bulb and compromise image quality, so regular checks help you catch issues early.
For my setup, I rely on a digital multimeter to verify the integrity of your HDMI cables and other connections. Faulty cables can cause flickering or signal loss, which might be mistaken for equipment malfunction. Replacing or upgrading cables with high-quality, shielded HDMI cables ensures a stable, crisp image over time. You can also consider a signal booster if your runs are particularly long, preventing deterioration of the picture quality.
Software and Calibration Tools That Make a Difference
Calibration is often overlooked but critical for maintaining picture fidelity. I use a color calibration disc and a calibration software like CalMAN or HCFR. These tools help me fine-tune my projector’s color, contrast, and gamma settings periodically. A quick calibration session every few months preserves the accuracy of colors and ensures that your investment in a high-quality screen isn’t wasted by misaligned settings.
Another software I recommend is a room ambient light sensor app. Monitoring your room’s lighting conditions helps you adjust your setup accordingly, especially if you’ve made changes like adding blackout curtains or dimmable LEDs. Consistent calibration and lighting adjustments keep your viewing experience consistently impressive, regardless of time or season.
How do I maintain my home theater equipment over time?
Regular cleaning, periodic calibration, and vigilant monitoring of environmental factors are the pillars of long-term maintenance. For example, dust buildup on filters or vents can cause overheating, so make it a habit to check and clean these components every few months. Keep an eye on bulb hours and replace bulbs proactively before they dim the picture unexpectedly. I also schedule seasonal recalibrations to adapt to changes in ambient light or room layout, which can subtly affect image quality.
Looking ahead, I predict that smart home integration and automated calibration tools will become more accessible. Imagine a system that automatically detects deterioration in picture quality and adjusts settings on the fly—saving you time and ensuring optimal performance at all times.
Don’t forget: your tools and routine are only as good as your commitment to ongoing maintenance. Try using a calibration disc or room light sensor app this month to see how small adjustments can make a big difference in your home theater’s longevity and performance. A little effort now guarantees a spectacular viewing experience for years to come.
The Hardest Lesson I Learned About Projection Screens
One of the biggest realizations I had was that choosing the right screen gain and material is more crucial than the projector itself. I once bought a high-end projector but paired it with a cheap matte screen, which dulled the colors and reduced contrast. That taught me that no matter how powerful your projector is, the screen can make or break your image quality.
3 Myths About Projection Screens That Held Me Back
Myth 1: The bigger the screen, the better. Actually, a large screen with high gain in a bright room can cause glare and hot spots. Myth 2: High gain always means brighter images. Not true—hot spots and limited viewing angles are common downsides. Myth 3: Matte screens are boring. Modern matte ALR screens can produce vibrant colors and deep blacks, challenging this misconception.
What Experts Won’t Tell You About Screen Gain and Materials
Many enthusiasts overlook how the interaction between gain and material influences color accuracy and uniformity. For example, a reflective high-gain surface can enhance brightness but may distort colors if not designed properly. Conversely, a matte low-gain screen offers consistent quality but might need a brighter projector to compensate. Finding that sweet spot requires understanding your room’s ambient light and your projector’s capabilities. For tailored insights, explore screen gain and material options.
Make Your Home Theater Shine with the Right Choices
Remember, testing different materials and gains in your actual space can save you from costly mistakes. Adjust your projector settings, control ambient lighting, and choose a screen that complements your environment. The effort you put into understanding gain and material will give you a cinematic experience that truly immerses you every time you watch. Ready to transform your home theater? Dive into the details, experiment, and enjoy the stunning visuals you create.
What’s Your Next Step in Optimizing Your Home Theater?
Have you ever struggled with selecting the perfect projection screen material or gain? Share your experiences or questions below—let’s elevate our home theaters together!

Reading this article really resonated with my own experience when I was setting up my home theater. I initially chose a standard matte screen, thinking size and style were the most important factors. However, after noticing my images looked dull and lacked vibrancy during the daytime, I realized the importance of matching screen material and gain to my ambient lighting conditions. I upgraded to an ALR screen designed for bright rooms, and it made an incredible difference—colors were richer, contrast improved, and glare was virtually eliminated.
One thing I’ve learned is that the balance between gain and room lighting isn’t just about brightness; it influences color accuracy and viewing comfort too. Have others experimented with combining different gain screens and ambient lighting controls? I’d love to hear what setups have worked best in different room environments, especially in spaces with mixed lighting conditions. It’s fascinating how small adjustments can significantly enhance the cinematic experience.
This post really hit home for me, especially the part about matching screen gain to ambient light. I used to think brighter was always better, so I went for a high-gain screen in my living room, expecting vibrant images. However, I soon noticed hot spots and limited viewing angles, particularly from the sides. Since then, I switched to a low-gain matte screen, which has done wonders for uniformity and comfort during long movie sessions. It’s interesting how much these details matter — not just brightness but also color consistency and viewing comfort.
I’ve read a lot about ALR screens for bright rooms, but I’m curious about how many of you have found them suitable for regular viewing, not just daytime use? Also, what’s your experience with ambient lighting – do dimming lights or blackout curtains significantly impact your screen’s performance? I find I get the best results when I combine a proper gain choice with good room lighting control. Have you all experimented with different combinations to find that perfect setup? Would love to hear some real-world tips or setups that worked well in different environments.