
Understanding Projection Screen Gain & Material for Optimal Home Theater Setup
I remember the exact moment I realized I’d been doing it all wrong. I had spent hours researching projectors, mounts, and screen sizes, only to be disappointed by a dull, washed-out image that just didn’t pop. Turns out, the secret wasn’t just in the projector or the size of the screen—it was in the material and gain of the screen itself. That lightbulb moment changed everything for my home theater setup, and I want to save you some frustration.
Why Choosing the Right Screen Material and Gain Matters
Choosing the perfect projection screen isn’t just about size or style; it’s about how well your screen interacts with light. Gain refers to how much light the screen reflects back to your eyes. A higher gain means brighter images, which is crucial if your room isn’t perfectly dark. But, beware—too high a gain can cause glare and hot spots, ruining the viewing experience. Conversely, a lower gain might mean dimmer images, especially in bright rooms. Balancing gain with your room’s lighting conditions is key to achieving that stunning picture quality you crave. I learned this the hard way early on, making the mistake of assuming bigger was always better, which led to a washed-out picture in my bright living room. For a comprehensive look at how gain impacts your setup, check out this guide on understanding projection screen gain.
Have You Faced This Problem Before?
If you’ve ever set up a projector only to be disappointed by poor image quality, you’re not alone. Many enthusiasts overlook the importance of screen material and gain, focusing instead on the projector specs. Trust me, it’s a mistake that can cost you hours of tweaking and frustration. But don’t worry—I’ll show you how to get it right.
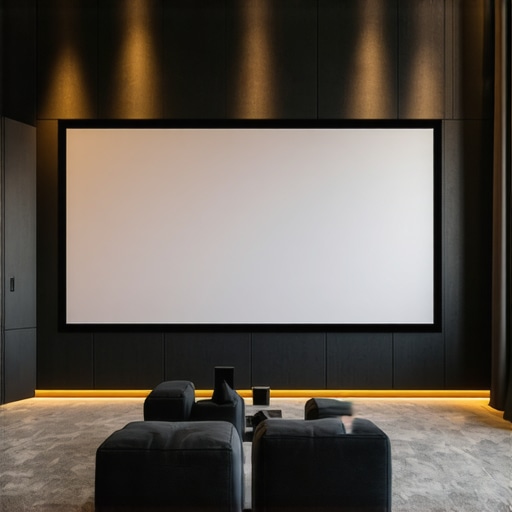
Picking the Right Gain and Material for Your Room
Before jumping into the technical details, consider your room’s lighting. Bright rooms demand screens with higher gain, often around 1.8 to 2.2, to reflect enough light and produce a vibrant picture. Darker rooms can get away with lower gain screens, around 1.0 to 1.3, which reduce glare and provide more natural colors. The material also plays a role—some screens are designed specifically for high gain, like ALR (Ambient Light Rejection) screens, which are perfect for rooms with ambient light. For a deep dive into the best options for bright rooms and how gain impacts your picture, visit top ALR screens for bright rooms.
In my experience, selecting the right material and gain is the foundation of a successful home theater. It’s worth investing time to understand these factors, rather than just picking the biggest or cheapest screen. I recommend reading the detailed guides available at complete guide to gain and material options to make an informed decision.
Now that I’ve shared my story and the importance of gain and material, let’s get into how you can choose the perfect setup for your space. Trust me, once you get this right, every movie night will feel like a trip to the theater—only better.
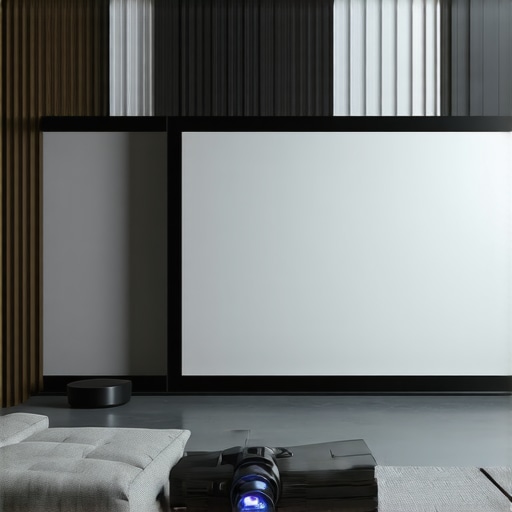
Choose the Right Screen Material for Your Room
Start by assessing your room’s lighting conditions. For bright spaces with lots of ambient light, opt for high-gain screens around 1.8 to 2.2. These screens reflect more light, making images brighter and more vivid. I once set up a high-gain screen in my sunlit living room, and the difference was night and day compared to my previous low-gain setup. For darker rooms, low-gain screens (around 1.0 to 1.3) work best, reducing glare and delivering more natural colors. Learn more about the best options for bright and dark rooms at top ALR screens for bright rooms.
Match Material Type to Your Environment
Not all screens are created equal. Some materials are designed specifically for ambient light rejection (ALR), which helps combat glare in bright rooms. For instance, matte white screens are versatile but may struggle with ambient light, whereas specialized ALR materials can significantly improve contrast and color vibrancy. I experimented with different materials, starting with a basic matte white, then switching to an ALR screen. The improvement in clarity was remarkable, especially when watching during the daytime. For detailed comparisons of materials and gain, visit the complete guide to gain and material options.
Set Gain to Match Your Projector’s Brightness
Calculate your projector’s lumen output and room lighting to choose an appropriate gain. For example, if your projector outputs 2000 lumens and your room is brightly lit, a gain of 1.8-2.2 will help preserve brightness. Conversely, in a dark room with a 1500-lumen projector, a lower gain around 1.0-1.3 will produce more natural images. I once used a high-gain screen with a projector that wasn’t quite bright enough, causing some hot spots—so I lowered the gain slightly, which smoothed out the picture. Dive deeper into this process at explained guides on choosing the right gain.
Test and Fine-Tune Your Setup
Once you’ve selected a screen material and gain, set up your projector and screen in your space. Play a test pattern or your favorite movie scene to evaluate brightness, contrast, and glare. Adjust the projector’s throw distance, keystone, and zoom to optimize the image. If you notice hot spots or glare, consider lowering the gain or repositioning the projector slightly. I recall spending hours tweaking my setup, but the moment I found the perfect balance, the image was stunning. Remember, small adjustments can make a big difference—don’t be afraid to experiment. For more tips on fine-tuning your setup, see this detailed guide.
Use Visual Aids to Confirm Your Choice
Including an illustrative image can help you visualize the difference gain and material make. A side-by-side comparison of a low-gain matte screen versus a high-gain ALR screen can clarify how each performs in different lighting conditions. Consider an image showing a projector’s light distribution on various materials, highlighting hot spots and glare areas. 
While it might seem straightforward—just pick a screen material and gain that matches your room—you’d be surprised how many enthusiasts fall into common traps that undermine their home theater experience. Let’s dig deeper into some nuances that often get overlooked and can cause costly mistakes or subpar viewing quality.
Why Relying Solely on Popular Myths Can Hurt Your Setup
One widespread misconception is that higher gain screens always equate to better brightness and clarity. In reality, many assume that a gain of 2.0 will deliver cinema-quality images in any setting. However, this overlooks the fact that such high-gain screens tend to create hot spots and glare, especially if your projector isn’t extremely bright or if your room isn’t perfectly controlled for ambient light. This is a classic mistake—believing that more gain equals better performance without considering the room’s lighting and projector lumen output. For a nuanced understanding of gain’s impact, check out this expert guide.
Beware the Trap of Ignoring Material Properties
Many assume all projection screens are essentially the same, just with different sizes. But the material’s optical properties—such as reflectivity, texture, and ambient light rejection capabilities—play vital roles. For example, matte white screens are versatile but may struggle with ambient light, causing washed-out images. Conversely, specialized ALR materials are designed to combat ambient light but can introduce color shifts or reduce contrast if not chosen carefully. Overlooking these nuances can lead to a mismatch that severely degrades image quality. I’ve seen setups where enthusiasts bought popular screens without understanding the material’s true capabilities, ending up disappointed during daytime viewing. Dive into the detailed comparison of materials to avoid this mistake.
Advanced Mistake: Overlooking the Impact of Screen Size and Throw Distance
Many think that once they pick the right material and gain, the size is just a matter of preference. But the truth is, the screen size and projector throw distance must be precisely calibrated to prevent distortions, hot spots, or loss of sharpness. For instance, a large screen with a short throw projector might produce uneven brightness or pixelation if not properly configured. Ignoring this can lead to an inconsistent viewing experience, especially in rooms with irregular dimensions. For insights into optimal sizing and placement, I recommend reviewing this comprehensive guide.
Have You Ever Fallen Into This Trap? Let Me Know in the Comments
Understanding these hidden nuances can save you from expensive mistakes and help you achieve a truly cinematic experience at home. Remember, the devil is in the details—so don’t settle for surface-level choices. Instead, evaluate your room’s lighting, projectors’ specs, and the materials’ optical properties carefully. If you want to explore these topics further, check out this ultimate guide. Happy viewing!
Investing in the Right Tools to Maintain Your Projection Screen
Maintaining a high-quality projection screen over time requires the right set of tools and a bit of know-how. One of my go-to items is a microfiber cloth, which I use regularly to gently remove dust and fingerprints without scratching the surface. Unlike generic cloths, a high-quality microfiber specifically designed for electronics ensures no abrasive particles scratch the delicate surface. I also keep a can of compressed air handy, which helps blow out dust from hard-to-reach areas or along the edges, preventing buildup that can affect image quality.
For deeper cleaning, I prefer a specialized screen-cleaning solution that’s alcohol-free and pH-neutral. I’ve tested many over the years, but I recommend sticking with brands that are designed explicitly for projection screens or delicate surfaces. Applying the cleaner with a soft, lint-free cloth allows me to keep the material pristine without compromising its optical properties. Regular cleaning not only preserves the clarity but also prolongs the lifespan of the screen material, ensuring consistent performance for years to come.
Why Using Proper Calibration Tools Matters
Once your screen is clean, the next step is calibration. I personally rely on a colorimeter like the X-Rite i1Display Pro, which I’ve found invaluable for accurately measuring brightness, contrast, and color accuracy. These tools help me fine-tune my projector’s settings to match the specific gain and material of my screen, ensuring the best possible image quality. Calibration isn’t a one-time task; I recommend redoing it every few months or whenever you notice a shift in picture quality. The investment in a good calibration device pays off by maintaining the vibrancy and contrast of your images, making every viewing session feel fresh and immersive.
Long-term Strategies for Consistent Results
Beyond tools, establishing a routine is key. I schedule a quick check-up of my setup every six months. During this time, I clean the screen, recalibrate the projector, and inspect for any signs of wear or damage. Implementing simple habits like using a projector cover when not in use and keeping the room free of dust can significantly extend the life of your equipment. Additionally, I keep a log of calibration settings and cleaning dates, which helps me track performance trends and catch issues early before they affect picture quality.
Scaling Up and Future Trends in Maintenance
As home theater setups become more sophisticated, the demand for smart maintenance solutions will grow. Future innovations might include automated calibration systems that use AI to optimize image settings in real-time, or self-cleaning screen coatings that repel dust and fingerprints. For now, sticking with proven manual tools and routines remains the best approach. I encourage you to try integrating a dedicated calibration device like the X-Rite i1Display Pro into your routine—it’s a game-changer for maintaining picture perfection.
How do I maintain my projection screen over time?
Consistent cleaning with microfiber cloths, gentle cleaning solutions, annual calibration, and regular visual inspections are the cornerstone practices. Investing in quality tools ensures your setup stays at peak performance, providing a cinematic experience every time you press play. As technology advances, I predict more user-friendly, automated maintenance systems will become available, making it even easier to keep your home theater in top shape. For detailed insights into choosing the best calibration tools, visit this guide on calibration tools. Don’t hesitate—start implementing these strategies today and enjoy flawless picture quality for years to come!
The Hardest Lesson I Learned About Projection Screens
One of my biggest surprises was realizing that choosing the right screen material and gain can make or break your home theater experience. I initially believed that bigger screens and brighter projectors alone could deliver cinema-quality images, but I was sorely mistaken. The subtle differences in screen material and the gain’s impact on light reflection changed everything, teaching me that the devil is in the details.
3 Myths About Projection Screen Setup That Held Me Back
First, I thought all high-gain screens would give me brighter images without downsides. Turns out, when gain exceeds 1.8, glare and hot spots become a real problem, especially with less-than-super-bright projectors. Second, I believed matte white screens were always the best choice, but in rooms with ambient light, ALR screens proved to be a game-changer. Lastly, I assumed size was the primary factor; in reality, size must be balanced with throw distance and room dimensions for optimal results.
What Experts Won’t Tell You About Gain and Material
Many overlook how the optical properties of different materials affect contrast and color accuracy. For example, specialized ALR screens are excellent in bright rooms, but choosing the wrong material can lead to color shifting or reduced contrast. The key is aligning your projector’s lumen output with the gain and material type—something I only fully grasped after extensive research and experimentation. For detailed insights, I recommend exploring this expert guide.
Curated Recommendations for a Perfect Setup
My Essential Toolkit for Optimized Projection includes a high-quality microfiber cloth for dust removal—trust me, cheap cloths can scratch delicate surfaces. I also swear by a colorimeter like the X-Rite i1Display Pro for precise calibration, ensuring my images stay vivid and accurate. For cleaning solutions, I use alcohol-free, pH-neutral sprays designed specifically for projection screens, which preserve the material’s optical qualities over time. These tools have consistently helped me maintain top-tier picture quality.
Your Turn to Try the Difference
Now that you know the importance of matching screen gain and material to your room and projector, it’s time to put these lessons into action. Experiment with different gain levels and materials, and don’t be afraid to fine-tune your setup for the best results. Your home theater experience can be transformed from good to spectacular—so start today and enjoy every movie night like never before. What’s been your biggest challenge with projection screens? Share below—I’d love to hear your story!

Reading this post really struck a chord with me. I used to think that having a brighter projector meant I didn’t need to worry much about the screen material or gain, but I learned the hard way that the screen’s properties play just as critical a role. I remember setting up a high-gain ALR screen in my living room, which had a lot of ambient light, and while the brightness increased, I also experienced glare and uneven brightness spots. It took some fine-tuning and experimenting with different screen materials to get the image just right. This post highlights the importance of balancing gain with room lighting, which is something I wish I had grasped earlier. Have others found that switching to ambient light rejection screens in similar bright environments significantly improved their viewing experience? It seems like understanding these nuances can save a lot of frustration and improve overall satisfaction.
This post really hits home for me. After spending so much money on a high-end projector, I was disappointed with the picture quality in my bright living room. It wasn’t until I realized how crucial the screen material and gain were that I finally got it right. I switched to an Ambient Light Rejection (ALR) screen with a higher gain of around 2.0, and the difference was night and day, especially during daytime viewing. I also learned that balancing projector brightness with screen gain is essential—I have a 2500-lumen projector, so I needed a screen that could reflect enough light without causing glare.
It made me wonder, how do others decide on the ideal gain for their specific projector lumen output? Do you find it better to go slightly higher in gain and then adjust projector settings accordingly? Doing this fine-tuning really elevated my home theater experience, making every movie night feel like a real theater. I’d be interested to hear more about how others approach balancing projector brightness with screen gain—any tips or lessons learned?
This post really resonates with me because I’ve gone through a similar journey with setting up my home theater. I used to focus solely on getting the brightest projector I could afford, thinking that was the key to a cinematic experience. It wasn’t until I started paying attention to my screen’s gain and material that I truly saw an improvement. I initially chose a cheap, high-gain screen for my bright living room, expecting it to fix everything, but the glare and hot spots made it worse. It was only after swapping to an ALR screen designed for ambient light that my picture quality significantly improved without sacrificing brightness.
Have others experienced similar frustrations when trying to balance projector output with screen characteristics? I found that adjusting both the gain and brightness settings together is crucial, but I’d love to hear any tips on fine-tuning for different room conditions. Is there a general rule of thumb for matching projector lumens with screen gain levels, or is it mostly trial and error? It seems like investing in the right screen material has saved me hours of tweaking and finally brought my movie nights to another level.
I totally relate to this journey of understanding how critical the screen material and gain are for a home theater setup. It’s interesting how many enthusiasts focus primarily on projector specs, forgetting that the screen’s optical properties can make or break the entire experience. When I switched to an ALR screen with a suitable gain for my living room’s lighting, the improvement in picture clarity and contrast was remarkable, especially during daytime viewing. The key for me was really balancing projector lumen output with screen gain, as you mentioned. I’ve found that slight adjustments in projector settings combined with the right gain can eliminate hot spots and glare issues.
It makes me wonder, for those with large rooms or spaces with variable lighting, what’s your go-to strategy for testing and fine-tuning gain and material? Do you rely more on visual tests or calibration tools? I’d love to hear different approaches—maybe there are some tricks I haven’t tried yet that could bring my setup even closer to perfect.