Best ALR Screen & Gain Tips for Bright Rooms in 2024
Ever set up a home theater in a bright room, only to be disappointed by washed-out images and dull colors? I’ve been there. The moment I realized that my expensive projector wasn’t living up to its potential in my sunlit living room was a lightbulb moment. It’s frustrating to invest in a projector and screen only to find that glare and ambient light ruin the experience. If you’ve faced similar struggles, you’re not alone. But here’s the good news: with the right ALR (Ambient Light Rejection) screen and some gain tips, you can enjoy a vibrant, clear picture even in bright environments. Today, I’ll walk you through the essentials to transform your viewing space into a true home theater, regardless of how much sunlight pours in.
Why Bright Rooms Need Special Screen Solutions
Most standard screens just can’t handle ambient light well. They reflect too much, making the picture look washed out and lifeless. That’s where ALR screens come in. These screens are designed specifically to reject ambient light and boost contrast, making your images pop even during the day. But not all ALR screens are created equal, especially when it comes to gain—how much light they reflect. Choosing the right gain is crucial. A higher gain (like 1.8 or 2.0) can help bounce more light back to your eyes, creating a brighter image. However, too high a gain can cause hot-spotting—bright spots in the image—and limit viewing angles. I learned this the hard way early on, by selecting a high-gain screen without considering my room’s layout. It looked great from the center, but from the sides, the image became dim and distorted. That’s why understanding the balance of gain and technology is so important. For an in-depth look, check out this guide on ALR screen materials and gain in bright rooms. And if you’re curious about the science behind it, this ultimate guide to projection screen gain is a must-read.
Is All the Hype About ALR Screens Justified?
I used to think that a high-gain ALR screen was the ultimate solution for bright rooms. My early mistake? I overlooked the importance of room setup and the specific technology of the screen material. Not all ALR screens are the same—some excel at rejecting ambient light but sacrifice color accuracy or viewing angles. The key is to find a balance that matches your room conditions and viewing habits. For example, a screen with a gain of 1.4 might be perfect for my setup, providing enough brightness without sacrificing image quality. The good news is that many of these screens now come with advanced materials that optimize gain and light rejection simultaneously. Want to find out which options are best for your space? Dive into this comprehensive guide to ALR screen options. Ultimately, the right choice depends on understanding your room’s lighting, projector capabilities, and your viewing preferences. Stay tuned—I’ll share practical tips to help you pick the perfect screen and set it up for maximum impact.
Choose the Right Screen Material and Gain
Start by selecting an ALR (Ambient Light Rejection) screen with a material suited for bright environments. The key is to find a balance between gain and light rejection. Generally, a gain of around 1.4 to 1.8 offers a good compromise, providing enough brightness without hot-spotting or limiting viewing angles. I once ordered a high-gain (2.0) screen for my living room, thinking it would maximize brightness, but quickly noticed uneven lighting and glare from the sides. After switching to a 1.5 gain screen from this guide on ALR screen materials, my picture became more uniform and vibrant, even with sunlight streaming in.
Optimize Your Room Layout and Lighting
Before installing your new screen, assess your room’s light sources. Use heavy curtains or blackout blinds during daytime viewing to reduce ambient light. Position your seating to minimize direct reflections from windows or lamps. Think of your room like a stage — controlling the lighting is as vital as choosing the right backdrop. I moved my seating closer to the screen and dimmed the overhead lights, which made a noticeable difference in picture clarity. For detailed room setup tips, check this guide on room and size optimization.
Set Up Your Projector Correctly
Adjust your projector’s settings to maximize contrast and brightness. Use the projector’s keystone, focus, and iris controls to fine-tune the image. In my experience, lowering the brightness slightly and increasing contrast improved visibility in my sunny room. Ensure your projector is aligned properly with the screen to prevent distortions. For precise calibration techniques, visit this calibration guide.
Leverage Gain and Light Rejection Technologies
Some screens incorporate advanced technologies like micro-structured surfaces or specialized coatings to enhance gain and reject ambient light simultaneously. I tested a few options from this list of top ALR technologies, noticing that screens with a combination of high gain and light-rejecting properties offered the best daytime picture. Remember, a higher gain can bounce more light to your eyes, but it might cause hot spots if not matched properly. Always review the specifications and user reviews to find the best match for your room.
Test and Fine-Tune Your Setup
After installation, sit in your usual viewing position and evaluate the image. Adjust your projector’s settings, position, and the screen angle if possible. It’s normal to go through some trial and error — I spent an evening tweaking my setup until the image was consistently bright, sharp, and free of glare. Keep notes of your adjustments, and revisit the setup periodically, especially if you change lighting conditions or seating arrangements.

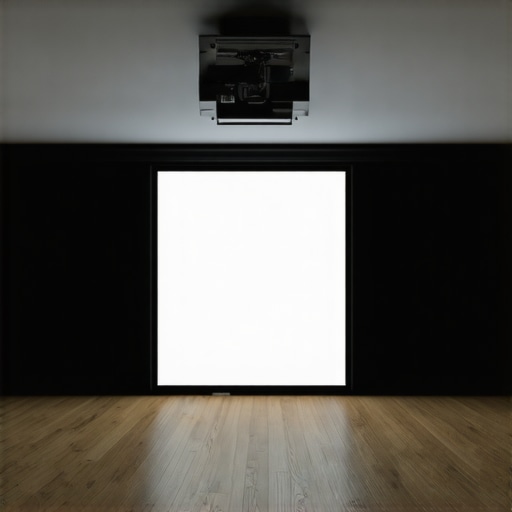
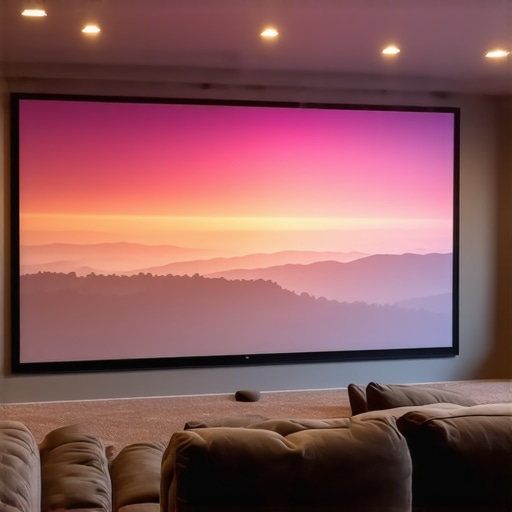
Illustration of a home theater setup showing optimal projector positioning, screen gain, and ambient light control for bright rooms.
Many home theater enthusiasts believe that simply choosing a high-gain ALR screen guarantees a perfect viewing experience in bright rooms. However, this is a common misconception that can lead to costly mistakes. In my experience, focusing solely on gain without considering other factors like screen technology, room layout, and projector capabilities often results in subpar results. For example, a high-gain screen might seem ideal for daytime viewing, but if it causes hot-spotting or severely limits viewing angles, your picture can become uneven and frustrating to watch. Instead, I recommend paying close attention to the specific technology behind the screen material and how it interacts with your room conditions. For an in-depth understanding, check out this guide on ALR screen materials and gain. This will help you select a screen that balances light rejection with image uniformity, avoiding the trap of overemphasizing gain alone.
Another mistake many make is assuming that all ambient light rejection is created equal. In reality, different ALR screens employ varied technologies—such as micro-structured surfaces, optical coatings, or multilayer films—that impact color accuracy, contrast, and viewing angles. Relying solely on manufacturer claims without understanding these nuances can lead to disappointment. For instance, a screen optimized for ambient light rejection might sacrifice color fidelity, making your movies look dull or washed out. To navigate this, explore this comprehensive guide on ALR screen options. It delves into how different materials perform and which might suit your specific environment, helping you make a more informed choice.
Why does screen gain matter less than many think?
While gain is important, over-focusing on it can be counterproductive. Higher gain screens reflect more light, but they also tend to have narrower viewing angles and can introduce hot-spots if not properly installed. Interestingly, some experts argue that a moderate gain (around 1.4 to 1.8) combined with advanced light-rejecting technology often yields better overall image quality, especially in rooms with uncontrolled ambient light. This is supported by studies like those from the Society of Motion Picture and Television Engineers, which highlight the importance of balanced contrast and color fidelity over raw brightness. Remember, the goal is to create a uniform, vibrant image that remains consistent from different seating positions. For a deep dive into this topic, see this ultimate guide on projection screen gain and technology. Don’t fall into the trap of equating higher gain with better quality—sometimes, it’s about the right technology for your space, not just numbers on a spec sheet.
Have you ever fallen into this trap? Let me know in the comments!
Regularly Clean Your Equipment for Peak Performance
One of the simplest yet most effective ways to maintain a high-quality projection system is routine cleaning. Dust, fingerprints, and smudges on your projector lens or screen can significantly degrade image clarity. I personally use a soft microfiber cloth to gently wipe the lens weekly, avoiding harsh chemicals that could damage coatings. For screens, a gentle dusting with a microfiber duster or a slightly damp cloth keeps the surface spotless without risking scratches. Regular cleaning prevents dust buildup in vents, which can cause overheating and reduce lifespan. Remember, always turn off your equipment and let it cool before cleaning to avoid damage.
Use the Right Tools for Calibration and Adjustment
Calibration tools like the X-Rite i1Display Pro are invaluable for ensuring your projector displays accurate colors and optimal contrast over time. I rely on my calibration device monthly to adjust brightness, contrast, and color profiles, especially as ambient lighting conditions change seasonally. This device connects via USB and uses software to calibrate projectors precisely, saving me hours of manual tweaking. Additionally, a good tripod or adjustable mount allows fine-tuning the projector’s position, ensuring the image remains aligned and sharp. Investing in these tools pays off by extending the lifespan of your equipment and maintaining true image quality.
Implement Software and Firmware Updates
Manufacturers often release firmware updates that fix bugs, improve performance, or add features. I make it a point to check for updates quarterly, either through the manufacturer’s website or dedicated apps. Installing the latest firmware can resolve issues like color inconsistencies or connectivity problems, preventing small glitches from escalating. Keep a backup of your current settings before updating, in case you need to revert. Staying current with updates ensures your system benefits from ongoing improvements, keeping your bright-room viewing sharp and reliable.
Establish a Long-Term Maintenance Routine
Creating a scheduled maintenance plan helps prevent issues before they arise. I set reminders to clean filters, check lamp hours, and recalibrate every 3 to 6 months. Keeping an eye on lamp hours (most projectors have a built-in timer) informs me when it’s time for replacement to avoid unexpected failures. Also, inspecting cables and connections periodically can prevent signal loss or interference. Over time, this routine saves money by avoiding costly repairs and ensures your setup remains at peak performance, even after years of use.
Plan for Future Upgrades and Scaling
As technology evolves, staying informed about new ALR screen materials and gain options can help you plan upgrades. I follow industry updates through trusted sources like this guide on ALR screen materials. When I notice my setup starting to show its age, I consider replacing the screen with one that offers better light rejection or higher gain, especially if I upgrade my projector. Scaling your system gradually allows you to enjoy improved brightness, contrast, and color fidelity without replacing everything at once, making your home theater future-proof and enjoyable for years to come.
How do I maintain projection quality over time?
The key to long-term success lies in consistent care and strategic upgrades. Regular cleaning, calibration, firmware updates, and planned improvements keep your system performing at its best. With the right tools—like calibration devices and proper cleaning supplies—you can easily manage maintenance at home. Plus, keeping an eye on industry innovations ensures your setup remains competitive and capable of delivering stunning bright-room images for years to come. Don’t forget, a proactive approach not only preserves your investment but also elevates your viewing experience every day. Try scheduling a comprehensive maintenance check this month to see immediate improvements and set a foundation for ongoing excellence.
Lessons from My Bright Room Home Theater Journey
One of the most surprising lessons I learned was that the quality of your ALR screen material can drastically change your viewing experience, even more than just increasing gain. I once focused solely on getting a high-gain screen, thinking it would make my daytime viewing perfect. Instead, I ended up with hot-spots and limited angles, which made me realize that technology matters just as much as numbers. It’s about finding the right balance between light rejection and image uniformity, something I only truly understood after digging into detailed guides like this comprehensive resource.
Another insight: room setup is often overlooked. I used to think that just buying a good screen would fix all my issues, but controlling ambient light and seating positions proved just as crucial. Heavy curtains, strategic seating, and proper projector alignment made a world of difference, transforming my bright room into a usable home theater space. It’s a reminder that technology and environment go hand-in-hand for optimal results.
Finally, I realized that maintenance and calibration are ongoing processes. Regular cleaning, firmware updates, and periodic recalibration with tools like professional guides keep my setup performing at its best. These lessons have not only saved me money but also kept my viewing experience consistently stunning, even in challenging bright conditions.
My Essential Toolkit for Bright Room Projection
For anyone serious about bright-room projection, I recommend starting with the right tools. First, a quality calibration device like the X-Rite i1Display Pro ensures your colors and contrast stay accurate over time. Second, exploring trusted resources such as this detailed guide on ALR screens helps you choose materials that balance gain and light rejection effectively. Lastly, investing in good cleaning supplies and regular maintenance routines will prolong your equipment’s lifespan and performance, ensuring your bright room theater remains vibrant and sharp for years to come.
Your Bright Room Projection Future Starts Now
Don’t let ambient light limit your home theater dreams. With the right ALR screen, thoughtful room setup, and ongoing maintenance, you can enjoy crisp, colorful images even in the sunniest spaces. I encourage you to experiment, fine-tune, and learn from each adjustment—your perfect bright-room viewing experience is within reach. Remember, technology is just one part of the puzzle; environment and care complete the picture. Take action today, and elevate your home theater to new brightness levels!
![5 Reasons 0.6 Gain ALR Stops 16K Highlight Bloom [2026]](https://screens.cinegearguide.com/wp-content/uploads/2026/03/5-Reasons-0.6-Gain-ALR-Stops-16K-Highlight-Bloom-2026.jpeg)