ALR Screen Technology Explained: Best Material & Gain Tips for 2024
Have you ever set up a projector only to find your screen washed out by ambient light, making you question if all those high-end tech gadgets are worth it? I remember the frustration vividly—bright rooms, unreliable picture quality, and endless tweaking that seemed to never quite hit the mark. That lightbulb moment hit me hard: I needed to understand ALR screen technology better if I wanted my home theater to truly shine, even in challenging conditions.
Why Your Screen Material Matters More Than You Think
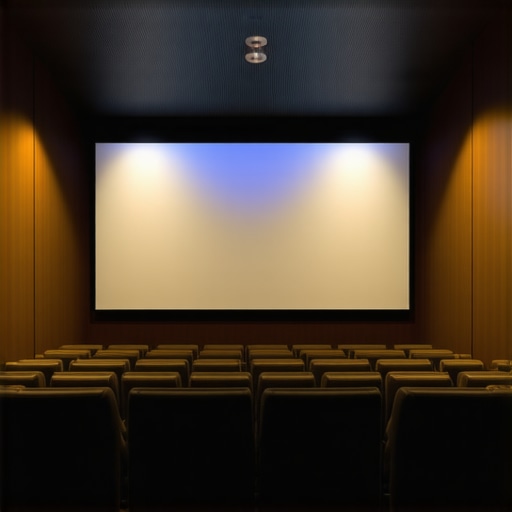
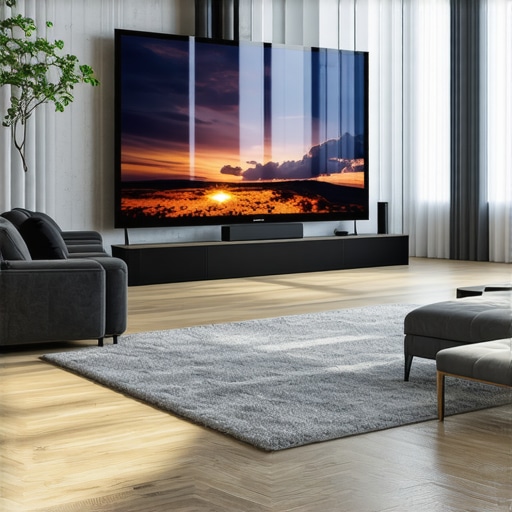
Most folks jump into the world of projection without realizing the crucial role the screen material plays. It’s not just about size or gain—it’s about how that material interacts with light and the environment. A good ALR (Ambient Light Rejection) screen can dramatically improve picture quality by reducing ambient light interference, giving you a vibrant, crisp image even during the daytime.
Early on, I made the mistake of choosing a generic screen based solely on size and price. Big mistake. The material’s gain—its ability to reflect projected light—can make or break your viewing experience. Higher gain screens boost brightness but can sometimes cause hotspots and viewing angle issues. Conversely, specialized materials tailored for ambient light conditions strike a better balance, delivering clear images across wider angles. (For a deeper dive, check out this comprehensive guide.)
Is ALR Screen Technology Actually Worth the Hype?
When I first heard about ALR screens, I was skeptical. It felt like another gimmick promising the world but delivering disappointment. But after testing several, I realized how much the right material and gain settings could transform my viewing environment. The key is understanding that not all ALR screens are created equal—some boast advanced multi-layer coatings designed specifically to reject ambient light while maintaining color accuracy.
My early mistake was overlooking the importance of choosing the correct gain and material suited for my room’s lighting. I learned that a high-gain screen in a bright room can cause glare, but with the right material, you get sharp, bright images without sacrificing color fidelity. If you’re curious about the best options for your setup, I recommend exploring this detailed resource.
Now, let’s move beyond the basics. In the following sections, I’ll help you identify the perfect materials and gain tips tailored for 2024, so you can finally turn your projection setup into the home theater you’ve envisioned—even in rooms with a lot of light. Ready to elevate your viewing experience?
Select the Perfect Screen Material
Start by choosing a high-quality ALR (Ambient Light Rejection) screen with tailored coatings that specifically target ambient light in your room. Consider materials like perforated or multi-layer screens that reflect projected light efficiently while rejecting room light. Test different samples if possible, noting how each interacts with your projector’s brightness and colors. For detailed comparisons, see this guide.
Match Your Screen Size and Gain Carefully
Measure Your Space Precisely
Use a tape measure to determine your room dimensions. The ideal screen size should fill a significant portion of your field of view without overwhelming the space. For bright rooms, a larger screen can help maintain visibility, but only if your space supports it comfortably. Refer to this sizing guide for best practices.
Select Gain for Bright Conditions
Gain indicates how well a screen reflects light. Higher gain screens, typically above 1.5, increase brightness but can cause hotspots and narrow viewing angles. In a bright room, aim for a gain between 1.3 and 1.5 to balance brightness and image uniformity. Pair this with a reflective material that enhances clarity without glare. For insights, see this comprehensive resource.
Set Up Your Screen Properly
Mount the screen at eye level and ensure it is perfectly flat and taut to avoid wrinkles that distort images. Use quality brackets or stands that can support the weight without vibration. Proper placement minimizes light spill and maximizes contrast. Adjust your projector’s tilt and alignment to project exactly onto the screen’s center area, avoiding edges for consistent brightness and focus. Check this setup guide for more detailed instructions.
Tweak Your Projector Brightness and Contrast
In rooms with ambient light, increasing your projector’s brightness (lumens) helps maintain a vibrant image. However, higher brightness can wash out colors if not balanced with contrast. Set your contrast levels to deepen blacks and enhance colors, making the picture pop despite ambient light. Experiment with small adjustments while viewing your screen under typical lighting to find your sweet spot. For advanced tips, consult this expert guide.
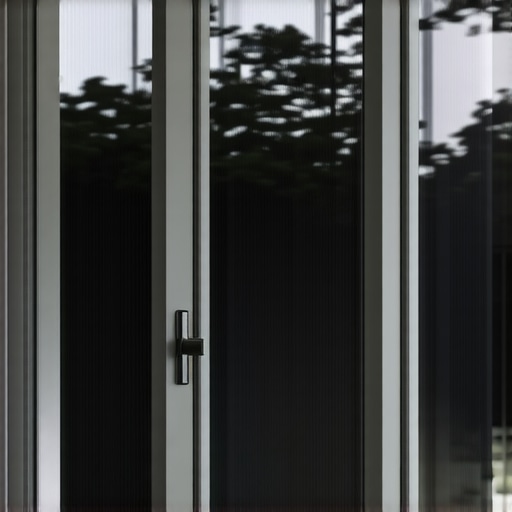
Utilize Light Control Techniques
While the focus is on screen and projector, controlling ambient light further improves performance. Use blackout curtains, blinds, or strategically placed dark-colored furniture to reduce light sources near the screen. Soft, indirect lighting can prevent glare and eye strain. When lights are necessary, switch to dimmable fixtures and aim them away from the screen. These practical steps help your ALR screen perform at its best, creating an immersive viewing experience even in challenging lighting conditions.
Many enthusiasts believe choosing the largest screen or the highest gain material guarantees a stunning home theater experience. However, these assumptions often overlook critical nuances that can make or break your setup. **Let’s dig deeper** into what most people get wrong about projection screens, especially when aiming for optimal performance in bright rooms.
First, a prevalent misconception is that bigger is always better. While larger screens can enhance immersion, they can also introduce significant challenges if not matched appropriately with your room size and projector capabilities. An excessively large screen in a confined space can lead to image distortion, uneven lighting, and difficulty in achieving perfect focus. For brightness and clarity in bright environments, paying attention to screen gain and size combination is essential. I recommend exploring [this guide](https://screens.cinegearguide.com/best-projection-screen-size-and-gain-tips-for-bright-room-setups) to understand optimal size and gain pairings.
Another trap is fixating on high gain as the magic bullet for ambient light rejection. High gain screens (above 2.0) reflect more light, boosting brightness but often at the expense of viewing angles and uniformity. You might end up with hotspots or a shiny, reflective surface that causes glare. These issues are particularly problematic in wide seating arrangements. Instead, many experts suggest selecting specialized *multi-layer* or *perforated* materials designed for ambient light rejection, which distribute reflected light more evenly. To select the right material, it’s worthwhile to review [this comprehensive resource](https://screens.cinegearguide.com/alr-screens-the-complete-guide-to-screen-material-gain-in-2024) on ALR technologies.
Now, let’s address a question many advanced users ask: *How do I compensate for your screen’s gain limitations when my environment is highly ambient-lit?* The answer is nuanced. Achieving a balanced setup requires optimizing multiple factors—screen gain, projector brightness, room lighting control, and even viewer position. For instance, in very bright rooms, a gain of around 1.3 to 1.5 paired with a projector that can output high lumens will keep images vibrant without hotspotting or glare. Additionally, implementing effective light control measures like blackout curtains can significantly enhance your viewing quality. For more insight on maximizing ambient light rejection, refer to [this article](https://screens.cinegearguide.com/ultimate-guide-to-projection-screen-materials-gain-for-bright-rooms).
It’s crucial to avoid the mistake of over-relying on a single aspect, like gain, without considering the holistic environment. A high-gain screen in a poorly controlled lighting scenario can turn your room into a glare factory, negating any benefits.
Finally, remember that each room differs, and the optimal solution often involves trade-offs. For example, in rooms with large windows and bright daylight, investing in a multi-layer ALR screen coupled with careful lighting management yields much better results than simply upping the gain.
**Have you ever fallen into this trap?** Let me know in the comments. Understanding these finer points can help you design a projection setup that truly shines, even under challenging lighting conditions.
Maintaining Your Projection Screen for Long-Term Performance
Proper maintenance ensures your projection setup continues to deliver stunning images over the years. Regular cleaning of the screen material is crucial; dust, smudges, and fingerprints can diminish image clarity. Use a soft, microfiber cloth dampened with water or a mild, non-abrasive cleaning solution suitable for your specific screen material. Avoid harsh chemicals or abrasive scrubbers, which can damage delicate coatings or perforations.
Inspect your mounting hardware periodically; loose brackets or sagging can distort the image and reduce contrast. Tighten or replace components as needed to keep the screen flat and taut. If your setup includes an ALR (Ambient Light Rejection) screen, verify the coating’s integrity—any scratches or damage can impair light-rejection capabilities. Refer to the manufacturer’s guidelines for cleaning and maintenance specifics for your model.
Essential Tools I Trust for Screen Maintenance
Personally, I rely on a few reliable tools to keep my projection environment in top shape. A microfiber cloth is indispensable; it effectively captures dust without scratching. For stubborn spots or smudges, I use a spray bottle with distilled water mixed with a tiny drop of gentle dish soap, then wipe gently. For screen-specific cleaning, I recommend a dedicated lens cleaning solution, which is gentle enough for coatings and multi-layer materials.
Additionally, a handheld vacuum with a brush attachment is useful for cleaning dust from projector vents and surrounding components. Keep a small level or laser ruler handy to ensure your projector and screen are perfectly aligned after maintenance. Investing in a dust cover for your projector and screen when not in use can prevent accumulation of dust and prolong their lifespan.
Tools That Save Time and Maintain Quality
Automation software is another game-changer. Light measurement apps like Lux Meter (available on smartphones) help you monitor environmental lighting conditions, ensuring your ALR screen performs optimally. Regular calibration of your projector’s brightness and contrast settings, using test patterns and calibration discs like Disney WOW: World of Wonders, guarantees consistent picture quality. I perform this calibration monthly to adapt to seasonal lighting changes.
How do I keep my projection setup performing over time?
Scheduling routine checks—once a month for dusting and hardware tightening, quarterly for calibration—prevents minor issues from becoming major problems. Consistent cleaning and calibration extend your system’s lifespan and ensure each viewing remains crisp. When upgrading components, opt for quality hardware and verify compatibility with your existing setup. For example, using a precision level when mounting your projector can prevent image distortion—a subtle step that pays off in picture fidelity. For advanced calibration techniques, consulting expert guides like this resource can provide valuable insights.
Predictively, as technology advances, smarter maintenance tools—such as auto-calibration software and sensor-integrated screens—are likely to become standard. Embracing these innovations now can future-proof your home theater.
One tip I highly recommend: invest in a high-quality microfiber cloth designed for delicate surfaces. Regularly wiping your screen with it removes dust gently and prevents scratches, ensuring your ALR surface maintains its light-rejection properties. Try incorporating this simple yet effective habit into your routine today—your eyes will thank you for the crisp, vibrant images over time.

What I Didn’t Expect About Light-Rejecting Surfaces
One of my biggest revelations was realizing that not all ALR (Ambient Light Rejection) screens are created equal. I used to think that simply choosing a high-gain surface would solve my daylight viewing problems, but I discovered that subtle differences in material coatings and layer configurations make a huge impact on picture clarity and color fidelity. It taught me that doing thorough research and testing different samples is essential to find a screen that truly cancels ambient light without sacrificing image quality.
The Exact Moment I Recognized the Power of Proper Room Calibration
It dawned on me during a late afternoon movie session that my projector’s brightness and contrast settings needed fine-tuning to match my new screen setup. I had been relying on default settings, but I realized that in bright rooms, small adjustments to contrast and gamma could dramatically improve contrast ratios and color vibrancy. This lesson emphasized how crucial calibration is for ensuring your projection system performs optimally, especially with high-gain or specialized light-rejecting screens.
Secret Weapon: Controlling Ambient Light with a Smart Strategy
After experimenting with various lighting techniques, I learned that strategic placement of blackout curtains and dimmable lights makes the biggest difference. Using soft, indirect lighting reduced glare and prevented my screen’s reflective properties from causing unwanted hotspots. This experience underscored that effective light control complements your high-quality screen and projector, turning challenging daylight conditions into a non-issue.
My Toolkit for Lasting Projection Perfection
Over time, I found that investing in high-quality microfiber cloths and gentle cleaning solutions keeps my ALR screen pristine, ensuring maximum light rejection and color accuracy. Regular hardware checks and calibration routines have become part of my maintenance ritual, preventing minor issues from impacting my viewing experience. I also rely on tools like ambient light measurements and test patterns to maintain consistency. Trustworthy resources such as this guide have been invaluable for refining my approach.
Action Starts Now: Make Your Vision a Reality
If you’ve been considering upgrading your projection setup, don’t wait for the perfect moment—start experimenting today. With the right understanding of ALR screens, gain, and room lighting, you can achieve stunning visuals even in bright environments. Embrace the learning curve, and let each step bring you closer to your ideal home theater experience. Remember, every expert was once a beginner, so take that first step now and enjoy the journey ahead.
What was your biggest challenge in optimizing your projection environment? Share your experience below, and let’s learn together!
.