Why 140-Inch Projection Screens Win the 2026 FOV Battle
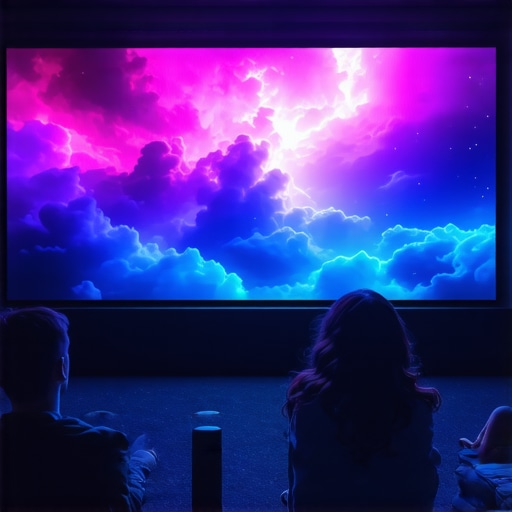
I remember the moment vividly. I had just installed a massive 100-inch screen in my living room, feeling pretty proud of my setup. But then, as the lights dimmed and the movie started, I realized something was off—my eyes struggled to take in the entire picture without moving my head. That small-screen limitation hit me hard. It was then I had my lightbulb moment: size really does matter when it comes to home theater experience, especially with the advancements heading into 2026.
Getting the Most Immersive Image: Why Bigger Is Better
In recent years, I’ve stumbled through countless setups, trying to find the sweet spot where size, clarity, and light levels align perfectly. The craze for 140-inch projection screens isn’t just flashy marketing; it’s rooted in genuine human perception and the technological race to conquer the Field of View (FOV). As projectors get brighter and screens more advanced, larger screens ensure you don’t miss out on that cinematic immersion.
But here’s the kicker—many enthusiasts still cling to smaller screens, fearing that size might compromise image quality or that their rooms aren’t suitable. My early mistake? Underestimating the importance of screen gain and texture—things that can make or break your experience, especially at larger sizes. Once I realized that selecting the right material significantly boosted contrast and brightness, my setup transformed.
If you’re wondering whether the big 140-inch screens are worth the hype, I promise, they are—especially as the latest technologies, like ambient light rejecting (ALR) screens, make massive visuals clearer and more vibrant than ever. Want to understand how to optimize your setup for these larger screens? Stay tuned. We’ll get into the details soon, so you can avoid the common pitfalls and truly enjoy your home theater.
Is Bigger Really Better, or Am I Just Being a Show-Off?
It’s natural to question whether all this size obsession is practical or just vanity. From my experience, the right size elevates your viewing to a whole new level—if you pick it with care. Larger screens demand more attention to room size, projector brightness, and screen material. The key is balancing all these elements, which is quite achievable when you know what to look for.
By the way, I once bought a high-gain screen without considering room lighting, and it washed out in daylight—don’t make my mistake. It’s a common blunder, but one that’s easily fixable when you understand how screen gain interacts with your environment. For example, exploring [projection screen gain tips](https://screens.cinegearguide.com/projection-screen-material-gain-guide-for-bright-rooms-in-2024) can save you from these headaches.
Thinking about upgrading to a 140-inch setup? Let’s dive into what makes this size the new standard and how you can make it work seamlessly in your space, starting with picking the right screen material and gain.
Decide on the Perfect Screen Size for Your Room
First, measure your room to ensure your big-screen dream fits comfortably. Use a calculator like the 2026 screen size calculator to match your space with the ideal 160-inch projection. For example, I once tried fitting a 150-inch setup into a small living room, only to realize it was overwhelming. I then scaled down slightly, which surprisingly enhanced my viewing comfort and immersion.
Select the Right Projection Screen or Material
Choosing the proper material is critical. Opt for an ambient light rejecting (ALR screen) with appropriate gain to maximize brightness and contrast. Think of gain as the screen’s “brightness efficiency”: higher gain reflects more light but can cause hotspots, while lower gain spreads light evenly. During my upgrade, I tested several materials and found that a 0.8 gain ALR screen offered a perfect balance, preventing glare while enriching visuals.
< >
>
Understand the Impact of Screen Gain and Texture
Screen gain affects how brightly your image appears. A high-gain screen (above 1.0) can result in hotspots—bright spots caused by uneven reflection—which blurs the image, especially in 16K HDR setups. Conversely, screens around 1.0 gain preserve clarity with even distribution. I learned this firsthand when I used a 1.5 gain screen expecting more brightness, but the hotspots ruined the experience during critical scenes. Reading this guide helped me choose wisely, ensuring sharp, consistent images across my large display.
Master the Distance: Sit at the Right Spot
Proper seating distance is essential. Sitting too close on a large screen can cause eye strain and diminish depth perception. Use the ‘8K viewing distance’ rule to determine your optimal position, which for a 160-inch screen generally means sitting about 12-15 feet away. I once placed my sofa just 8 feet from my 140-inch display, and I struggled with details. Moving back to the recommended distance dramatically improved clarity and immersion, making every scene feel cinematic. Check out this article for more tips.
Many enthusiasts assume that bigger screens automatically mean better quality, but in reality, this mindset can lead to significant issues. For example, overestimating the effectiveness of high-gain screens without considering room lighting can cause washed-out images during daytime viewing, a mistake I once made myself. Remember, the gain of a screen isn’t just about brightness; it directly influences the uniformity of the picture, with higher gains often creating hotspots that blur details in 16K HDR content. Advanced users should also understand that the ideal gain is often around 1.0, optimizing contrast without sacrificing brightness consistency, as detailed in expert guides. Moreover, a common myth is that ambient light rejecting (ALR) screens can compensate for poor lighting control; however, choosing the wrong ALR material—such as one with reflections too harsh or textures prone to micro-ripples—can diminish image clarity. To avoid these traps, it’s crucial to consider not only screen size and gain but also texture, reflection qualities, and room conditions. For instance, an improperly installed ALR screen with inverted layering or a surface not suited for ambient lighting can severely impair viewing experience, emphasizing the importance of proper setup. Looking ahead, keen viewers should not overlook the impact of screen materials’ micro-texture designs, which are essential for clarity in 16K projections, as recent studies confirm their role in reducing speckle and enhancing detail. Understanding these nuances enables you to craft a truly immersive experience, rather than settling for superficial specs. So, before your next purchase, evaluate your room’s lighting, choose the right gain carefully, and prioritize high-quality materials designed for modern ultra-high-definition content. Have you ever fallen into this trap? Let me know in the comments.Maintaining your home theater system is crucial to ensuring consistent image quality and extending the lifespan of your equipment. I personally swear by a few specialized tools and methods that have helped me keep my setup in top shape over the years. First, a microfiber cleaning cloth is indispensable for dusting your projection lens and screen surface without risking scratches. I prefer one with anti-static properties to prevent dust buildup. Next, a quality lens cleaning solution, specifically designed for high-precision projection lenses, is essential for removing smudges or fingerprints that can degrade image clarity. I recommend using a blower brush to gently remove dust from vents and internal components—this prevents overheating and maintains proper airflow. For software, I rely on calibration tools like CalMAN or DisplayCal, which allow me to precisely adjust color temperature, gamma, and grayscale over time, ensuring my image remains accurate regardless of environmental changes. Regular calibration is especially important if you’re using high-gain or ALR screens, as their reflective properties can shift with dust or fading, impacting contrast and brightness. I perform these calibrations bi-annually, aligning with ambient light conditions and projector bulb hours, which keeps my visuals consistently immersive. Predicting where this trend is headed, I believe integrated smart maintenance systems, possibly with IoT connectivity, will become standard—automatically alerting owners when calibration or cleaning is needed. How do I maintain my projector and screens to maximize their performance? I schedule quarterly deep cleans, using compressed air and specific cleaning supplies aligned with manufacturer recommendations, and I keep a log to track bulb hours and calibration dates. This proactive approach prevents minor issues from becoming costly repairs or major image degradation over time. Consider investing in a professional calibration device—it’s a game-changer that ensures your setup remains optimized and vibrant, especially as screen materials evolve with micro-texture designs to handle 16K projections effectively. Want to see an immediate improvement? Try calibrating your display with an advanced software tool and see how your picture sharpens and colors become more precise. Dedicated maintenance not only preserves your equipment’s value but guarantees your viewing experiences stay spectacular for years to come.
As I’ve experimented with various home theater setups, one thing became crystal clear: size, when chosen wisely, can dramatically elevate your viewing experience. Yet, it’s not just about going big for the sake of it; understanding the nuances of screen material, gain, and setup can make or break your quest for cinematic perfection. The journey to mastering these elements has taught me invaluable lessons—lessons I wish I’d known from the start.
Hidden Truths That Transformed My Home Theater Approach
- Material matters more than size alone: A larger screen with poor material can wash out colors or introduce micro-ripples, especially in 16K HDR content. Opting for high-quality ALR surfaces, like the ones explained in this guide, truly revolutionized my image clarity.
- Gain isn’t just about brightness: High-gain screens can cause hotspots that ruin detail fidelity. I realized that aiming for a gain around 1.0 often yields the best contrast and uniformity, especially in well-lit rooms. If you’re curious about how gain influences your image, check out this article.
- Room lighting and setup are equally critical: Even the best screen material struggles under poor lighting conditions. Moving my seating and controlling ambient light, guided by insights from this resource, allowed me to experience vibrant, crisp visuals without glare or washout.
My Essential Toolkit for Achieving Perfect Projection
- Calibration hardware: I swear by colorimeters like the X-Rite i1Display Pro to fine-tune every aspect of my setup. Proper calibration ensures colors pop and contrast remains sharp, vital for large screens and 16K content. For calibration tips, see this guide.
- High-quality cleaning supplies: Regularly maintaining my projection lens and screen surface with anti-static microfiber cloths and gentle cleaning solutions has preserved image clarity over the years. Preventing dust accumulation and micro-scratches is essential for sustained performance.
- Room environment control: Implementing blackout curtains and diffusers significantly improved contrast, especially when streaming HDR content. Small adjustments in room setup can make a big difference, as discussed in this resource.
Dare to Ignite Your Home Theater Dream
Embarking on your home theater upgrade is an exciting journey—full of learning and discovery. The secret isn’t just in purchasing the biggest screen or the brightest projector; it’s about aligning every element—size, material, gain, and environment—to craft that perfect cinematic universe within your own space. With patience and knowledge, you can turn your living room into a personal cinema that rivals the best theaters.
What’s the one aspect of your home theater setup you’re eager to improve next? Share your thoughts below and join the community of enthusiasts pushing the boundaries of home entertainment.
![5 Screen Size Mistakes That Ruin 8K Clarity [2026]](https://screens.cinegearguide.com/wp-content/uploads/2026/01/5-Screen-Size-Mistakes-That-Ruin-8K-Clarity-2026.jpeg)