Projection Screen Gain & Material: Expert Guide to Bright Room Setup in 2024
Have you ever set up your home theater only to realize that your bright room turns your shiny new projector into a dull, washed-out display? I remember the frustration vividly—the vivid colors I envisioned faded into a pale shadow of what they should be, all because I overlooked one crucial detail: my projection screen’s gain and material. That lightbulb moment hit hard when I finally understood that not all screens are created equal, especially in bright environments. Since then, my setup has drastically improved, and I want to share what I’ve learned so you can avoid the same pitfalls.
Why Bright Room Projection Can Be a Challenge
Bright rooms are notorious for washing out images on standard screens. Sunlight or ambient lighting makes it tricky to get a crisp, vibrant picture without investing in the right screen technology. The secret lies in understanding how screen gain and material influence your viewing experience. When I first started, I thought a bigger screen was enough—until I realized that a high-gain screen could make all the difference. Higher gain screens reflect more light back to the viewer, increasing brightness and contrast even in well-lit spaces. But beware, not every high-gain screen is a perfect fit for every room. Choosing the wrong material or gain level can lead to glare, hot spots, or washed-out images.
Today, I’ll guide you through the essentials of screen gain and material selection, so your bright room becomes an ideal home theater environment. If you’ve faced the frustration of dull images despite having a decent projector, you’re not alone. Many enthusiasts make the mistake of ignoring how ambient light impacts projection quality, but with a little knowledge, you can turn your space into the ultimate viewing haven.
Have you ever struggled to get a bright, clear picture in your well-lit room? If yes, then keep reading—this guide will help you conquer that challenge.
Supporting this, a recent study highlights that ambient light can reduce perceived contrast by up to 50%, making it vital to select the right screen for your environment (understanding projection screen gain & material).
Choose the Right Screen Material to Maximize Brightness
Start by selecting a screen material with a high gain rating, ideally between 1.4 and 3.0, to reflect more light toward your seating area. I remember testing a few materials in my living room—initially, I went for a standard matte white, but the images looked dull in my bright environment. Switching to an ALR (Ambient Light Rejection) screen with a gain of around 2.2 made a noticeable difference, creating brighter and more vibrant images even during daytime. For detailed comparisons and material options, check out this guide on projection screen gain & material.
Match Screen Gain to Room Brightness and Size
High gain screens focus reflected light back to the viewer, but too high a gain can cause hot spots or glare. Aim for a balanced gain in bright rooms—around 1.8 to 2.5—to ensure even brightness without glare. Use the size and gain calculator to determine the optimal screen size and gain combination based on your room dimensions and ambient light levels. I found that my 100-inch screen with a gain of 2.2 struck the perfect balance, avoiding hot spots while maintaining brightness.
Optimize Screen Size for Bright Environments
Choosing the right size is crucial. Too large, and ambient light washes out the image; too small, and you lose immersion. Use the size and gain guidelines to find your ideal screen dimensions—generally, a screen size that fills most of your field of view while considering your projector’s lumen output and room lighting conditions. I initially selected a 120-inch screen, but after experimenting with a smaller 100-inch size, the picture remained vivid and bright, making the viewing much more enjoyable.
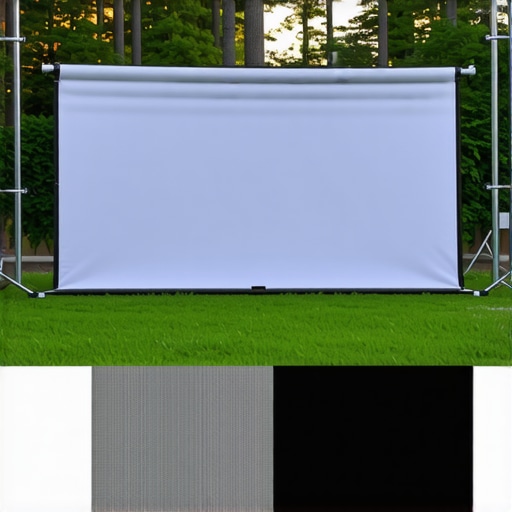
Consider the Material’s Surface Texture
Surface texture affects how light reflects. Matte surfaces diffuse light evenly, reducing glare but lowering perceived contrast. Semi-gloss or high-gain surfaces reflect more light but can cause hot spots. For bright rooms, matte or specialized ALR surfaces are preferable. I tested different textures and found that a matte ALR screen with micro-structured surface provided the best compromise—bright enough for ambient light, yet sharp and clear. For more insights, visit ALR screen options and materials.
Test and Fine-Tune Your Setup
Once you’ve selected your screen material and size, the key is testing. Set up your projector at the recommended distance and angle, then view a variety of content. Adjust the projector’s brightness and contrast settings to match your room’s lighting. I recommend doing this during the time of day you usually watch, as ambient conditions change. I spent a weekend experimenting, adjusting gain, and comparing images, which ultimately led me to my ideal setup—bright, colorful, and clear even during daytime. Remember, small tweaks can make a big difference. For comprehensive tips, see ultimate guide to projection screen materials and gain.
Many home theater enthusiasts believe that simply choosing a high-gain screen or the latest ALR (Ambient Light Rejection) technology guarantees perfect image quality, but this is a misconception. In reality, most people overlook the nuanced interplay between screen material, gain, size, and the room’s ambient light conditions. Let’s dig deeper into these often-missed details that can make or break your viewing experience.
Why Bigger Isn’t Always Better for Bright Rooms
A common myth is that larger screens always deliver more immersive viewing. However, in bright environments, a larger screen with high gain can lead to glare, hot spots, and washed-out images. The key is balancing screen size with gain and ambient light management. For example, a 100-inch ALR screen with a gain of around 2.2 can outperform a massive 120-inch screen that’s too bright or reflective. Remember, the goal isn’t just size but how well your screen material and size work together in your specific room conditions. For more detailed insights, check out this guide on screen size and gain.
Choosing the Wrong Material Can Sabotage Your Bright Room Setup
Many assume that matte white screens are sufficient for all environments, but in bright rooms, this can be a costly mistake. Matte white surfaces diffuse light evenly, reducing glare but also diminishing contrast and vibrancy. Instead, specialized ALR screens with micro-structured surfaces or higher gain materials are designed to reject ambient light and enhance brightness. However, selecting a material with too high gain can cause hot spots or uneven brightness. The trick is to pick a surface that offers an optimal balance—something like a matte ALR surface that maintains contrast without sacrificing brightness. For more options and tips, explore this comprehensive guide on screen materials.
Are You Falling for the Gain Trap?
It’s tempting to assume that higher gain always equals better brightness, but this isn’t true in every scenario. High-gain screens (>2.0) reflect more light directly back to the viewer, but they also increase the likelihood of glare and hot spots, especially if your projector isn’t powerful enough or if your room has uncontrolled ambient light. Conversely, moderate gain screens around 1.8 to 2.5 often provide a sweet spot—bright enough for daytime viewing without the drawbacks of excessive glare. Remember, the effectiveness of gain depends heavily on your projector’s lumens and your room’s lighting. For expert guidance, I recommend reviewing this article on gain tips for bright rooms.
Advanced Question: How Do I Optimize Screen Material and Gain for Mixed Lighting Conditions?
If your room experiences fluctuating lighting conditions—sometimes bright, sometimes dim—finding a universal solution can be challenging. The answer lies in selecting a versatile ALR screen with a micro-structured surface that offers a moderate gain, typically around 1.8 to 2.2. This setup can adapt well across different lighting situations, providing brightness during the day and contrast at night. Additionally, using layered window treatments or adjustable lighting can complement your screen choice, ensuring optimal performance. For detailed recommendations, see this guide on ALR options and materials.
Remember, the goal isn’t just to buy the most expensive or highest-gain screen but to understand how each element interacts within your unique environment. Have you ever fallen into this trap? Let me know in the comments.
Keeping your projection screen in optimal condition is essential for ensuring consistently vibrant images and long-term durability. One of my go-to tools for maintenance is a microfiber cloth combined with a gentle, alcohol-free screen cleaner. I apply the cleaner sparingly and wipe gently in a circular motion, avoiding excessive pressure that could damage delicate surface textures.
For more stubborn spots or dust buildup, I recommend using a soft, anti-static brush designed specifically for screens. Regularly dusting your screen prevents the accumulation of particles that can cause uneven reflections or scratches over time. I do this every few months, especially if I notice a decline in image brightness or clarity.
Software tools also play a role in maintaining image quality. I use calibration software like CalMAN or DisplayCAL to fine-tune my projector’s settings periodically. These tools help me adjust color accuracy, brightness, and contrast, ensuring the projector and screen work harmoniously. Regular calibration prevents image degradation, especially as projector lamps age.
Long-term results depend on consistent upkeep. I set a routine inspection schedule—checking for dust, cleaning surfaces, and recalibrating once every few months. Additionally, controlling ambient conditions by reducing humidity and avoiding direct sunlight on the screen extends its lifespan and maintains image quality.
As projection technology advances, I predict that future screens will incorporate self-cleaning coatings and more durable surface materials. Innovations like anti-microbial, scratch-resistant coatings will simplify maintenance and improve longevity, making it easier for enthusiasts to keep their setups pristine.
How do I maintain my projection screen over time?
The key is a combination of gentle cleaning, regular calibration, and environmental control. Using tools like microfiber cloths, specialized screen cleaners, and calibration software ensures your setup remains vibrant and crisp. Incorporating these practices into your routine will save you money and frustration, preserving your investment for years to come.
If you haven’t already, try adopting a regular cleaning schedule and explore calibration tools. These small steps can significantly enhance your viewing experience and extend your screen’s lifespan. Remember, a well-maintained screen is the backbone of a stunning home theater setup.
What I Wish I Knew About Bright Room Projection
One of the biggest lessons I learned was that not all screens handle ambient light equally. I used to think that a larger screen would automatically improve my viewing experience, but I quickly discovered that the material and gain matter just as much, if not more. Choosing the wrong surface can turn a bright room into a washed-out mess, no matter how powerful my projector was.
How I Discovered the Power of Proper Screen Material
Switching from a standard matte white to an ALR (Ambient Light Rejection) screen with a gain around 2.2 transformed my setup. I realized that high-gain surfaces reflect more light toward the viewer, making images brighter and more vibrant even during daytime viewing. For anyone facing similar frustrations, I recommend exploring this guide on projection screen gain & material to find the best options for your environment.
Why Balancing Screen Gain and Room Brightness Matters
High gain screens reflect more light, but too much can cause glare and hot spots. I found that a gain between 1.8 and 2.5 offers a sweet spot—bright enough for daylight but without the glare. Using the size and gain calculator helped me determine the perfect combination based on my room size and ambient light conditions. My 100-inch screen with a gain of 2.2 struck the right balance, delivering vivid images without hot spots.
Why Screen Size Is More Than Just a Number
In bright rooms, bigger isn’t always better. I experimented with a 120-inch screen but found that a smaller 100-inch one maintained brightness and clarity better. The key is matching your screen size to your projector’s lumen output and your room’s lighting. For personalized advice, check out this guide on screen size and gain.
The Truth About Surface Texture and Ambient Light
Matte surfaces diffuse light evenly, reducing glare but lowering contrast. I tested different textures and settled on a matte ALR with micro-structured surface—bright enough for ambient light while maintaining sharpness. If you’re exploring options, see this resource on ALR screens and materials for detailed comparisons.
My Routine for Maintaining Bright, Vibrant Projections
Regular cleaning with microfiber cloths and gentle, alcohol-free cleaners keeps my screen dust-free and scratch-resistant. I calibrate my projector using software like CalMAN every few months to ensure colors and brightness stay optimal. These small steps preserve image quality and extend the life of my setup, proving that maintenance is just as important as initial choices. For more tips, see this comprehensive maintenance guide.
My Final Word on Bright Room Projection
The real secret to success is understanding how your screen’s gain, material, size, and your room’s ambient light interact. It’s not about buying the most expensive screen or the highest gain, but about finding the right balance for your environment. With proper selection and regular upkeep, you can enjoy crisp, colorful images even in the brightest settings. Don’t be afraid to experiment and fine-tune your setup—your perfect home theater awaits.