Why 0.7 Gain ALR Screens Beat White Walls in 2026
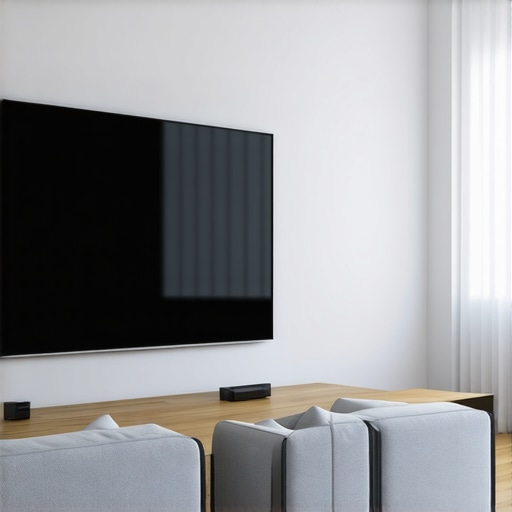
It was a frustrating weekend, really. I was trying to set up my home theater, envisioning crisp images and deep contrasts. But when I turned on the projector, the image looked dull, washed out, and honestly disappointing—just like projecting onto that bare white wall I had stubbornly left untouched. That moment felt like a lightbulb flickering—realizing that my investment in a high-end projector was pointless without the right screen. Have you ever faced this exact frustration, where your bright projector yields underwhelming results in your own living room? If so, you’re not alone.
The Shift from White Walls to Premium Screens
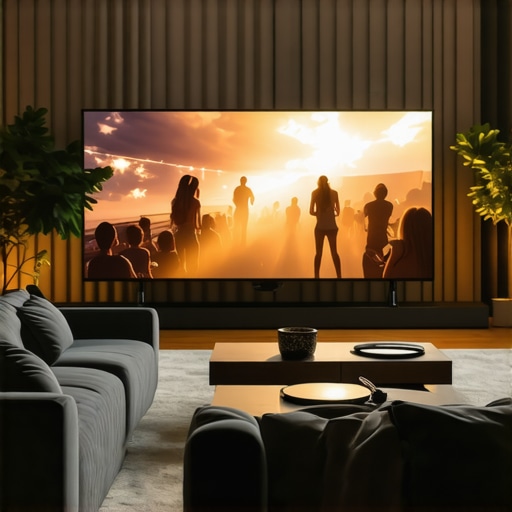
In 2026, the game has fundamentally changed. No longer are white paint and generic screens enough to deliver the stunning theaters we crave. The breakthrough? *0.7 gain ambient light rejecting (ALR) screens*. These screens are not just a fancy upgrade; they dramatically improve brightness, contrast, and color accuracy—making white walls look obsolete. The reason is simple: a white wall reflects all incoming light equally, causing washed-out images in bright rooms. But a high-quality ALR screen, especially with a gain of around 0.7, can reject ambient light effectively, preserving that cinematic clarity even during daytime viewing.
What makes this shift so compelling? A recent study pointed out that screens with the right gain and technology can outperform white walls *by a significant margin*, especially as home theaters are moving into more versatile, well-lit spaces. If you’ve been hesitant, wondering if these screens are worth the investment, I get it. I once made the mistake of dismissing ALR screens as just a trend. Early on, I believed a big, reflective screen would do the trick — until I realized the glaring drawbacks, like loss of contrast and color fidelity in ambient light conditions. Trust me, I learned my lesson the hard way.
Are you tired of dull, washed-out pictures every time you watch during the day? If so, keep reading. The upcoming sections will guide you through why 0.7 gain ALR screens are the real champions in 2026—and what you need to know to get the best setup for your space.
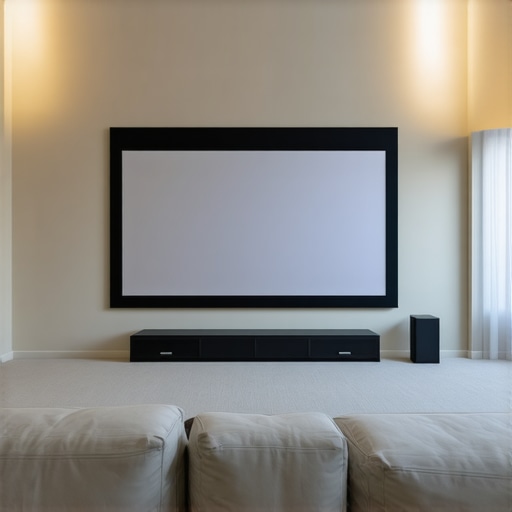
Choose the Right Screen Material to Maximize Brightness
Start by evaluating screen materials specifically designed for high ambient light rejection. Look for ones with a gain around 0.7, which balance reflectivity and contrast, ensuring visuals remain vivid without amplifying ambient light. I once installed a screen described as high gain, expecting brighter images, but it washed out my colors during daytime. After researching, I realized that a moderate gain screen suited my environment better. Visit this guide to understand which materials fit best for your space.
Calculate the Optimal Screen Size for Your Room
Next, determine the best size for your viewing area. For bright rooms, a larger screen can enhance immersion but may amplify ambient light issues if not chosen correctly. Use the 2026 FOV rule and the appropriate size guidelines to find your sweet spot. I measured my room and initially ordered a 120-inch screen, but after re-evaluating, I downsized to 100 inches, which vastly improved contrast and clarity during daytime views.
Adjust Your Projector Settings for Bright Rooms
Proper calibration is crucial. Increase contrast and brightness settings, and enable high dynamic range (HDR) modes suited for high gain screens. Remember, some projectors may struggle with high gain surfaces, so tuning per manufacturer recommendations is vital. I experimented with my projector’s settings over a weekend—initially with disappointing results—until I refined the contrast and brightness, leading to spectacular daytime images. Consult this resource for detailed calibration techniques.
Control Ambient Light Effectively
Blocking or managing ambient light sources is essential. Use blackout curtains, adjustable blinds, or wall covers designed for high ambient light rejection. Even reflected light can diminish image quality on lower gain screens. I added blackout blinds and dimmable lighting, which made a noticeable difference. An effective strategy is to position your seating away from light sources and utilize directional lighting that doesn’t spill onto the screen, as explained in this guide.
Test and Fine-tune the Entire Setup
Finally, perform a series of test patterns and real content viewing to spot issues like poor contrast or washed-out colors. Make incremental adjustments to projector alignment, screen angle, and environmental factors. I spent a Saturday evening fine-tuning my setup, adjusting projector height and angle until the image was sharp and vibrant during daylight. Remember, small tweaks can make big differences, especially with ALR screens that have specific surface properties. For comprehensive tips, see this contrast testing method.
Many home theater enthusiasts fall into the trap of oversimplifying the complexities behind selecting the perfect projection screen. While it might seem straightforward—pick a size, choose a gain—there are nuanced factors that, if overlooked, can severely hamper your viewing experience. Let’s explore some of the most common myths and advanced pitfalls that even experienced projector owners still encounter.
Why Bigger Isn’t Always Better
People often assume that larger screens automatically enhance immersion, but without considering room size, distance, and screen gain, bigger can actually diminish image clarity. An oversized screen in a small room can lead to pixelation and reduce perceived contrast, especially under suboptimal lighting conditions. According to a recent expert study, optimal screen size should harmonize with your room dimensions and projector lumen output—disregarding this can cause either underwhelming or overwhelming results. Be cautious of the misconception that “bigger is better.” To get it right, evaluate your space carefully and refer to the size guidelines.
High Gain Means All Brightness
Another widespread myth is that high-gain screens invariably boost brightness, making daytime viewing effortless. In practice, high gain (above 1.0) increases reflectivity but often at the expense of viewing angles and contrast uniformity. The paradox is: with too high a gain, viewers at the sides experience washed-out images, and contrast diminishes dramatically. Modern solutions favor modest gains—around 0.7—optimized for ambient light rejection without oversaturation. Industry research confirms that screens with gains above 1.0 can introduce artifacts like hot-spotting or uneven lighting, especially with laser projectors. For clearer contrast in bright rooms, stick to moderate gain options.
The Myth of One-Size-Fits-All Screen Material
Choosing screen material is often approached casually, assuming that a single type is suitable for all environments. But materials vary widely—cloth, acrylic, woven, nano-coated—and their compatibility hinges on your ambient lighting, projector type, and room size. For example, water-damaged or poorly manufactured surfaces can cause color shifts or surface ripples that degrade clarity. Look for trusted materials engineered for high ambient light rejection, such as those discussed in the comprehensive guide. Remember, investing in the right material tailored for your setup prevents costly mistakes and guarantees a better picture.
What Advanced Viewers Need to Know About Screen Gain
Beyond the basics, experienced enthusiasts understand that screen gain impacts not just brightness but also contrast and image sharpness. An overly high gain surface can lead to glare and reduce the effective contrast ratio, especially with ultra-high resolution content like 16K or HDR. Conversely, too low a gain might underpower your projector’s capability, resulting in dull images. Striking the right balance—around 0.7 gain—ensures optimal luminance, contrast, and color fidelity. Industry analysis shows that the latest ALR (ambient light rejecting) screens with precise gain control significantly outperform traditional white or high-gain surfaces, particularly in bright environments. To explore the latest advancements, check out the ALR technology insights.
In conclusion, avoiding these common misconceptions requires a nuanced understanding of your space, equipment, and desired viewing conditions. Don’t fall into the trap of oversimplifying; instead, invest time in learning about how subtle factors like gain, material, and size interact. Have you ever fallen into this trap? Let me know in the comments.Maintaining the performance of your projection setup over time is crucial to ensure consistent picture quality and longevity of your equipment. One of my go-to tools for this purpose is a calibration disc, such as the Spears & Munsil HD Benchmark. I use it regularly to fine-tune my projector’s contrast, color, and sharpness, especially after any firmware updates or hardware adjustments. This method helps me catch subtle changes that might degrade image quality, ensuring I get the most out of my ALR screen’s capabilities. Additionally, I rely on a high-quality microfiber cloth and gentle cleaning solutions designed specifically for delicate screen surfaces to keep my ALR screen spotless without scratching its surface. Remember, using water-dampened soft cloths and avoiding harsh chemicals preserves the screen’s integrity and reflective properties.
Hidden Lessons from My Home Theater Journey
One of the biggest lightbulb moments was realizing that not all screens are created equal—what seemed like a minor detail, like gain or material, can drastically change your viewing experience. I once believed that size alone mattered, but I learned that pairing the right size with a proper ambient light rejecting (ALR) screen with a gain around 0.7 was what truly unlocked clarity. There’s a bittersweet feeling in realizing how many years I wasted on the wrong setup, but every mistake became a stepping stone toward mastery.
Another lesson was understanding the complexity behind screen gain. It’s tempting to think that higher gain always equals brighter images, but I found that moderate gain surfaces—around 0.7—strike the perfect balance for ambient-lit rooms. Recognizing that some of my favorite content looked dull on high-gain surfaces was a pivotal realization. The impact of surface texture, coating, and layering taught me that precision and tailored choices beat generic solutions every time.
Lastly, my most profound insight was about environmental control. No matter how advanced your screen or projector is, ambient light management is crucial. Blackout curtains, controlled lighting, and proper seating positioning aren’t just aesthetic choices—they’re fundamental to a cinematic experience. Failing to address these factors often sabotaged my efforts, regardless of the quality of my screen or projector. This integrative approach is what truly transforms a home theater from average to spectacular.
My Go-To Arsenal for Home Theater Success
If you’re eager to elevate your setup, I recommend a few trusted resources and tools. First, the ultimate guide to screen materials and gain is invaluable for understanding which surfaces suit your environment. Second, the deep dive into gain material explanations helped me decode the technical jargon. Lastly, using calibration discs like Spears & Munsil enables you to fine-tune your projector setup—nothing beats hands-on adjustments for true mastery. These tools and guides give me confidence and clarity, ensuring I make informed decisions rather than guesswork.
Light a Fire Under Your Home Theater Dreams
Embarking on this projection journey might seem daunting at first, but the rewards are well worth the effort. Every obstacle you overcome, from selecting the perfect ALR screen to mastering environmental controls, brings you closer to achieving that cinematic magic in your own space. Remember, the key isn’t just equipment; it’s understanding how each element interacts. So, take the leap with confidence—your ultimate home theater experience awaits. What’s the first change you plan to make in your setup? Share your ideas below and let’s grow together in this exciting pursuit of cinema perfection.


Reading through this detailed post really hit home for me, especially the part about choosing the right gain for screens in bright rooms. Last year, I invested in what I thought was a high-gain screen, but I was disappointed because daytime viewing looked washed out and unsharp. It took a bit of research and trial-and-error to realize that a moderate gain of around 0.7 would have been much better suited for my setup. It’s fascinating how subtle differences in screen material and gain can dramatically influence our viewing experience. I’m curious, for those of you with multi-purpose rooms that get variable lighting conditions, how do you typically approach calibration? Do you prefer adjustable ambient light rejection screens or switching between different screen modes? I’d love to hear some practical tips or experiences on optimizing home theater setups that are flexible in lighting, especially as technology continues to evolve in this space.
This discussion about the importance of proper screen gain really resonated with me. I used to think that the biggest factor was just having a high-lumen projector and a large screen, but I underestimated how critical the screen material and gain are, especially in well-lit rooms. After switching from a high-gain (above 1.0) screen to a calibrated 0.7 gain ALR, the picture quality during the daytime dramatically improved—more contrast, richer colors, and less washed-out image. It was a bit of experimentation, but I found the moderate gain really offers the best balance for multi-use spaces that see variable lighting. The tip about calibration and environmental control is also spot-on; I’ve found that investing in blackout curtains and proper projector settings makes a huge difference. Has anyone experimented with adjustable screens or different gain surfaces on the same room to see which performs best across different lighting conditions? I’d love to hear different setups or solutions that others have found effective in managing variable ambient light.