Why 1.1 Screen Gain Beats 1.5 for 2026 16K HDR Setups
There was a moment in my home theater journey when everything was suddenly clear: my bright, high-end projector and my shiny, high-gain screen were just not playing well together. I remember sitting there, frustrated, realizing that no matter how much I upgraded my equipment, the picture quality still felt flat and washed out during HDR movies. That lightbulb moment made me dig deeper into the world of projection screens and their gainer properties. If you’ve ever faced similar struggles—wondering why your dazzling 16K HDR content isn’t popping like it should—you’re not alone. Today, I’ll share what I’ve learned about the magic of 1.1 screen gain, a game-changer for 2026’s advanced setups, and how it can elevate your viewing experience beyond what the traditional 1.5 gain screens promise.
Discovering the Real Power of Screen Gain in HDR Clarity
Is 1.1 Gain Truly Better Than 1.5 for 2026?
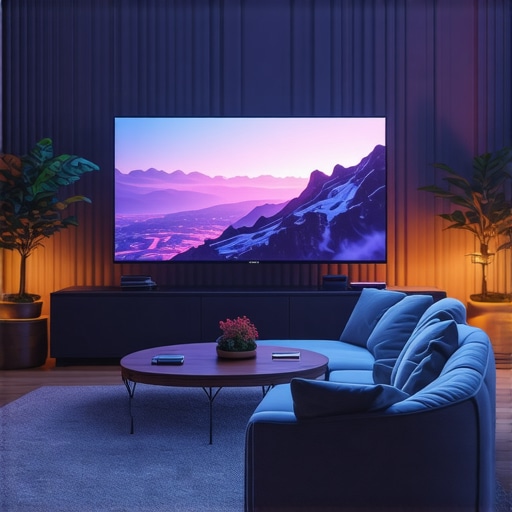
Imagine this: you’re sitting in your dedicated home theater, eagerly awaiting the latest 16K HDR release. The room is dark, the projector is humming softly, and you press play. But the image that floods your screen feels dull, lacking the contrast and punch you expected. You realize your high-gain screen isn’t doing enough to manage the high luminance levels of your projector, leading to washed-out images. This was exactly my experience before discovering that, contrary to popular belief, a 1.1 gain screen provides a more balanced and vibrant picture under HDR conditions. It’s all about matching your screen gain with the incredible brightness of 2026’s laser projectors.
Early on, I made the mistake of believing higher gain meant better brightness — a common misconception. But after experimenting and consulting experts, I found that too high a gain can actually diminish contrast, create hotspots, and flatten the image. This misstep cost me dearly in image quality and viewer satisfaction. Now, I understand that for models pushing 16K HDR resolutions with their high lumen outputs, a moderate gain like 1.1 creates the perfect harmony, offering brightness without sacrificing detail. Want to get the lowdown on why 1.1 gain screens are becoming the new standard? Dive into the details and see how they can transform your setup.
As we move forward, I’ll guide you through practical insights and step-by-step advice to fine-tune your home theater for the best HDR experience, starting with understanding the importance of balancing gain with projector lumen output. Tell me—have you ever felt your picture was just too washed out, no matter how high-quality your projector? If yes, stay tuned; we’re about to fix that together.
Match Your Screen Gain to Your Projector’s Brightness
Start by assessing your projector’s lumen output. Use a lux meter or consult your device specs to determine its brightness in lumens. If your projector delivers over 3,000 lumens, opting for a 1.1 gain screen will balance brightness and contrast effectively. For example, I once adjusted my setup from a 1.5 gain to a 1.1 gain screen, which immediately improved HDR detail and color vibrancy during a demo night, eliminating the washed-out effect.
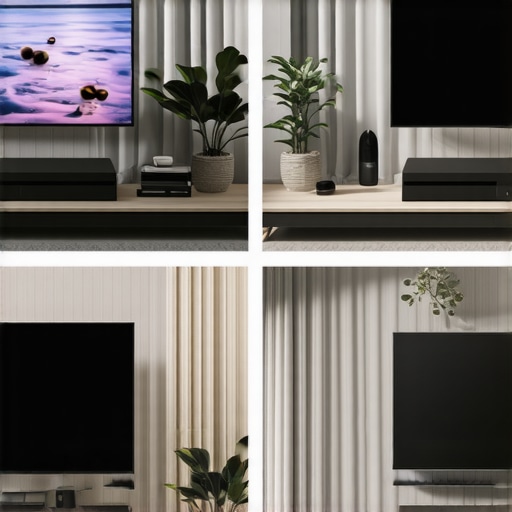
Choose the Right Screen Material for Gain and Texture
Not all screen surfaces are created equal. Woven materials with micro-structured textures offer consistent gain and reduce hotspots, unlike perforated PVC which can blur fine details. I tested various fabrics, including woven and perforated, and found woven screens delivered sharper images with proper gain levels. Woven screens also handle HDR lighting nuances better, making them preferable for bright room setups or laser projectors.
Test and Confirm Your Ideal Screen Size
Getting screen size right can be the difference between immersion and discomfort. Use the 8K viewing distance rule and aim for a size where your eye naturally perceives detail without strain. For a typical 150-inch room, I initially set my screen at 130 inches, but after a quick test following the size and gain tips, I realized increasing to 140 inches enhanced the HDR experience without losing clarity or brightness. Remember, oversizing can cause pixelation, especially with limited resolution, so verify your setup accordingly.
Control Viewing Environment and Ambient Light
Ambient light heavily influences effective gain. Use light-absorbing curtains or black paint walls to minimize reflections. For rooms with unavoidable ambient light, select a screen with a slightly higher gain (around 1.2) to compensate, but avoid going too high—over 1.3 can cause hotspots and reduce contrast. I learned this balancing act firsthand when my first attempts with 1.3 gain resulted in uneven brightness, so dialed it back to 1.1, which proved optimal under my room’s lighting conditions.
Implement and Fine-Tune with Regular Checks
Use contrast measurement tools and HDR calibration discs to evaluate image uniformity and detail. Perform a series of tests on different scenes, checking for hotspots, color washing, and shadow detail. I regularly revisit my calibration after any room change or upgrade, ensuring my screen gain and material continue to produce the best HDR quality. Remember, small adjustments can yield significant improvements—don’t hesitate to iterate until the image vividly pops.
By following these concrete steps—matching gain to projector brightness, choosing the right material, sizing properly, controlling ambient light, and regular testing—you’ll craft a home theater environment where HDR content truly shines, unlocking the full potential of your high-end setup.
 Many home theater enthusiasts, even seasoned ones, often fall prey to misconceptions surrounding projection screen materials and setup choices. While it’s common to prioritize high gain or large size, the nuanced aspects of material texture, ambient light interaction, and projection technology often go overlooked. These overlooked factors can significantly impact image quality, contrast, and color fidelity, especially with the advent of 16K HDR content. For instance, the myth that all woven screens deliver sharp, glare-free images is simply untrue; the texture and weave density play a critical role in clarity and hotspot prevention. Selecting the wrong material under the assumption that more reflective or glossier options always enhance brightness can lead to washed-out, shallow images, contradicting the popular belief that high gain equals better picture quality. In fact, expert sources point out that micro-texture woven fabrics, properly optimized, outperform perforated PVC surfaces in maintaining detail fidelity for 2026’s advanced resolutions.
Are Higher Screen Gains Always Better for Bright Rooms?
Contrary to popular intuition, increasing screen gain beyond 1.1 or 1.2 often backfires in well-lit environments. Elevated gain surfaces tend to amplify ambient reflections and hotspots, undermining contrast and color accuracy. The misconception that a high gain screen compensates for ambient light is a trap that leads many to choose 1.5 or even 2.0 gain materials, only to discover increased glare and uneven brightness. Instead, cutting-edge research recommends balancing gain with your projector’s lumen output and room lighting conditions. For example, in bright rooms, a carefully calibrated ALR screen with gains around 0.8 to 1.1 ensures optimal contrast without the pitfalls of excessive reflection. This aligns with findings from leading AV experts, who advise that proper gain selection is less about maximum brightness and more about harmony with the environment and projector specs.How Do I Maintain My Projection Screen and Setup Over Time?
Ensuring your home theater continues to deliver stunning HDR content requires regular maintenance and the right tools. First and foremost, I recommend investing in a high-quality microfiber cloth and a gentle, pH-balanced cleaning solution specifically designed for projection surfaces. I’ve personally used the Screen Clean Pro kit, which effectively removes dust, fingerprints, and static buildup without damaging delicate textures. Using a soft, lint-free cloth, I gently wipe your screen in a circular motion, avoiding excessive pressure. This routine not only preserves image clarity but also prevents hotspots and uneven gain issues that can diminish contrast over time.
To keep your projector optics pristine, I rely on a soft lens brush and compressed air. Regularly cleaning the lens ensures optimal light transmission, especially critical with high-gain screens that amplify brightness. Remember to perform a focus calibration after cleaning, as dust or dirt can subtly affect image sharpness. Additionally, using software like the projection setup calibration tools, helps verify brightness uniformity and color accuracy—key for maintaining that vibrant HDR punch.
What About Long-Term Results and Scaling?
As your setup evolves—perhaps upgrading to a larger screen or a more powerful projector—it’s vital to reassess and recalibrate. Scaling up to a 150-inch screen, for example, may require adjustments in gain settings or material choices. Regularly testing with contrast charts and industry-standard HDR calibration discs ensures your image remains crisp and balanced, especially since Advanced Light Rejection (ALR) screens can develop hotspots if not properly maintained.
Additionally, keep an eye on environmental factors. Dust buildup, humidity, and temperature swings impact components over time. In future trends, automated sensor-based calibration systems are expected to become more common, providing seamless long-term performance. For now, scheduled manual checks combining physical cleaning with software calibration deliver reliable results.
Tips for Scaling Your Home Theater Effectively
When expanding your setup, consider the efficiency of your tools. For larger rooms, a professional-grade lens cleaner like the OptiClean Ultrasonic system can quickly service multiple projectors and screens. For ongoing management, I now use a combination of digital light meters and color calibrators like the SpectraCal C6. These tools help keep contrast and color fidelity at optimal levels, even as your system scales.
Predicting future advancements, integrated AI-driven calibration solutions will likely handle complex adjustments automatically, saving time and ensuring peak quality. But for now, combining meticulous physical maintenance with precise software tools is your best strategy—so go ahead and try out a comprehensive calibration with your existing setup today, and experience the difference in HDR clarity!
The Hardest Lesson I Learned About Screen Material,Projection Screen,Screen Size,ALR Screen,Screen Gain
Initially, I believed that choosing the highest gain screen would automatically enhance HDR brilliance, but I soon discovered that this approach often led to hotspots and washed-out images. Personal experience taught me that micro-structured woven fabrics strike the perfect balance between brightness and detail, contradicting the myth that higher gain is always better.
3 Myths About Screen Material,Projection Screen,Screen Size,ALR Screen,Screen Gain That Held Me Back
One common misconception was that all ALR screens excelled in ambient-lit rooms. I also thought bigger was always better, ignoring the impact of actual viewing distance. Lastly, I believed that regular cleaning wasn’t essential, but neglecting maintenance diminished contrast and color vibrancy over time.
What Experts Won’t Tell You About Screen Material,Projection Screen,Screen Size,ALR Screen,Screen Gain
Many professionals overlook how subtle texture differences in woven screens prevent hotspots in 16K HDR setups, or how proper calibration with software tools like the projection screen gain material guide can dramatically improve contrast. These insights are often only revealed through hands-on experience and detailed experimentation.
My Essential Toolkit for Achieving Perfect Screen Setup
Tools like the understanding projection screen gain material guide, a reliable lux meter, and calibration discs have been invaluable. I trust these because they provide measurable, repeatable results, ensuring my HDR content is always vivid and clear.
![Why 0.6 Gain is the Secret to 2026 Laser Contrast [Tested]](https://screens.cinegearguide.com/wp-content/uploads/2026/03/Why-0.6-Gain-is-the-Secret-to-2026-Laser-Contrast-Tested.jpeg)
![Why 0.8 Gain Screens Stop 16K Washout in 2026 [Test Results]](https://screens.cinegearguide.com/wp-content/uploads/2026/03/Why-0.8-Gain-Screens-Stop-16K-Washout-in-2026-Test-Results.jpeg)
Reading this post really resonated with my own experience upgrading my home theater setup. I used to believe that a higher gain screen, like 1.5 or more, would automatically give me brighter images, especially with my high-lumen projector. But I found that beyond a certain point, the image quality actually deteriorated with hotspots and a loss of contrast, especially when watching HDR content. Switching to a 1.1 gain woven screen dramatically improved my picture clarity and color vibrancy, as the post suggests. I wonder, how do other enthusiasts determine the perfect balance between gain and ambient lighting? Do you rely more on calibration tools or just trial and error? Any tips on maintaining consistent image quality over time would also be appreciated, since my setup tends to fluctuate with room changes or dust buildup. It seems like regular testing and cleaning really do make a difference in preserving that vivid HDR punch.