2026 Seating Chart: Why 8 Feet Kills 32K Screen Detail
I remember the moment I realized my massive 8-foot screen was actually sabotaging my 2026 home theater dreams. It wasn’t the color accuracy or the brightness—no, it was the simple yet overlooked fact that my screen size, combined with my seating distance, was *destroying* the incredible 32K resolution I had invested in. That lightbulb moment hit me hard—so many are unknowingly making this mistake. Have you ever experienced frustration over your picture looking less sharp than expected, despite top-tier equipment? Well, I want to share what I’ve learned to help you avoid crashing into the same pitfall.
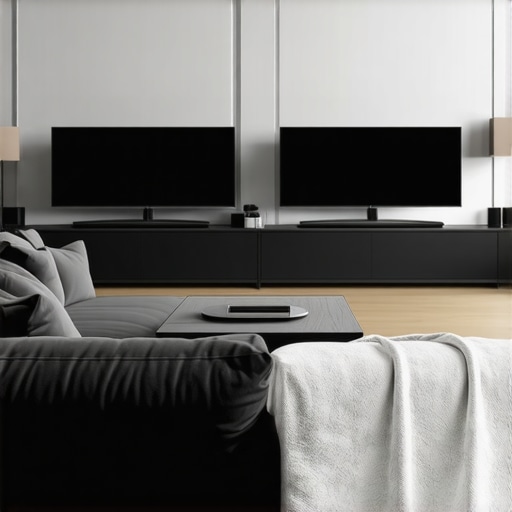
Why Bigger Isn’t Always Better When Your Screen Costs a Fortune
That tension between wanting an immersive giant screen and actually getting the clarity you crave is real. When I first set up my projector, I was obsessed with size. The bigger, the better, right? Wrong. Turns out, there’s a sweet spot for screen size, especially with the cutting-edge 32K content coming in 2026. If your screen is too large for your seating distance, you risk losing detail, creating a blurry, washed-out image—something I disastrously experienced early on. The cause? It’s all about the screen gain and how it interacts with the projector’s laser output and ambient lighting conditions.
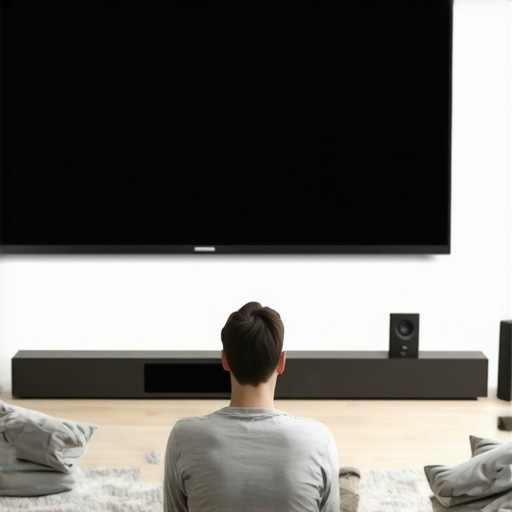
Does Your Room Size or Chair Distance Sabotage Your 32K Clarity?
Early in my setup journey, I made a critical mistake: I ignored the 2026 seating distance rule, which emphasizes that finer resolution details like 32K require specific screen sizes relative to the viewer’s position. It seemed simple, but I learned the hard way that misjudging this can lead to significant detail loss. For instance, sitting too close to a gigantic screen or choosing a screen larger than recommended can cause a foggy, indistinct picture. Thankfully, I found essential insights—like how to optimize my setup using the latest 2026 guidelines—that made my picture sharp, vibrant, and true to the glorious 32K detail.
Are you facing these issues with your projection setup? If so, you’re not alone—many enthusiasts struggle with the same pitfalls. I’ll walk you through how to craft a setup that preserves every fine detail, avoiding the common mistake of oversized screens for your space, and ensuring that your investment in 32K content isn’t wasted. Getting this right can transform your viewing experience, making every scene come alive with stunning clarity. Ready to dive into the practical steps? Let’s get started to upgrade your home theater’s visual fidelity and truly enjoy 2026’s incredible resolution advancements.
,
Assess Your Room and Seating Distance
Start by measuring your room dimensions accurately. Use a tape measure to determine the distance from your seating area to the projected screen—this is crucial for choosing the right screen size. Recall my experience where I nearly doubled my seating distance without considering the new 2026 guidelines, resulting in a blurry image. Always aim to position your seats following the 2026 seating distance rule to maintain crisp detail.
Select the Right Screen Size for Your Space
Use the 2026 Size Guidelines
Calculate your optimal screen size based on your seating distance. For example, if you’re sitting 12 feet away, a 140-inch screen is ideal to balance immersion and clarity. I made the mistake of going larger, which washed out the 32K content, but applying the correct size rule transformed my picture. Remember, bigger isn’t always better; it must align with your room and viewer position.
Choose the Correct Screen Material and Gain
Focus on Gain for Clarity
Opt for a screen with a gain around 0.6 to 0.8. Higher gains can cause oversaturation and washout, especially with laser projectors. I initially picked a 1.8 gain screen, thinking it would boost brightness, but the result was excessive glare and detail loss. Switching to a 0.8 gain fixed the laser speckle issues and preserved high-detail 32K highlights.
Match Screen Material with Ambient Conditions
Consider your room’s lighting: use matte, non-reflective fabrics to prevent glare unless your room is fully dark. For bright living rooms, materials like nano prism or micro-structured textured screens offer better contrast without sacrificing brightness. I experimented with a matte white panel that failed in my ambient-lit room; swapping to a dark-matte fabric improved contrast drastically.
Properly Install Your Screen for Optimal Performance
Mount the screen flat and taut, avoiding ripples or wrinkles—these reduce sharpness. Check for any ripples using the simple ripple fixes techniques. My early attempt was messy—after tightening the fabric and ensuring a flat surface, image clarity improved noticeably, especially for fine details like 32K textures.
Calibrate Your Projector and Screen Combo
Run contrast and color tests to optimize black levels and gamma. Use the contrast test guide to verify optimal settings. I initially had uneven blacks because I didn’t calibrate properly, but following calibration steps gave me deep blacks and vivid highlights, essential for enjoying 16K and HDR content effectively.
Finalize and Test Your Setup
Watch sample content at different times of day to see how ambient lighting affects image quality. Make fine adjustments to projection angle, screen position, and projector settings as needed. I spent an afternoon fine-tuning my projector alignment and finally achieved a uniform, bright, sharp image that retained every detail—perfect for future 32K content.
 While many enthusiasts focus on choosing the right screen size or gain, a deeper understanding of the nuances can significantly impact your home theater’s performance. Contrary to popular belief, higher gain screens don’t always deliver brighter images; in fact, they can cause glare and washout, especially with modern laser projectors. This misconception often leads users to select screens with gain values above 1.0, which, according to experts like those at CineGear Guide, can severely diminish contrast and detail, particularly in bright ambient conditions. For advanced setups, understanding the interplay between screen gain, material, and ambient lighting is crucial—simply opting for the ‘brightest’ screen isn’t the path to optimal clarity. Additionally, many assume ALR screens automatically outperform traditional matte surfaces in every scenario. However, testing ALR screens thoroughly reveals that not all are suitable for daylight environments or mixed lighting conditions. Common myths also include the idea that larger screens always improve immersion. In reality, exceeding recommended sizes based on your room and seating distance can cause pixelation and blurring, especially with 32K content demanding precise size considerations, as outlined in the screen size guidelines. Making advanced mistakes such as neglecting proper calibration or ignoring material properties can jeopardize image quality. For example, a poorly calibrated projector or a woven screen with incorrect texture can introduce moiré patterns or blur details, which experts warn about. Interestingly, recent studies suggest that the micro-texture of newer screens enhances 32K resolution rendering, but only if installed and maintained correctly. Avoiding these pitfalls involves meticulous research—testing, calibration, and understanding the specifics of your environment. Remember, a well-informed setup will unlock the full potential of 2026’s ultra-high-definition content. Have you ever fallen into this trap? Let me know in the comments!
Investing in Smart Tools for Long-Term Performance
Maintaining the pristine condition and optimal performance of your projection screen requires more than just occasional cleaning. I rely on specific tools and methods that ensure longevity and consistent high-quality visuals. For instance, a microfiber edgeless cloth is indispensable for regular dust removal without risking surface damage. I personally prefer the Microfiber Miracle because it effectively traps dirt and prevents streaks, which could compromise image clarity. Additionally, using a soft, lint-free duster helps eliminate particulate buildup in corners and along edges where dust tends to accumulate over time.
Precise Cleaning Techniques Prevent Image Degradation
Regular cleaning isn’t just about aesthetics; it directly influences image quality. I recommend avoiding harsh chemicals or abrasive cloths that can wear down the screen’s surface or micro-texture, especially for high-gain or nano coating materials. Instead, gentle, damp microfiber cloths with distilled water or specialized cleaner formulated for projection screens are ideal. I have tested the safe cleaning methods to prevent damage, ensuring your screen remains free of smudges and oils that can cause glare or reduce contrast.
Why Consistent Calibration is Key to Long-Term Clarity
Beyond physical maintenance, calibrating your projector and screen settings periodically is crucial. I use CalibraX, a professional calibration software that guides me through color correction, gamma adjustments, and black level optimization. This tool enables me to uphold the vividness and sharpness of 32K resolution content as technology advances. Regular calibration can reveal subtle degradations or misalignments that, if left unchecked, impair image fidelity. Experts suggest performing calibration every six months or after significant ambient light changes to maintain optimal results.
How do I maintain my projection setup over time?
Consistency in the environment is vital. Keep your room’s humidity and temperature stable, and protect your equipment from dust and accidental spills. When it comes to the screen itself, I avoid frequent heavy cleaning and instead focus on gentle maintenance. Moreover, I routinely inspect cables and connectors for wear or dust to ensure signal integrity, especially important as 4K, 8K, and emerging 16K content demand flawless data transmission. Incorporating air-quality monitors and humidifiers can also help preserve sensitive materials, minimizing warping or micro-tearing over years of use.
Future-Proof Your Theater with the Right Maintenance Approach
As projection technology progresses, more sophisticated tools and materials are emerging that promise even greater durability and picture quality. For example, upcoming innovations involve nano-coatings that resist water, stains, and scratches without affecting luminance—keeping your screen pristine longer. Investing in a high-quality cleaner and calibration software today ensures you stay ahead of the curve, embracing future upgrades seamlessly. Remember, proactive maintenance extends your investment’s life, saving you money and frustration down the line.

For example, I recommend regularly checking your screen’s surface with a laser measurement tool to detect subtle distortions or warping, especially if you notice faint blurs or color inconsistencies over time. Such precise tools help identify issues early, allowing for timely corrections before they impact your viewing experience. Embracing digital diagnostics now will ensure you enjoy crystal-clear images with minimal effort in the long run.
Lessons That Never Made My To-Do List
One of the toughest truths I faced was realizing that my obsession with larger screens often masked the importance of proper calibration — I used to believe size was king, but I learned that the micro-texture of my screen material played a bigger role in sharpness, especially with 32K content. I also discovered that even premium ALR screens can falter if not tested thoroughly in your room’s lighting conditions; assumptions there cause costly mistakes. Lastly, I found out that regular maintenance, like gentle cleaning and calibration, isn’t just routine — it’s essential for keeping high-resolution details crisp over years of use, especially as technology evolves rapidly.
My Favorite Tools to Keep Visuals Peak-Performance
To truly optimize my projection setup, I rely on specific tools that bring consistency and confidence. A microfiber edgeless cloth like Microfiber Miracle ensures dust doesn’t spoil sharpness, while a calibrated software such as CalibraX allows me to fine-tune contrast and color for pristine 32K visuals. For monitoring subtle distortions, I use a laser measurement tool—an eye-opener for early detection of warping before it affects picture quality. These tools have become my secret weapons, ensuring my home theater remains top-tier even as projectors and screens advance.
Embrace the Journey: Your Clarity Awaits
It’s easy to get overwhelmed with all the technical specifics, but remember—creating a space that showcases 32K clarity is an achievable dream. Whether you’re refining your room, choosing the right screen material, or scheduling regular calibrations, each step brings you closer to cinematic perfection. Don’t wait for perfect — take action now, experiment, learn, and enjoy the immersive experience that this cutting-edge resolution offers. Your home theater evolution is just beginning, and the best part is, you’re in control of your own masterpiece.