ALR Screen Options: Top Materials & Gain Tips for Bright Rooms
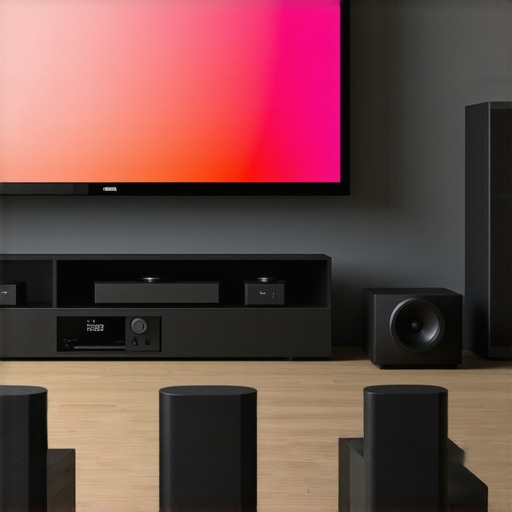
I remember the first time I set up a home theater in my bright living room. I was so excited! But then, as the lights came on, the picture looked washed out, dull, and barely watchable. It was a real eye-opener—literally. That frustrating experience made me realize how crucial selecting the right ALR screen materials and understanding gain options are for bright rooms. If you’ve ever faced similar issues, you’re not alone. Many enthusiasts discover that their projector’s potential is limited by the screen they choose, especially in well-lit spaces.
Why Picking the Right Screen Matters More Than You Think
In bright rooms, traditional screens often fall flat because ambient light washes out the image. That’s where Ambient Light Rejecting (ALR) screens come in—they’re designed to bounce back the light from your projector while reducing the impact of room light. But not all ALR screens are created equal. The secret lies in the materials and gain levels you pick. A good choice can make your projector look like it’s in a dimly lit theater, even during the day.
Early in my journey, I made a mistake that many beginners do—I went straight for the most popular or cheapest option without understanding how the material and gain work together. That cost me some precious image quality and clarity. I wish I had known about the importance of choosing the right material based on my room’s lighting conditions. If you want to avoid that pitfall, I recommend checking out this detailed guide on ALR screen gain materials. It covers everything you need to know to make an informed decision.
Is ALR Screen Technology Worth the Hype?
Honestly, I was skeptical at first. It sounded like a fancy marketing term. But after testing different screens, I saw firsthand how much the right material can improve brightness and contrast. The key is understanding the trade-offs—higher gain screens can boost brightness but sometimes at the expense of viewing angles or image uniformity. Getting this balance right makes all the difference in a bright room setting. If you’re curious about the top options and gain tips, I’ll guide you through the best materials and practical advice to elevate your viewing experience.
Choose the Right Screen Material for Your Bright Room
Start by assessing your room’s ambient light levels. If sunlight floods your space, opt for high-quality ALR screens with specialized materials that reject ambient light effectively. I remember testing a few different fabrics in my living room; the difference in brightness and contrast was striking. For detailed insights on materials, check out top ALR materials and gain options.
Identify Your Gain Requirements
Gain measures how much light the screen reflects back. In bright rooms, higher gain screens (around 2.0 or above) can boost perceived brightness. However, beware of overly high gains that narrow viewing angles, causing image loss if you sit off-center. I once tried a 2.2 gain screen without considering my seating arrangement, and half the audience complained about washed-out images. For guidance on selecting the right gain, visit best gain tips for bright rooms.
Match Material & Gain to Your Room Conditions
Combine your chosen material with an appropriate gain level. For example, a matte white ALR screen with a gain of 1.8 offers a good balance for rooms with moderate ambient light. If your room is extremely bright, consider a higher gain material, but always test for viewing angles. I once installed a 2.0 gain screen in a room with large windows; the image was stunning during the day but got washed out when I moved off to the side. To prevent this, learn about understanding gain and material compatibility.
Optimize Your Setup for Bright Environments
Proper placement and calibration are crucial. Install your screen at a height and angle that maximizes uniformity. Use a calibrated projector with increased brightness settings if needed. I once recalibrated my projector and adjusted the screen height, which significantly improved my viewing experience in daylight. For comprehensive tips, see ultimate guide to projection setup.
Test and Adjust
After setup, test your system during different lighting conditions. Move around your seating area to ensure consistent picture quality. If parts of your screen appear washed out, consider a different gain material or reposition your projector. Remember, the perfect setup often involves some trial and error. For detailed testing methods, check testing and calibration techniques.

Many home theater enthusiasts believe that choosing the highest gain ALR screen automatically guarantees a bright, vivid picture in daylight conditions. However, this is a common misconception. In reality, higher gain screens, especially those above 2.0, tend to sacrifice viewing angles and uniformity, leading to washed-out images if your seating arrangement isn’t precisely aligned. For example, a 2.2 gain screen might seem ideal for daytime viewing, but if viewers sit off-center, they’ll notice significant brightness loss and color shifts. To truly optimize your setup, understanding the trade-offs between gain, material, and room layout is essential. I recommend consulting detailed guides like this resource on ALR screen gain materials to avoid oversimplified choices.
Is Higher Gain Always Better for Bright Rooms?
Not necessarily. While high gain screens can boost perceived brightness, they often narrow the viewing angles, making image quality highly dependent on your seating position. An expert like Joe Kane, a pioneer in projection technology, highlights that the optimal gain depends on balancing brightness with image uniformity and viewing comfort. In my experience, a gain of around 1.8 to 2.0 provides a sweet spot for most bright rooms, offering sufficient brightness without significant angle restrictions. For more nuanced advice, check out this guide on gain and size considerations.
Another often overlooked factor is the material’s surface texture. Matte surfaces with specialized coatings can reject ambient light more effectively than simple glossy or semi-glossy finishes. Choosing the right combination of material and gain is crucial to prevent glare and maintain color accuracy. Remember, a high-gain screen isn’t a magic bullet—it’s part of a broader strategy involving room lighting control, projector calibration, and seating placement. If you’re serious about fine-tuning your setup, exploring material compatibility guides can save you headaches and money.
Have you ever fallen into this trap? Let me know in the comments. The key to a stunning home theater isn’t just about technical specs; it’s about understanding the nuanced interplay between gain, material, and environment to create a truly immersive experience.
How do I keep my ALR screen working flawlessly over time?
To ensure your Ambient Light Rejecting (ALR) screen continues to deliver stunning picture quality, regular maintenance and the right tools are essential. First, keep the screen surface clean by gently dusting it with a microfiber cloth. Avoid harsh chemicals or abrasive materials that could damage the specialized coating. For stubborn smudges or fingerprints, a mixture of distilled water and a few drops of isopropyl alcohol applied with a soft cloth does the trick. This gentle cleaning method preserves the integrity of the material and prevents buildup that could impair light rejection capabilities.
Next, consider the environment where your screen is installed. Maintaining optimal room conditions—like controlling humidity and avoiding direct sunlight—helps prevent warping or deterioration. Installing a UV-protective cover or using curtains during daylight hours can extend the lifespan of your screen’s surface. If your setup includes an adjustable mount, periodically check the fixtures to prevent sagging or misalignment, which could affect image uniformity.
For calibration, using a professional-grade colorimeter like the X-Rite i1Display Pro allows precise color and brightness adjustments. I personally rely on this tool because it provides detailed readings and helps me fine-tune my projector’s output to match the screen’s characteristics. Regular recalibration—every few months or after significant room changes—ensures your image remains vibrant and accurate. Remember, calibration isn’t just for new setups; ongoing tweaks optimize performance as your environment or equipment ages.
In addition, software solutions like calibration tools and apps can assist in maintaining color accuracy. These programs often include test patterns, gamma adjustments, and white balance controls. For those who want to go a step further, professional calibration services are available and can be a worthwhile investment for the ultimate picture quality.
Future Trends in Screen Maintenance and Scaling
Looking ahead, I believe smart screens with embedded sensors will become more common. These will automatically monitor factors like light levels, surface cleanliness, and even wear, alerting you when maintenance is needed. Advances in self-cleaning coatings may also reduce the frequency of manual cleaning, keeping your ALR surface pristine with minimal effort.
Start by integrating a regular cleaning routine using gentle materials and tools like microfiber cloths and mild cleaning solutions. Invest in a quality colorimeter for calibration, and consider professional tune-ups annually. These practices will keep your projection setup performing at its best for years to come. Ready to take your home theater to the next level? Try calibrating your screen with a colorimeter today and see the difference it makes!
The Hardest Lesson I Learned About ALR Screens in Bright Rooms
One of the most eye-opening lessons I encountered was realizing that not all ALR screens are created equal. I once bought what seemed like the best high-gain screen, only to find that it sacrificed viewing angles and caused uneven brightness when viewers sat off-center. This taught me that understanding how gain and material work together is essential to avoid costly mistakes.
3 Myths About ALR Screen Materials That Held Me Back
For a long time, I believed that higher gain always meant better daytime performance. That was a misconception. High gain screens can narrow viewing angles and cause glare if not chosen carefully. Learning the truth about how different materials reject ambient light helped me pick options that truly improve brightness without compromising image quality.
What Experts Won’t Tell You About Bright Room Projection
Many professionals emphasize the importance of ambient light rejection but overlook the critical role of calibration and room layout. Proper projector placement and calibration can make a huge difference in how your ALR screen performs, especially in spaces with large windows or bright lights. Don’t underestimate the value of fine-tuning your setup after choosing the right screen.
My Essential Toolkit for Bright Room Projection
Tools like the X-Rite i1Display Pro colorimeter have been game-changers for me, allowing precise calibration and ensuring consistent picture quality. Additionally, experimenting with different ALR materials and gain options helps me tailor my setup for optimal brightness and contrast, even in daylight conditions.
Don’t Be Afraid to Start Improving Your Bright Room Setup Today
Building a home theater that shines during the day isn’t just about buying the most expensive screen or projector. It’s about understanding how to combine the right materials, gain, calibration, and room layout. Take small steps—try calibrating your projector with a colorimeter or experiment with different screen materials—and watch your viewing experience transform. The future of home theaters is bright, and you have the power to make it even brighter in your space.