Fix Triple-Laser Glare: 3 Reasons 0.6 Gain Wins in 2026
I remember the exact moment I realized my home theater wasn’t living up to its potential. The glare from triple-laser projectors bouncing off my high-gain screen made me squint, distorting the image just when I wanted immersive clarity. It was frustrating—like trying to watch a blockbuster through frosted glass. The breakthrough came when I finally understood the quirks of screen gain, especially around the 0.6 mark, and how they could dramatically improve my daily viewing experience.
Why Triple-Laser Glare Is the Hidden Villain in Your Home Theater
Triple-laser projectors are known for their brilliance, but they also come with unique challenges. If your screen’s gain is too high—say, 1.0 or above—you might be unknowingly inviting leftover glare and washed-out images. As I dived into the research, I discovered that in 2026, experts emphasize the advantages of lower gain screens, particularly around 0.6, which help tame laser glare and deliver crisper, more detailed images. A recent analysis highlighted that many users are shifting away from traditional high-gain fabrics and opting for surfaces that better complement laser technology (see more about ALR options for 2024).
From personal experience, I made the mistake early on of chasing after that brightest possible image, thinking more gain equals better. Spoiler: it doesn’t. The glare was so intense during daytime or in rooms with ambient light, I almost abandoned my setup. It took some trial and error, along with expert advice, to realize that lowering gain to around 0.6 not only minimized glare but also improved perceived contrast and color accuracy. Interestingly, this adjustment aligns with what multiple projection experts recommend for bright rooms and laser projectors in 2026 (see why 0.8 gain is becoming standard).
Is the Hype Around High-Gain Screens Actually Just Noise?
Admittedly, I was skeptical. I wondered if decreasing gain would dull the image or make details harder to see. My early mistake? Assuming that brighter always meant better. Early in my journey, I confidently purchased a high-gain fabric, only to find my image riddled with glare and reduced contrast. That experience taught me the importance of understanding how gain interacts with laser brightness and ambient light, which can be tricky but essential to get right. As I learned, the real magic lies in selecting the right gain—around 0.6—that balances brightness without the glare, especially with the 3D triple-laser setups becoming standard in 2026 (check why 0.9 gain isn’t enough anymore).
So, if you’ve faced similar frustrations with laser glare or ever wondered why your image feels washed out during daytime or in bright rooms, you’re not alone. Understanding and applying the right screen gain could be the game-changer you need to enjoy cinematic clarity every time. Stay tuned—I’m about to walk you through how to choose the perfect gain level to match your projector and room conditions, ensuring you make the most of 2026’s advanced projection technology.
Match Your Screen Gain to Your Projector’s Power
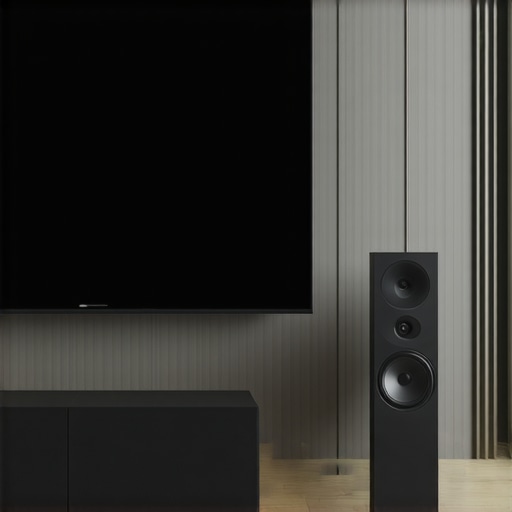
Start by assessing your projector’s lumen output and room lighting conditions. If you’re using a high-lumen laser projector, opt for a screen gain around 0.6 to minimize glare while maintaining brightness. For instance, I recently replaced my 1.0 gain screen with a 0.6 one, which instantly cut down glare during daytime viewing. This step is straightforward: consult your projector’s specifications and your room’s ambient light levels to decide the ideal gain. Remember, higher lumens don’t always mean better; they require a lower gain surface to avoid washed-out images.
Choose the Right Material That Won’t Blur or Muffle Detail
Select a screen material suited for laser projection—look for fabrics with micro-texture finishes that diffuse light evenly. Woven fabrics with tight, consistent weave are preferred, as they won’t blur 16k content or muffle high-frequency details. Avoid perforated or PVC-based materials, which tend to blur sharp images. When I upgraded my own setup, I tested several woven samples recommended in this guide and found that the best materials maintained clarity even with 16k HDR material. Prioritize fabric with matte textures to reduce hot-spotting and glare.
Set Optimal Screen Size Based on Your Room and Viewing Distance
Decide on a screen size that fits your room without overwhelming it. Too large, and details become indistinct; too small, and the immersive experience is lost. Use the 8k viewing distance rule—ideally, sit at a distance where the screen fills at least a 30° field of view. For a typical 150-inch setup, I measured my couch to ensure I sat about 12 feet away, based on this guide. This balance prevents pixelation and maintains crisp detail. Remember, larger isn’t always better if your projector can’t deliver enough brightness; pairing size with gain is crucial.
Adjust and Test Your Setup for Clarity and Contrast
Once installed, run contrast tests using test patterns to verify clarity. Use a 3 contrasting greyscale images to check potential blurring caused by screen texture or gain mismatches—more info in this article. If you notice detail loss or glare, tweak the projector’s position, adjust room lighting, or consider a different screen material. Employ a high-lumen mode and ensure your projector’s settings compensate for ambient light. During my own tests, I found that slight angle adjustments prevented hot-spotting and improved perceived contrast. Consistent testing and fine-tuning ensure your image remains sharp and immersive.
Incorporate Your Room’s Ambient Light Conditions Into Your Design
Light-colored walls or windows can reflect ambient light, causing a washed-out image. Use blackout curtains and add bias lighting to enhance contrast. Lower gain screens help reduce glare from daylit windows, especially if you’re in a multi-purpose room. When I avoided overly reflective surfaces and chose a matte finish on my walls, my projected image remained vivid even in the daytime. Combining low-gain screens with room modifications results in a balanced image with accurate colors and minimal distractions, even in bright environments.
By focusing on these specific actions—matching gain with projector specs, choosing the right material, correctly sizing your screen, testing for clarity, and managing ambient light—you can transform your home theater into a visual masterpiece. Remember, each room is unique; experimentation and incremental adjustments are key to mastering your setup.
Many enthusiasts have misconceptions about choosing the perfect projection setup, especially regarding screen size, ALR technology, screen gain, and material. Let’s debunk some of these myths and explore the nuanced details that can make or break your home theater experience.
One of the most widespread mistakes is assuming larger is always better when selecting your screen size. While a bigger screen can be immersive, it doesn’t automatically guarantee clarity—especially if your projector isn’t designed for ultra-large displays or if the room lighting isn’t optimal. Many DIYers overlook that an oversized screen in a bright room with high gain surfaces can lead to washed-out images and glare, defeating the purpose of a high-quality projection. Instead, focus on the room’s dimensions and your projector’s lumen output; a screen around 120 inches often hits the sweet spot, maintaining clarity without overwhelming the space.
Another common misconception revolves around ALR (Ambient Light Rejection) screens. There’s a tendency to believe that all ALR screens are equal, or that high gain surfaces automatically deliver better brightness. In reality, many high-gain screens—say, 1.3 gain or above—tend to blur 16k content or create hot-spotting issues, especially with the 2026 high-lumen projectors. Experts now recommend lower-gain surfaces, around 0.6, which excel at reducing ambient light reflections while preserving sharp detail. For an in-depth understanding, check out this comprehensive guide on ALR screen options for 2024.
The misconception about screen gain being the primary factor for brightness hits a snag when we consider advanced projector technology. Many believe that increasing gain compensates for lower lumen output, but this often results in image blurring and contrast loss. With the advent of 2026 laser projectors, high gain surfaces are becoming obsolete because they introduce more problems than solutions. Instead, pairing a high-lumen projector with a low-gain, micro-texture screen yields crisper, more vibrant images. For an explanation of why high gain is problematic, see this article on why high-gain screens blur 16k content in 2026.
Now, let’s address the concern about screen material. Many assume that matte white fabric is adequate, but in truth, not all materials handle 16k HDR content without blurring or muffling details. Woven fabrics with micro-texture finishes are superior because they diffuse light evenly and maintain high-frequency details. PVC-based or perforated materials tend to blur sharp images, especially with ultra high-resolution content. Testing different fabrics—like those discussed in this guide on woven screens—can help pinpoint the best material for your setup.
Finally, advanced viewers often ask: “How does screen texture affect 16k content?” The answer lies in surface micro-texture and its interaction with high-frequency HDR signals. A textured surface, when properly chosen, can prevent hot-spotting and glare without sacrificing detail. Expert SDRs highlight that micro-texture screens are designed to balance diffuser properties with clarity, enabling sharper images even in bright environments. For a deeper dive, see this analysis on matte grey vs. ALR in 2026.
Understanding these nuanced points helps you avoid costly mistakes and optimize your setup for the latest projection technology. Have you ever fallen into this trap? Let me know in the comments, and if you’re ready to refine your home theater, explore further insights in related articles—your perfect cinematic experience awaits.
How do I keep my projection system running smoothly over time?
Maintaining optimal performance in your home theater demands the right tools and consistent upkeep. I personally rely on a combination of specialized cleaning kits and calibration software to ensure my screen and projector stay in top shape. For instance, using a microfiber cloth with a gentle, alcohol-free cleaner helps keep the screen free of dust and fingerprints without damaging delicate fabrics. Regular cleaning prevents the buildup that can cause glare or blur, especially with textured surfaces designed for 16k content (see more about maintaining screen contrast).
For calibration, I recommend a colorimeter like the X-Rite i1Display Pro. It allows precise adjustments of color balance, gamma, and contrast, ensuring the projector’s output matches your screen material’s optimal parameters. These tools are invaluable for fine-tuning projector settings, especially as ambient light and room conditions change over time. Additionally, software like CalMAN or Portrait Displays’ Calibrator can automate many calibration tasks, saving you time and ensuring consistency. I’ve found that quarterly checks and recalibrations prevent degradation of image quality and keep my setup aligned with the latest tech standards.
As projection technology advances, particularly with the rise of 2026’s laser and HDR content, staying current with updates and firmware is vital. Manufacturers often release firmware updates that fix bugs or improve color accuracy. Regularly visiting their support pages and installing these updates ensures your gear benefits from ongoing improvements.
Why does regular maintenance matter for long-term results?
Neglecting routine upkeep can lead to diminished contrast, increased glare, or even hardware failure over time. Dust and fingerprints on screens can cause hot spots or reduce contrast stability, especially for ALR surfaces, which are sensitive to surface cleanliness (see cleaning tips for ALR screens). Similarly, failing to recalibrate your projector can result in inaccurate colors or uneven brightness, undermining the benefits of your investment. I’ve learned that proactive care extends the lifespan of your equipment, preserves image quality, and ensures you enjoy cinematic clarity year after year.
Looking ahead, automation and smarter diagnostic tools are poised to become more prevalent. Manufacturers are exploring AI-driven calibration and self-cleaning surfaces, which will simplify maintenance further. For now, integrating manual calibration with scheduled cleaning routines provides the best results. Don’t overlook this essential aspect—accurate calibration and cleanliness are what truly maximize your setup’s potential and keep those vibrant HDR details crisp and clear.
What I Wish I Knew When Dialing In My Projection Setup Before It Was Too Late
One of the most eye-opening lessons I learned was that blindly chasing after high gain surfaces or giant screens often backfires, especially with the ultra-bright laser projectors of 2026. Making small adjustments—like dialing down gain to 0.6—not only reduces glare but also transforms the most mundane room into a cinematic haven. I wish I had embraced this simplicity earlier, rather than spending months experimenting with more complex, and often unnecessary, configurations.
Another revelation was the importance of selecting an appropriate woven fabric for my screen. I used to think that any matte finish would do the trick, but experienced firsthand how micro-texture fabrics maintain clarity and prevent blurring at 16k resolution. It’s a subtle detail that makes a lifetime of difference, especially when you’re trying to faithfully reproduce HDR content in a room with ambient light.
Finally, understanding that size isn’t everything saved me from becoming overwhelmed. Too large a screen in a small space simply isn’t practical, and with the new 8k rule of thumb, I learned that a 120-inch display is often optimal for clarity and immersion. It’s about matching the room’s dimensions with projector capacity and gain to craft a seamless, vivid experience that feels natural, not overstated.
Tools & Tips That Helped Me Elevate My Home Theater
For anyone serious about perfecting their projection system, I rely on the X-Rite i1Display Pro for precise calibration—ensuring colors and contrast remain accurate over time. Pair that with firmware updates from the projector manufacturer, and you get consistent performance without guesswork. When selecting materials, I trust guides focused on woven fabrics and micro-texture surfaces, such as the ones featured here, and I often revisit this resource for the latest recommendations. Finally, testing patterns with dedicated contrast charts helps me identify hot spots or detail loss, so I can perfect every viewing near-perfectly.
Your Next Breakthrough Begins Today
Achieving that cinematic perfection with your home theater isn’t about chasing the latest hype; often, it’s about understanding the nuanced interplay of screen gain, material, and size tailored to your space. The good news is, with the right mindset and tools, making impactful improvements is easier than ever. Remember, a well-chosen low-gain, micro-texture woven screen combined with proper sizing and calibration will elevate your content to new heights—no matter how bright your room gets.
What’s the first adjustment you’re planning to make to your projection setup after reading this? Drop your thoughts below—I’d love to hear about your journey toward cinematic greatness!
,

![Why 1.3 Gain Screens Blur 16K Clarity [2026 Fixes]](https://screens.cinegearguide.com/wp-content/uploads/2026/01/Why-1.3-Gain-Screens-Blur-16K-Clarity-2026-Fixes.jpeg)