Ultimate Guide to Effective ALR Screen & Gain Options for Bright Rooms
Have you ever set up your home theater only to realize that daylight or ambient lighting ruins your movie night? I remember the frustration of investing in a high-quality projector, only to be disappointed when the picture washed out during the day. It was a lightbulb moment for me—bright rooms demand a different approach, especially when choosing the right ALR screen and gain options. If you’ve faced similar issues, you’re not alone. Today, I’ll guide you through the essentials of selecting the perfect projection screen for bright environments, so you can enjoy vivid, clear images no matter how much daylight sneaks in.
Why Bright Rooms Need Special Attention for Projection Setup
Most folks assume that a good projector and a dark room are enough for a cinematic experience. But in reality, many of us don’t have the luxury of total darkness—whether it’s a living room with large windows or a multi-purpose space. Bright ambient light can wash out images, making them dull and hard to see. That’s where the importance of screen material, gain, and ambient light rejection (ALR) technology come into play. The right combination can make a huge difference, transforming a compromised space into a vivid, cinema-quality environment. Early on, I made the mistake of ignoring ambient light and choosing a standard matte white screen, which simply couldn’t handle the brightness. This mistake taught me that understanding projection screen gain and ALR options is crucial for bright room setups.
Is All ALR Screens and Gains Created Equal?
Not exactly. When I started shopping for screens, I thought any high-gain screen would do the trick. Spoiler: it doesn’t. Many high-gain screens can produce an overly bright image but at the cost of viewing angles and color accuracy. The key is finding a balance—something that boosts brightness without sacrificing image quality. That’s why I always recommend looking into specific ALR technologies and gain levels designed for bright rooms. For instance, some materials are engineered to reject ambient light from certain angles, keeping your picture crisp and colorful even with lights on. If you want to dive deeper into the options, check out this comprehensive guide.
So, if you’ve been battling glare, washed-out colors, or lackluster images in your bright space, don’t worry. There are proven solutions. The next step is understanding how to pick the right gain and material that match your room’s lighting and your viewing needs. Ready to learn how? Let’s get into the specifics and turn your bright room into a home theater haven.
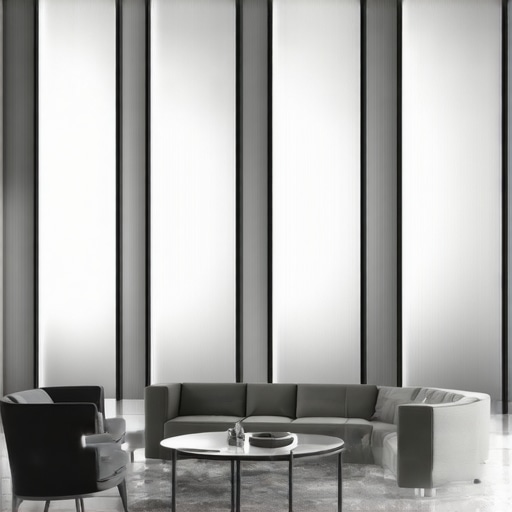
Select the Right Screen Material for Bright Environments
Start by narrowing down your options to screen materials specifically designed for ambient light rejection (ALR). These screens are engineered to reflect light from your projector while absorbing or redirecting ambient light from other angles. When I upgraded my setup, I chose an ALR screen with a matte finish that minimized glare and retained color accuracy. To find the best fit, check out this detailed guide on projection screen materials. It helped me understand which surfaces deliver high contrast in bright rooms without washing out the image.
Understand and Match Gain Levels to Your Room
Gain measures how much light your screen reflects toward the viewer. For bright rooms, a gain between 1.4 and 2.0 is ideal. Higher gains create a brighter image but often at the expense of narrow viewing angles and potential hot-spotting. I initially tried a 2.0 gain screen, which made the picture appear vibrant when seated directly in front, but I noticed severe color shifts at off-angles. After reading this comprehensive guide on gain, I opted for a 1.8 gain screen, balancing brightness and viewing flexibility. When choosing gain, consider your seating positions and room layout to avoid issues like hot spots.
Leverage Technology for Ambient Light Control
Invest in screens with advanced ALR coatings that reject ambient light from specific angles. These screens are often layered with microstructures or special reflective coatings that direct projected light toward you while dispersing unwanted light. I installed a screen with such technology, which drastically improved contrast even with daylight streaming through windows. For a technical deep dive, check out this expert guide to ALR tech. Remember, pairing a high-quality screen with proper room lighting control yields the best results.
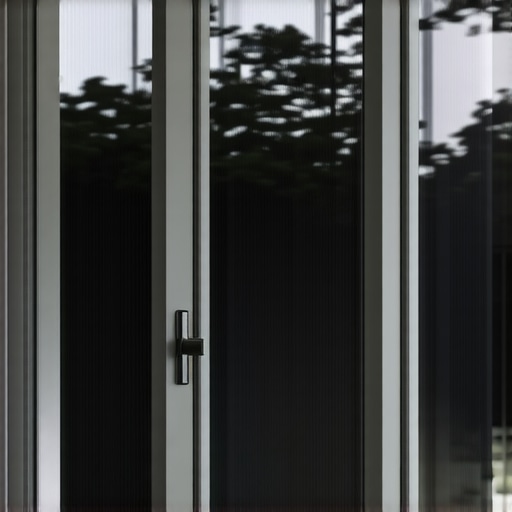
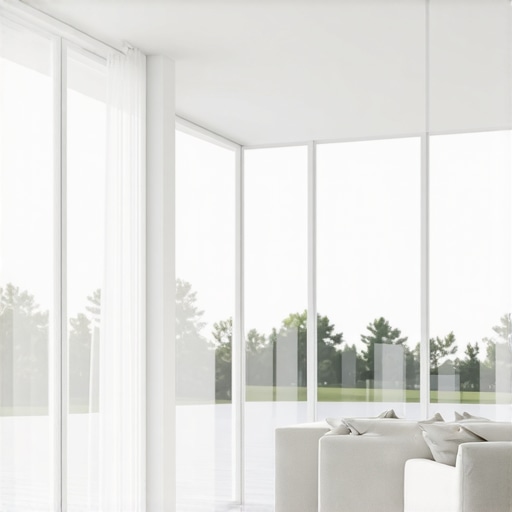
Position Your Screen for Optimal Effectiveness
Placement matters. Position your screen perpendicular to windows and avoid reflective surfaces nearby. During my setup, I used painter’s tape to outline potential screen locations and tested different angles to minimize glare. A well-placed screen maximizes the benefits of ALR features and gain levels. For precise measurements and layout tips, see this size and placement guide.
Test and Fine-Tune Your Setup
Once installed, test your setup with various content and lighting conditions. Use test patterns to evaluate brightness, contrast, and uniformity. I adjusted my projector’s settings and repositioned the screen slightly to eliminate hotspots. Keep notes on what works best in your environment. This iterative process ensures you get the most vivid images possible in your bright room. For additional tips, explore this top tips for screen optimization. With patience and the right choices, your bright room can rival a dedicated home theater—bright, colorful, and crystal clear.
Many enthusiasts and even seasoned home theater owners fall into the trap of oversimplifying what it takes to get a great picture in bright environments. A prevalent misconception is that simply increasing the gain or opting for ultra-high-gain screens guarantees vivid, contrast-rich images. However, this approach often backfires, causing issues like hot-spotting and limited viewing angles that diminish overall quality. Let’s dig deeper into why more isn’t always better and what advanced setups truly require for optimal results.
One of the biggest myths is that high-gain screens are a quick fix for ambient light problems. While they can boost brightness, they often come with trade-offs such as narrow viewing angles and uneven brightness distribution. This means that viewers seated off-center may see washed-out or overly bright spots, ruining the cinematic experience. Instead, I recommend exploring ALR screens with optimized gain levels designed specifically for bright rooms, which use microstructures to reject ambient light from certain angles while maintaining wide viewing angles for all seats.
Another misconception is that all ambient light rejection (ALR) screens perform equally well. In reality, the technology behind ALR screens varies significantly. Some rely on optical coatings that reflect projector light efficiently, while others use micro-structured surfaces that diffuse ambient light. The expert guide to ALR technology highlights that choosing the right material and coating is crucial for balancing contrast, color accuracy, and ambient light rejection. Overlooking these nuances can lead to disappointing results, even with premium equipment.
Why do some setups still struggle despite choosing high-quality screens?
This often comes down to installation and environmental factors. Positioning your screen correctly relative to windows and light sources, along with controlling room reflections, is just as vital as selecting the right material. A poorly placed screen or reflective surfaces can negate the benefits of advanced ALR coatings. For example, I learned that even with a top-tier ALR screen, adjusting the room layout and adding light control curtains dramatically improved contrast and color vibrancy. For detailed tips on placement, check out this size and placement guide.
Have you ever fallen into this trap? Let me know in the comments.
Maintaining your home theater setup, especially when dealing with advanced ALR screens and optimized gain materials, is crucial for long-term performance. Over time, dust, fingerprints, and environmental factors can degrade image quality if not properly managed. One of my go-to tools for upkeep is a high-quality microfiber cloth, which gently cleans the screen surface without scratching or leaving streaks. I avoid harsh chemicals; instead, I prefer a mixture of distilled water and a few drops of isopropyl alcohol, applied lightly to the cloth, to keep the surface spotless and ensure maximum light rejection efficiency.
For more stubborn spots or smudges, I use a specialized screen cleaning solution designed for optical surfaces, available from brands like Screen Mom or NovaCare. Regular cleaning not only preserves the reflective properties but also prevents dust buildup that can scatter projector light, reducing contrast and color accuracy. Remember, always turn off your projector and let the screen cool down before cleaning to avoid damage.
Regarding equipment, investing in a good projector calibration tool like the calibration device helps ensure your projector’s settings are optimized for your specific screen and room conditions. Proper calibration maintains bright, vibrant images and prolongs the lifespan of your projector lamp by avoiding unnecessary brightness levels.
In terms of software, I recommend using calibration software such as CalMAN or Portrait Displays’ CalibExpert. These tools allow precise adjustments of contrast, gamma, color temperature, and white balance, ensuring your images stay vivid and true to life over years of use. Automated calibration routines can save time and help maintain consistency across different viewing sessions.
Looking ahead, the trend in projection technology leans toward smart, auto-calibrating projectors equipped with AI-driven image adjustments, which will reduce manual maintenance. As these innovations become more affordable, maintaining peak performance will become easier, and your setup will stay optimized with minimal effort.
How do I maintain my projection setup over time?
The key to long-lasting performance is routine inspection and cleaning. Schedule a monthly check of your screen surface, projector filters, and lamp hours. Replace filters as recommended by the manufacturer to prevent dust buildup inside the projector, which can impact brightness and color. Keep the room’s ambient light conditions stable, as sudden changes can affect calibration settings. When in doubt, revisit your calibration with software tools to ensure your colors and contrast remain sharp and accurate. By integrating these maintenance habits and using recommended tools, you’ll keep your bright room projection setup performing at its best for years to come. Don’t forget to try out the calibration device to fine-tune your projector’s output—it’s a game-changer for image quality.
The Hardest Lesson I Learned About Bright Room Projection
One of the toughest truths I discovered was that a high-gain screen isn’t a magic bullet for bright environments. I once thought that increasing gain would automatically improve my picture, but I quickly learned that it often caused hot spots and narrow viewing angles, making the experience less immersive. The key lesson was that balance is everything—selecting an ALR screen with optimized gain and proper placement can turn a dull, glare-filled room into a vibrant home theater without sacrificing image quality.
Why I Switched to Micro-Structured ALR Screens
After experimenting with different materials, I found that micro-structured ALR screens rejected ambient light from problematic angles while maintaining wide viewing angles. This technology drastically improved contrast and color accuracy in my bright room. If you’re tired of washed-out images, I highly recommend exploring ALR tech with microstructures. It’s a game-changer that I wish I knew earlier.
My Biggest Mistake Was Ignoring Room Layout
Initially, I focused only on the screen material and gain, neglecting how room placement influences performance. I realized that positioning my screen perpendicular to windows and away from reflective surfaces made a huge difference. Proper alignment maximized the benefits of my ALR screen’s rejection technology. For detailed tips on layout, check out this guide on placement. Small adjustments can dramatically elevate your viewing experience in bright rooms.
My Favorite Tools That Elevate Bright Room Projection
Over time, I’ve found that regular cleaning with microfiber cloths and proper calibration software keeps my setup performing at its best. I trust calibration tools like CalMAN to fine-tune my projector, ensuring vivid images year-round. Also, investing in quality cleaning solutions like Screen Mom helps maintain the reflective properties of my screen without damage. Consistent maintenance has been crucial in preserving my bright room cinema’s clarity and contrast.
Where to Go from Here to Improve Your Bright Room Setup
If you’re serious about overcoming ambient light challenges, start by exploring top ALR screens with optimized gain. Pair them with proper room layout, lighting control, and regular maintenance. The right combination of technology and technique will unlock your room’s full cinematic potential and bring vibrant, clear images to your everyday space. Remember, improving projection in bright environments is a journey—every small step counts, and the results are worth it.

This article really hits home for anyone trying to get the most out of their projection setup in a bright room. I remember my initial mistake of just increasing gain, thinking it would boost brightness without considering the downsides like narrow viewing angles and hot spots. It’s only after switching to a micro-structured ALR screen and adjusting my room layout that I saw a noticeable improvement. I’ve also learned that proper calibration and regular cleaning are key to maintaining that vibrant image over time. One thing I wonder about is how many people are using automatic calibration tools, like AI-driven projectors, in their setups. Has anyone switched to these, and if so, what’s your experience with maintaining optimal visuals without manual intervention? Would love to hear more insights from fellow enthusiasts on balancing technology with room design for perfect brightness and contrast.
Reading through this article really resonated with my own experience in optimizing a bright room for home theater use. I initially thought that just selecting a high-gain or even ultra-high-gain screen would magically solve the ambient light problem. However, as many others have discovered, this often introduces new issues like hot spots and limited viewing angles, which can severely diminish the overall experience. I’ve found that integrating micro-structured ALR screens with a carefully planned room layout—like positioning the screen perpendicular to windows and using blackout curtains—can make a huge difference. What’s been your biggest challenge when adjusting room light controls? I’d love to hear what solutions others have tried beyond just screen selection and placement, especially for those with limited space for extensive light control options.
This article really brings up some important points about projecting in bright rooms, especially regarding the balance between gain and image quality. I tried pushing the gain to 2.0 for my setup, thinking it would compensate for ambient light, but I ended up with hotspots and color shifting issues. Switching to a micro-structured ALR screen with a more moderate gain—around 1.8—made a notable difference. I also found that room layout and light control are just as crucial; repositioning furniture and adding blackout curtains helped limit stray light. Has anyone experimented with smart blinds or automated room light controls to improve contrast and reduce glare during daytime viewing? I’d love to hear if integrating these technologies has helped others achieve a better cinematic experience in bright spaces.
This article hits the nail on the head when it comes to optimizing projection setups in bright rooms. I’ve struggled with similar issues, especially with washed-out images during daytime viewing. I found that pairing a micro-structured ALR screen with room blackouts and adjusting my projector’s settings really helped. One thing I’ve started exploring is the use of smart blinds, which can automatically regulate ambient light throughout the day, making it easier to maintain perfect contrast without constant manual adjustments. Has anyone here experimented with integrating such smart window treatments into their home theater? I’d love to hear how it’s affected your viewing experience, particularly in terms of brightness and contrast management. Also, I’m curious how others approach calibration over time—do you rely on software tools, or do you prefer manual adjustments even after initial setup? The key for me has been finding a balanced mix of technology and room environment control. Would appreciate any additional tips or experiences from fellow enthusiasts!