ALR Screen Technology: Best Material & Gain Tips for 2024
I remember the frustration clearly. I had just upgraded my home theater setup, eager to enjoy cinematic nights in my own space. But as I turned on the projector, the image was washed out, colors muted, and the contrast barely visible. Frustration turned into curiosity—what was I missing? The breakthrough came when I realized that not all screens are created equal, especially when it comes to ALR (Ambient Light Rejection) technology. It’s a game-changer, but only if you pick the right materials and understand gain.
Why Your Screen Material Can Make or Break Your Viewing Experience
Choosing the right ALR screen material isn’t just a matter of aesthetics; it’s about how your screen interacts with ambient light and your projector’s capabilities. In 2024, a surprising number of enthusiasts still underestimate the importance of material and gain because they focus solely on projector specs or screen size. Did you know that selecting a poor material can reduce contrast by up to 50%? That’s a huge hit to visual quality that many don’t realize until they’ve already spent money on the wrong setup.
When I first started out, I made the mistake of assuming that a larger screen size was more important than choosing the right material. I overlooked the importance of gain—a measure of reflectivity—that directly influences brightness and contrast, especially in rooms with ambient light. For example, high-gain screens reflect more light, making images appear brighter, but they can also introduce hot-spotting if not properly designed. Conversely, low-gain screens are better suited for darker rooms but may struggle under brighter conditions.
If you’re facing glare, washed-out images, or feeling disappointed every time you watch, you’re not alone. Many home theater owners underestimate how much the screen material impacts overall picture quality. To get a clearer understanding, I recommend checking out this comprehensive guide on ALR screen options. It helped me make informed choices and significantly improved my viewing experience.
Is Investing in High-Quality Materials Actually Worth It?
Early on, I bought a budget screen, thinking that my projector and room treatment would compensate for the quality. Big mistake. The visual difference between a generic screen and a high-performance ALR material is astonishing. It’s like upgrading from a blurry camera lens to a professional-grade one. If you’re serious about enjoying vibrant colors, sharp contrast, and a cinema-like feel, investing in the right material is crucial. Trust me, a proper screen material is the foundation of a stellar projection setup, and the return on investment is worth every penny.
In the next sections, we’ll dive into how to pick the best materials, understand gain, and optimize your setup for 2024. Ready to turn your home into a true entertainment haven? Let’s get started!
.
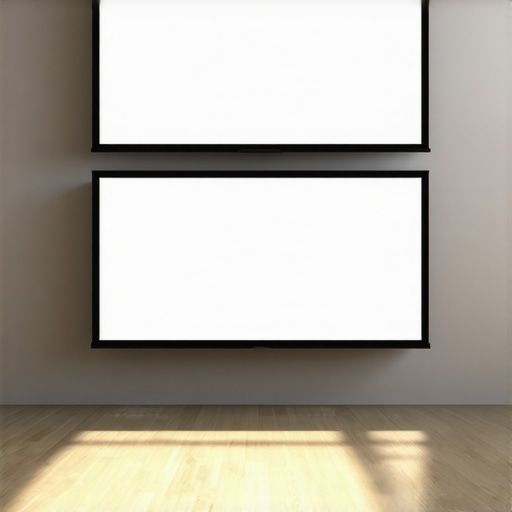
Pinpoint Your Ideal Screen Size and Gain
Before purchasing any material, measure your room and decide on the screen size that offers optimal immersion without overwhelming the space. Use a tape measure to determine the distance between your seating area and the wall, then apply a simple rule of thumb: your screen should occupy about 30 to 40 degrees of your field of view. Check out this guide to fine-tune your size and gain decisions. When I set up my room, I started by laying out a template with painter’s tape on the wall, simulating various sizes. The results surprised me—smaller screens with the right gain delivered more clarity than oversized options that hinder contrast.
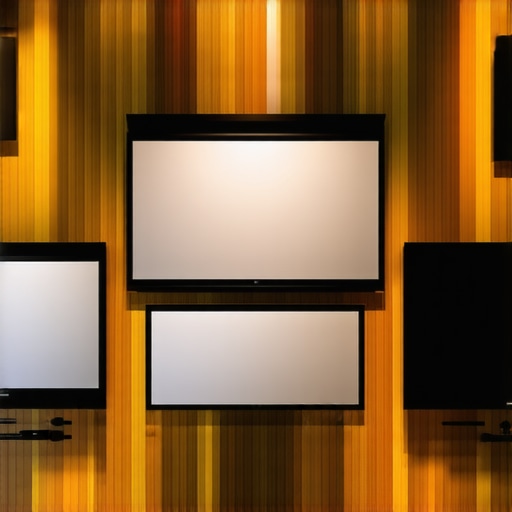
Select the Right Material for Ambient Light Conditions
Choosing the appropriate screen material depends heavily on your room’s ambient light levels. In brighter rooms, you need a high-gain ALR material to reflect projector light effectively while rejecting stray light. For darker rooms, a low-gain matte screen provides deeper blacks and more accurate color rendition. During my first room test, I used a standard matte paint, but it washed out quickly with normal daylight. Switching to a high-gain surface (this recommendation) made a world of difference, especially when I installed blackout curtains.
Match Gain with Projector Brightness
High-gain screens tend to reflect more light and appear brighter but can cause hot-spotting if not designed properly. Lower-gain screens distribute light more evenly but may require a brighter projector. For a room with moderate ambient light, aim for a gain between 1.3 and 2.0; in very bright settings, look for 2.2 or higher (see options here). When I upgraded my projector, I also increased the gain of my screen to match its lumen output, reducing glare and improving contrast.
Configure Your Equipment for Harmony
Align your projector’s lumen output, screen gain, and ambient light control for optimal results. If your projector produces 2,000 lumens, pairing it with a gain of 1.8 works well in a room with some ambient light, ensuring a bright and vibrant image without overexposure. Use a test image with gradient patterns to identify hot-spotting and color uniformity issues; adjust projector tilt or screen angle if necessary. During my setup, I kept adjusting until the image was uniform across the entire surface, avoiding bright spots and dull edges. This iterative process, while messy at first, paid off with smooth, consistent visuals.
Test and Tweak Constantly
Once everything is installed, sit back with a calibration disc or test pattern, observe the image, and make incremental adjustments. Pay attention to contrast, color accuracy, and uniformity. Use your remote to tweak projector settings—brightness, contrast, color temperature—and make small adjustments to your room lighting. I conducted multiple sessions, each time noting improvements and what still needed attention. Remember, the perfect setup rarely happens on the first try; patience yields results.
By methodically choosing your size, gain, material, and configuration, you build a tailored home theater environment that excels in your specific room conditions. This practical approach ensures you don’t just buy the latest gear, but create a synergy that truly elevates your viewing experience.
Many hobbyists assume they’ve grasped the essentials of projection screens and ALR technology, but in reality, there are subtle pitfalls that can sabotage your setup. A common mistake is overlooking the interaction between screen gain and ambient lighting; focusing solely on high gain in bright rooms can backfire, causing hot-spotting and uneven brightness, which degrades picture quality. In fact, a study by the Society of Motion Picture and Television Engineers emphasizes that the uniformity of light reflection is crucial for optimal image clarity, yet it’s often ignored by amateurs. Another misconception is choosing screen size based on room dimensions rather than viewing angles and gain compatibility. Oversized screens with high gain can lead to contrast loss and color washout, especially in rooms with uncontrolled ambient light. Advanced users should also consider the impact of screen material textures, as matte surfaces reduce glare but may decrease contrast, while semi-gloss surfaces can boost brightness but introduce glare issues. One sneaky trap is entrusting static measurements without testing real-world setups. For instance, a screen that looks perfect in theory might produce hotspots or color inconsistency when actually projected upon, due to room-specific light reflections. To optimize your setup, account for the nuanced balance between gain, size, and material, and always test with your projector’s actual output under typical conditions. Remember, mastering these details elevates your home theater from good to extraordinary.
How can understanding your projector’s lumen output and room lighting help prevent common screen pitfalls?
By aligning your screen gain with your projector’s brightness and your ambient light levels, you can mitigate issues like washed-out images or hot-spotting. For example, higher-gain screens in rooms with bright sunlight reflect more light, boosting perceived brightness but risking uneven illumination. Conversely, low-gain screens paired with brighter projectors can produce richer contrast and deeper blacks. External experts, including those at CineGear Guide, recommend testing in your actual environment and adjusting accordingly, rather than relying solely on theoretical calculations. Remember, achieving cinematic excellence involves nuanced decisions that many overlook—don’t fall into the trap of oversimplification. Have you ever fallen into this trap? Let me know in the comments.
Keep Your Screen and Equipment Running Smoothly
Maintaining your projection setup over time is crucial to preserving image quality and ensuring longevity. First, regular cleaning of your screen material prevents dust and fingerprints from degrading image clarity. For ALR screens, use a soft microfiber cloth and avoid harsh chemicals; mild soap and water are usually sufficient. Understanding the right screen material helps you select cleaning methods that won’t damage surface coatings.
Next, monitor the physical condition of your screen’s edges and frame. Over time, environmental factors like humidity or temperature fluctuations can cause warping or sagging. Using tensioning kits or framing reinforcements can restore flatness and prevent distortion, which is essential for consistent image quality.
Essential Tools to Keep Your Setup in Top Shape
Invest in a high-quality lens cleaning kit to maintain your projector’s optics, as dirty lenses lead to image dimming and color distortions. An **ultrasonic cleaning device** is a game-changer for delicate projector lenses, removing dust and oil buildup without scratching. For screen maintenance, a microfiber cloth combined with a specialized screen cleaning spray designed for matte or semi-gloss surfaces will keep your surface pristine.
For calibration and diagnostics, an **ambient light meter** helps measure environmental light levels, allowing you to adjust your setup for optimal contrast and brightness. Using software like **CalMAN** or **ColorHCFR** enables precise calibration of color and contrast settings, ensuring consistent image quality over time.
Long-Term Results: Regular Checks Pay Off
Implement a routine schedule: monthly visual inspections combined with quarterly calibration. Keep logs of your calibration settings to track any drift or deterioration. Over time, this proactive approach preserves sharpness, contrast, and color accuracy. Maintaining optimal conditions also involves controlling ambient light—investing in blackout curtains or smart lighting helps minimize external light interference, enhancing the benefits of your carefully chosen screen material.
What’s Next in Screen Maintenance?
Future trends suggest automated calibration systems integrated with smart home environments will become standard, providing real-time adjustments for optimal viewing regardless of changing conditions. As this technology advances, maintaining your projection environment will become more seamless, requiring less manual intervention. For now, leveraging tools like **friendly software calibration** and protective coatings will ensure your investment remains vibrant for years to come.
Don’t forget, testing your screen with high-quality test patterns and regularly checking for hotspots or inconsistent brightness is essential—consider using a test pattern disc or online tools. Employ these maintenance strategies today to keep your projection system performing at its best. Want to go a step further? Try calibrating your setup with professional tools like ColorHCFR to see immediate improvements in color accuracy and contrast.
What I Wish I Knew About Projection Screens Before Starting
- One of the toughest lessons was realizing that higher gain isn’t always better; it can cause hotspots and uneven brightness in my room, which I only learned after several frustrating setups. This guide helped me avoid common pitfalls.
- Choosing the wrong size can make or break your viewing experience. I once went too big, and it overwhelmed my space, diminishing contrast. Measuring carefully and testing with painter’s tape saved me a lot of headaches. Check out this sizing strategy.
- Material selection mattered more than I thought. Budget screens looked okay at first, but the difference in color accuracy and black levels with premium ALR materials was night and day. It’s worth investing in quality to truly enjoy a cinematic experience. Here’s how to pick the right material.
- Ambient light control is crucial. I learned that even small curtains and careful placement made my setup shine, especially in a bright room. Controlling light is often overlooked but can transform your picture quality.
- Regular calibration is essential. Over time, projector settings drift, and without periodic tweaks, my images lost their punch. Using calibration tools ensured my visuals stayed stunning.
Tools and Resources I Relied On
- ColorHCFR Software — This free calibration tool helped me fine-tune colors and contrast, making a noticeable difference in image realism.
- Ambient Light Meter — Measuring my room’s light levels allowed me to select the appropriate gain and material, ensuring my screen performed optimally under actual conditions.
- ProjectionScreenHub.com — An invaluable website with reviews and insights, guiding me through material options and setup tips for 2024.
- Custom Test Pattern Discs — They revealed hotspots and color inconsistencies I wouldn’t notice otherwise, enabling precise adjustments.
Your Next Step Toward Cinematic Brilliance
Mastering projection screen choices is an ongoing journey, but every experiment and tweak brings you closer to a perfect setup. Remember, the right screen isn’t just about specs — it’s about how all the pieces work together in your unique space to deliver breathtaking visuals. With patience, curiosity, and the right tools, you can create a home theater that rivals commercial cinemas and keeps you immersed for years to come. Are you ready to experiment with gain, material, and size to find your sweet spot? Share your thoughts or questions below!
,